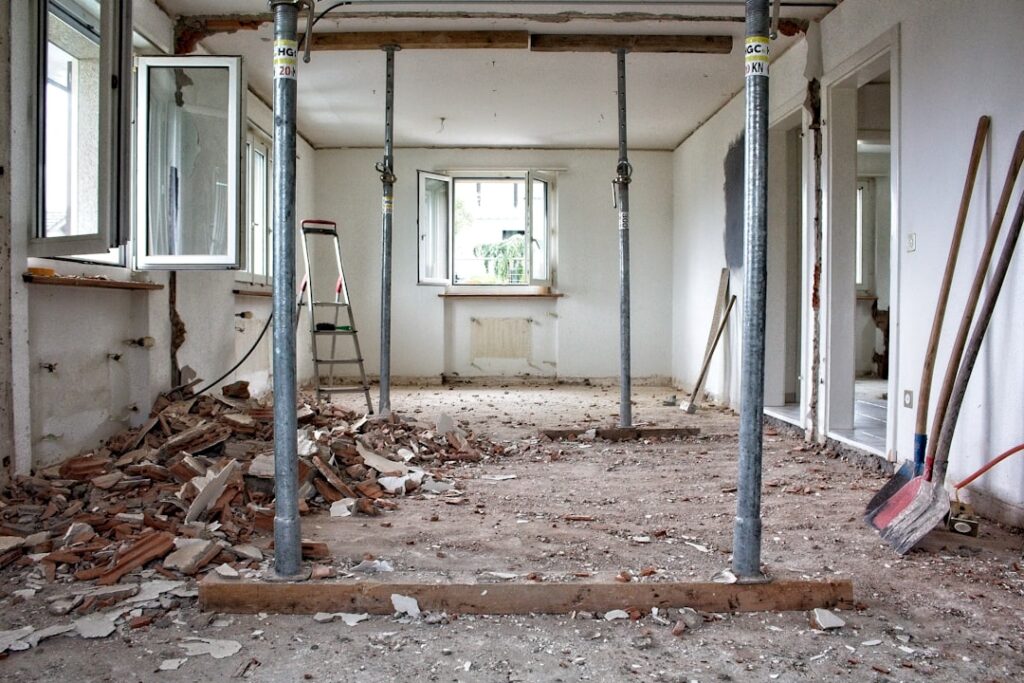
Every flooring problem I’m hired to fix eventually leads to the same question: what’s going on underneath? Soft spots that flex underfoot, floors that squeak like a haunted house, tile that keeps cracking, vinyl planks with gaps opening — these are subfloor symptoms wearing flooring costumes. Subfloor repair is the unglamorous work that determines whether your beautiful new floor lasts thirty years or fails in three, and most of it is genuinely DIY-able with a circular saw and a weekend. Here’s how I diagnose subfloor problems, the repair playbook for each failure type — soft spots, rot, squeaks, and sag — and the costs, whether you swing the hammer or hire it out.
Know What You’re Standing On
Effective subfloor repair starts with knowing the layers. A wood-framed floor is a sandwich: joists (the 2×8/2×10/2×12 or I-joist structure, 16 inches on center in most homes), the subfloor itself (modern homes: 23/32-inch tongue-and-groove OSB or plywood; pre-1970s homes: diagonal 1×6/1×8 plank boards), and sometimes an underlayment layer (thin plywood or cement board) under the finish floor. Repair means figuring out which layer failed. Subfloor-only damage is a weekend patch. Joist involvement is a bigger job — still doable, but the stakes and the lumber get heavier. Slab-on-grade homes have a different problem set entirely (cracks and moisture, no squeaks or rot in the concrete itself), so this guide is for framed floors.
Diagnosis: Reading the Symptoms
| Symptom | Likely Cause | Repair Class |
|---|---|---|
| Localized soft/spongy spot | Water-damaged OSB/plywood (delaminated or rotted) | Cut-and-patch |
| Squeaks when stepped on | Subfloor rubbing loose nails/joists; gapped panels | Refastening |
| Bounce across a whole area | Undersized/overspanned joists or joist damage | Sistering/blocking |
| Visible sag, sloped floor | Cracked/rotted joist, settled support, notched framing | Structural repair |
| Musty smell, cupped finish floor | Ongoing moisture from below (crawlspace) or a leak | Fix moisture first, then patch |
| Cracking tile/grout lines | Deflection — floor too flexible for tile | Stiffening (add layer, sister joists) |
The two diagnostic tools that matter: your bodyweight (map the soft zone by feel and mark it with painter’s tape) and a moisture meter ($25–$50). Readings over about 16% mean active moisture — and here’s the rule I never break: find and fix the water source before repairing anything. A patched subfloor under an unfixed leak is a subscription, not a repair. Check the usual suspects: toilet wax rings, dishwasher and fridge lines, tub surrounds, and crawlspace humidity below.
Repair 1: Cut-and-Patch a Soft or Rotted Section
The bread-and-butter repair — a bathroom soft spot in front of the toilet, a delaminated patch under a failed window, the classic dishwasher-leak corner. Materials: a piece of matching-thickness plywood ($25–$60), construction adhesive, 2×4 blocking, and deck screws. Time: half a day.
- Remove the finish floor over and slightly beyond the damage. (With sheet vinyl or laminate this often decides the project’s scope — factor the flooring redo into the plan.)
- Find the joists. Locate the joists flanking the damage (nail lines or a stud finder). You’ll cut back to joist centerlines so the patch has bearing.
- Cut out the damage. Set a circular saw exactly to subfloor depth (usually 23/32 inch) and cut a rectangle around the bad area, landing the two side cuts on joist centers. Check for pipes and wires before cutting — a borescope or a modest inspection hole is cheaper than a plumbing bill.
- Inspect the joists below. Probe with a screwdriver. Solid wood: proceed. Surface-darkened but firm: let it dry, treat with a borate wood preservative ($15–$25), proceed. Soft, punky, or deeply checked: jump to the joist section before patching over the problem.
- Add blocking. Screw 2×4 cleats to the joist faces along the cut edges (and across unsupported patch edges) so every side of the new panel bears on wood. Unsupported patch edges are tomorrow’s squeaks.
- Install the patch. Cut plywood to fit with a 1/8-inch expansion gap on all sides, run construction adhesive on every bearing surface, and screw it down every 6 inches at edges, every 8 in the field, with 2-inch deck screws. Glue-plus-screws is the difference between silent and squeaky at year five.
DIY cost: $50–$150. Hired out: $300–$800 per patch area, plus flooring reinstallation.
Repair 2: Silencing Squeaks
Squeaks are movement — wood sliding on a nail shank or a gapped joist. From below (open basement/crawlspace ceiling): find the squeak with a helper walking above, then drive shims lightly into any subfloor-to-joist gap (snug, not jacked — over-driving lifts the floor), add a bead of construction adhesive along chronic gap runs, and screw wobbly bridging. From above under carpet: breakaway squeak kits (Squeeeeek No More, $20–$30) drive scored screws through the pad into the joist and snap off below the surface. Under hardwood: trim-head screws through pre-drilled, counterbored holes at the joist lines, filled with matching wax. Whole-floor squeak epidemics usually mean the original builder nailed instead of glue-and-screwed — the honest fix, if you ever redo the finish floor, is screwing off the entire subfloor at $0.50 or so per square foot in screws and a satisfying afternoon.
Repair 3: Joist Problems — Sistering and Blocking
When a joist is cracked, rot-softened at its end, or the floor bounces because the framing is overspanned, the standard fix is a sister: a matching-depth joist run alongside the damaged one, bearing on the same supports where possible, glued and through-bolted or heavily screwed (I use construction adhesive plus staggered 1/2-inch bolts or structural screws every 16 inches). Jack the sag out slowly first — a bottle jack and a post, an eighth of an inch a day for anything beyond minor, so plaster and drywall upstairs don’t crack. Localized rot at a joist end over a foundation sill can take a partial sister lapping 3+ feet past the damage in both directions. Solid blocking between joists mid-span ($30 in lumber for a room) stiffens a bouncy but undamaged floor surprisingly well and is the first thing I add under a future tile floor.
Know your limits here: one damaged joist is a DIY-with-research job; multiple sagging joists, anything under a load-bearing wall, notched or drilled-out framing, or an I-joist with flange damage is structural-engineer territory ($300–$700 for an assessment, worth every dollar). Widespread crawlspace rot or termite damage is a $3,000–$10,000+ conversation.
Prepping a Repaired Subfloor for New Flooring
Subfloor repair isn’t done until the surface meets your flooring’s spec. Flatness: most floating floors and LVP want 3/16 inch over 10 feet; tile wants 1/8 inch over 10. Check with a straightedge, grind humps, and fill dips with cementitious floor patch ($15–$40 a bag) — not thinset, not wood filler. Deflection for tile: the assembly must meet L/360 (L/720 for natural stone); if the floor bounces, add blocking, a second plywood layer (3/8–1/2 inch glued and screwed), or an uncoupling membrane per the tile spec. Moisture: patched areas and the surrounding field should read under 12–14% and within a few points of each other before anything gets installed over them. Rushing flooring onto a damp patch is how you buy the repair twice.
Cost Reference
| Repair | DIY Cost | Professional Cost |
|---|---|---|
| Soft-spot patch (up to ~10 sq ft) | $50–$150 | $300–$800 |
| Bathroom subfloor replacement | $150–$400 | $800–$2,500 |
| Squeak elimination (per room) | $20–$60 | $200–$500 |
| Sister one joist | $50–$150 | $500–$1,500 |
| Whole-room subfloor replacement | $400–$1,000 | $2,000–$5,000 |
| Structural/multi-joist repair | — | $3,000–$10,000+ |
For plank-subfloor houses (roughly pre-1970), one adaptation: individual diagonal boards can be replaced piece by piece, but if you’re prepping for tile or rigid flooring, the better move is usually overlaying the planks with 3/8- or 1/2-inch plywood, glued and screwed on a 6-inch grid, which stiffens the whole assembly and gives modern flooring the continuous surface it expects.
Parting advice from the demolition side of the trade: subfloor problems only ever get bigger, and they get bigger in the dark. The soft spot you’re stepping around today is drinking from a leak you haven’t found yet, and the difference between this weekend’s $100 patch and next year’s joist job is usually nothing but time. So chase the moisture first, cut back to solid wood always, glue everything you screw, and leave yourself a floor you’d be happy to tile over — because someday, someone will, and I’d rather it not be me finding your shortcut.
Prefer to explore on your own?
See how new flooring looks in your actual room in seconds — free, no signup.
Try the free Floor Studio →