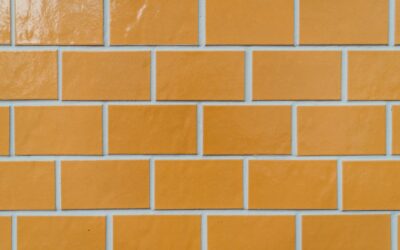
Subway tile has been a default bathroom finish for over a century, but most installations stop at the obvious — white 3×6 rectangles in a running bond pattern. Pushing past that template unlocks dramatic visual upgrades for almost no extra cost. The right subway tile bathroom ideas cover layout choices, grout strategy, color shifts, and modern size variations that turn a tired backsplash formula into a custom-feeling design. The tile itself runs $2 to $20 per square foot, so creativity is where the value compounds.
Part of our Bathroom Remodeling & Flooring guide — explore the full guide →
The Layout That Changes Everything
The classic 50 percent offset running bond is recognizable and clean, but five other patterns give the same tile a different attitude:
- Stack bond (no offset, tiles aligned in a grid): modern, architectural, makes ceilings feel higher
- Vertical stack: visually stretches a short wall, popular in powder rooms
- Herringbone: each tile turned 90 degrees from neighbor; reads upscale and adds movement
- Crosshatch (basket weave): two tiles laid horizontally, two laid vertically alternating
- Soldier course or bond shift: standard running bond with a vertical row at the top or as a chair-rail accent
Herringbone uses about 12 percent more tile due to cuts at the edges. Stack bond uses about 5 percent less. Plan accordingly when ordering.
Grout Color: The 70 Percent Decision
Grout color shifts the entire look more than the tile. White subway tile with white grout reads as one continuous bright surface. The same tile with charcoal or black grout becomes a graphic, almost industrial pattern that highlights the rectangular geometry.
For light grout in a wet area, choose a stain-resistant epoxy or a urethane-based grout. Cementitious light grout in a shower yellows within 2 to 3 years from soap residue and wet-dry cycles, no matter how aggressively you clean.
Mid-tone grout (warm gray, taupe) is the safest pick — it reads intentional, hides minor discoloration, and works with both warm and cool tile colors.
Tile Size and Proportion
The original subway tile size is 3×6 inches. Modern variations expand the menu dramatically:
- 2×4 mini subway: dense pattern, perfect for niches and accent zones
- 3×6 classic: timeless, works in any layout
- 4×8 oversized: more contemporary, fewer grout lines, easier to clean
- 4×12 long subway: very modern, dramatic in horizontal layouts
- 3×12 plank tile: hybrid look between subway and plank, great in shower walls
The 4×12 size has overtaken classic 3×6 in higher-end residential builds since about 2020. Fewer grout lines mean less cleaning and a calmer visual field.
Color Strategies Beyond White
Glossy white still dominates because it reflects light and never dates badly, but consider these alternatives:
Soft sage green creates a spa feel against warm wood vanities. Warm taupe or greige blends into transitional design. Deep navy or hunter green on a single accent wall behind a freestanding tub becomes the room’s focal point. Handmade-look subway tile with slight color variation (Mediterranean Bianco, Heath Ceramics, Cle Tile) adds organic texture that uniform machine-made tile can’t replicate.
Two-tone schemes work well too — white field tile with a contrasting color on the niche interior, or up to chair-rail height on the wainscot.
Beveled, Flat, or Handmade Edge
The edge profile of the tile changes the wall’s depth and shadow play. Standard flat-edge subway tile is the cleanest, most modern look. Beveled subway tile (flat center, angled edges) catches light and adds traditional dimension. Handmade-look tile with slightly irregular edges feels custom and ages gracefully — the irregularity is forgiving of slightly uneven walls.
Handmade tile from American makers runs $15 to $35 per square foot. Mass-produced “handmade-look” tile from Cle, Heath alternatives, or Daltile imitation lines lands at $4 to $12 per square foot for a similar visual effect.
Where to Stop the Tile
Three height stopping points work in most bathrooms:
Half-wall (about 48 inches): chair-rail height, traditional and budget-friendly. Caps with a bullnose row or a thin pencil molding. Best in powder rooms and traditional spaces.
Three-quarters height (about 60 to 66 inches): hits just above standard towel bar height, hides splash zones around vanities. Caps cleanly under window heads when present.
Full ceiling height: most contemporary, makes small bathrooms feel grander, dramatically more expensive. Becomes the dominant feature of the room.
Always tile to the actual ceiling, not stopping a few inches short. The half-tile gap is one of the most common bathroom design mistakes — it makes the room feel cheaply finished.
The Niche Treatment
Recessed shower niches deserve their own design moment. Three approaches:
- Same tile as the surround — subtle and seamless
- Contrast tile (penny round, hex, mosaic) — turns the niche into a jewel-box accent
- Slab insert (marble, quartz remnant) — luxurious and easy to clean
Standard niche dimensions are 12 to 14 inches wide, 14 to 16 inches tall, 4 inches deep. Position the bottom of the niche about 48 inches off the shower floor for adult use, or align the top with a horizontal grout line in the surround for visual harmony.
Floor and Wall Pairings
Subway walls pair beautifully with hex floor tile (especially black-and-white penny mosaic), large-format wood-look porcelain plank, or matte natural stone. Avoid pairing subway with another rectangular tile on the floor — competing horizontals confuse the eye.
For a vintage feel, use 1-inch hex porcelain mosaic in white with a black border. For modern, choose 24×24 inch matte porcelain in a stone-look. For warmth, 6×36 wood-look porcelain that mimics white oak balances the cool ceramic perfectly.
Budget and Lifespan
Material cost for subway tile in a typical 50-square-foot bathroom shower surround: $200 to $1,000. Installation labor: $7 to $15 per square foot. Total bathroom subway tile project (walls only): $1,200 to $3,500. Done well, the installation lasts 30 to 50 years before any tile failure.
Prefer to explore on your own?
See how new flooring looks in your actual room in seconds — free, no signup.
Try the free Floor Studio →