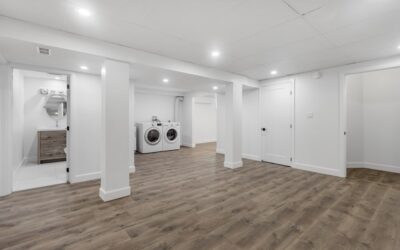
Nothing ruins a newly finished basement faster than two inches of groundwater seeping across the carpet after a spring storm. Installing a sump pump in finished basement space is the insurance policy that protects the flooring, drywall, and furniture you just invested thousands in. The challenge is doing it without demolishing the finished room you are trying to protect. With smart placement, a low-profile pit, and the right backup system, you can add serious water protection while keeping the space looking like a living area, not a mechanical room. This guide walks through the decisions that matter most.
- Why a Finished Basement Needs Protection
- Where to Put the Pit
- Installing Without a Major Tear-Out
- Choosing Submersible vs Pedestal
- Battery Backup Is Non-Negotiable
- Discharge, Drainage, and Freeze Protection
- Concealing and Soundproofing the Pit
- Radon and Air Quality Considerations
- Maintenance and Smart Monitoring
Why a Finished Basement Needs Protection
Below-grade rooms sit against soil that holds water, and hydrostatic pressure pushes that water toward any crack, joint, or porous spot in the foundation. Even homes that stayed dry for years can flood after a heavy rain, a rapid snowmelt, or a rising water table.
In an unfinished basement, an inch of water is a mop-up job. In a finished basement it is a catastrophe: soaked carpet pad, wicking drywall, ruined baseboard, and the mold that follows within 48 hours. A sump pump collects intruding water in a pit and pumps it safely outside before it ever reaches your floor. It is the single most effective defense against basement flooding.
Where to Put the Pit
Placement is the biggest challenge in a finished space, because the ideal spot is the lowest point of the foundation, exactly where water collects. Look for the natural low corner, often near where the foundation drain tile terminates.
In a finished basement, the goal is to tuck the pit into an unobtrusive location: inside a utility closet, mechanical room, under a stair, or in a corner you can conceal. If the finished floor is already down, a specialist can core through the slab and dig a pit with minimal disruption, patching neatly around it. Try to keep the pit accessible for future maintenance while hiding it from the main living view. A discreet access panel is far better than burying the pump where you can never service it.
Installing Without a Major Tear-Out
You do not always have to rip up the whole room. If there is no existing pit, a contractor cuts a roughly 24-inch square in the concrete, excavates a hole, and sets a perforated sump basin surrounded by gravel. The floor is patched and, where possible, the flooring reinstalled over the seam.
Where a pit already exists but was never fitted with a pump, the job is far simpler: drop in the pump, run the discharge line, and connect power. Route the discharge pipe through the rim joist or an existing penetration to avoid opening finished walls. A tidy, planned install by someone experienced with finished spaces keeps the mess to a single small patch rather than a gutted room.
Choosing Submersible vs Pedestal
For a finished basement, the pump type matters for both noise and looks. Two designs dominate, and the choice is usually clear.
- Submersible pumps: sit inside the pit under water, run much quieter, and hide completely under a sealed lid, ideal for living space
- Pedestal pumps: mount with the motor above the pit, cost less and are easier to service, but are louder and visually intrusive
In a finished area, a submersible pump with a sealed, gasketed lid is almost always the right call. It runs quietly, contains any radon or sewer gas, and disappears from view. Choose a cast-iron model of at least 1/3 horsepower for typical homes, or 1/2 horsepower where water volume is high.
Battery Backup Is Non-Negotiable
Here is the hard truth: the storms that flood basements are the same storms that knock out power, and a sump pump on grid power alone fails exactly when you need it most. In a finished basement, a battery backup system is not optional.
A backup unit includes a second pump and a deep-cycle battery that kicks in automatically during an outage or if the primary pump fails. Better systems monitor the battery and alarm when charge runs low. For maximum protection, some homeowners add a water-powered backup that uses municipal water pressure and never runs out during long outages. Given what a finished basement is worth, the $300 to $600 for a solid backup is cheap insurance.
Discharge, Drainage, and Freeze Protection
Getting water into the pit is only half the job; getting it far from the house is the other half. The discharge line should carry water at least 10 feet from the foundation and slope it to drain away, so it does not simply circle back into the soil and return to your pit.
In cold climates, protect the discharge line from freezing, which can dead-head the pump and burn out the motor. A freeze-guard fitting or a downward-sloped line that fully drains helps. Add a check valve on the discharge to stop pumped water from flowing back into the pit and cycling the pump needlessly. These details separate a system that quietly works for years from one that fails in the first hard freeze.
Concealing and Soundproofing the Pit
In a living space, both the look and the sound of the pump matter, and a few touches make the system nearly invisible. A well-fitted, gasketed pit cover is the first step: it seals the opening, muffles the pump, blocks radon and sewer gases, and gives a flat surface you can build around. Choose a cover with a sealed grommet where the discharge pipe passes through so the seal stays intact.
To hide the pit entirely, many homeowners frame a small removable access panel into the floor or build a low bench or cabinet over it that lifts off for service. Never permanently seal or tile over the pit, because you will eventually need to reach the pump. For sound, a submersible pump under a sealed lid is already quiet, but adding rubber isolation on the discharge pipe where it passes through framing stops vibration from transmitting into the finished walls. The result is a system you neither see nor hear during a storm.
Radon and Air Quality Considerations
An open sump pit is a direct pathway between your finished basement and the soil gases beneath the slab, which is a real concern in radon-prone regions. Radon is an odorless, radioactive gas that seeps from the ground and is a leading cause of lung cancer, and an uncovered pit can let it pour straight into your living space.
The fix is straightforward: a fully sealed, gasketed pit lid with sealed penetrations for the pipe and power cord blocks that pathway. In high-radon areas, the pit can even be tied into an active radon mitigation system that draws gas out from under the slab and vents it above the roof. If you are finishing a basement over a sump pit, test for radon after sealing the lid to confirm your levels are safe. Addressing air quality at the same time you install the pump is far easier than retrofitting later, and it protects the health of everyone who spends time in the finished space.
Maintenance and Smart Monitoring
An unattended pump is a pump waiting to fail. Test the system every few months by pouring a bucket of water into the pit until the float triggers the pump; confirm it runs and shuts off cleanly. Clear debris from the pit and check that the check valve holds.
Because the whole point of a sump pump in finished basement space is protecting a room you cannot afford to lose, add a Wi-Fi water alarm or a smart pump controller that texts you if the water rises or the power drops. For under $50, that alert can save you thousands. Combined with an annual professional check, this routine keeps your investment dry through the worst storms your climate can throw at it.