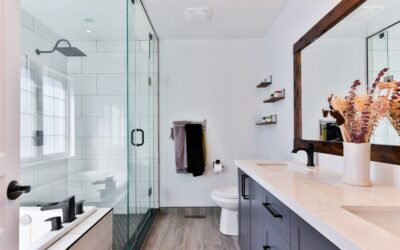
Real marble slabs look stunning in a shower, but they stain, etch from acidic cleaners, weigh a ton and can cost more than every other part of the bathroom combined. Synthetic marble shower walls give you the veined, grout-free slab look for a fraction of the price and with far less upkeep. The four main routes are cultured marble, solid surface, marble-look laminate or PVC panels, and large-format porcelain slabs.
Part of our Countertops guide — explore the full guide →
Each one trades cost, durability and realism differently. Cultured marble and solid surface are the most watertight and easiest to clean. Panels are the cheapest and fastest to install. Porcelain slabs look the most like stone and resist almost everything, but they need skilled hands to cut and set. Your budget, your DIY comfort level and how much the veining matters to you will point to the right choice.
- What Synthetic Marble Shower Walls Actually Are
- Side-by-Side Comparison
- Cost Ranges to Expect
- Seams, Trims and Water Management
- How to Install a Panel or Cultured Marble Surround
- Mold and Moisture Safety
- Cleaning and Long-Term Care
- Troubleshooting Common Problems
- When to Call a Pro
- Frequently Asked Questions
We cover what each material is made of, how the seams behave, rough installed cost ranges, the prep that keeps water out of your walls, and the signs that a project needs a professional.
What Synthetic Marble Shower Walls Actually Are
“Synthetic marble” is an umbrella term rather than one product. Shoppers searching for marble shower wall panels, imitation marble wall panels or marble slab shower walls are usually comparing the same handful of materials, and the labels get mixed up in showrooms all the time. Knowing what is inside each panel tells you how it will age.
Cultured marble
Cultured marble is crushed marble or limestone dust blended with polyester resin, cast in a mold and topped with a clear gelcoat. The gelcoat is what makes it glossy and nonporous. Panels are typically 1/2 inch thick and made to order for your shower dimensions, so wall pieces arrive sized with few seams. The weak point is that gelcoat: a deep scratch or chip exposes the porous core underneath, which then needs a gelcoat repair kit.
Solid surface
Solid surface is acrylic or polyester resin with mineral fillers, and the pattern runs all the way through the material. That makes it the most repairable option: light scratches sand out with a fine abrasive pad. Seams can be chemically welded so they nearly disappear. It is typically 1/4 to 1/2 inch thick and costs more than cultured marble, but it holds up to decades of daily use.
Marble-look laminate and PVC panels
These are thin sheets (often 3 to 10 mm) with a printed marble image under a protective top layer. High-pressure laminate panels usually sit on a moisture-resistant core and join with tongue-and-groove or aluminum profiles. PVC and composite panels are fully waterproof and very light. They go up fast with adhesive and are the most popular choice for weekend remodels and rental units, though the print can look repetitive on large walls.
Large-format porcelain slabs
Thin porcelain slabs (often 6 mm and up to roughly 5 by 10 feet) are fired clay with a high-resolution marble print fused into the glaze. They are the most realistic and the most heat, stain and scratch resistant. They are also the most fragile to handle before installation and need a full waterproofing membrane behind them, since porcelain is set with thinset like tile.
Side-by-Side Comparison
| Material | Realism | Seams | Typical installed cost |
|---|---|---|---|
| Cultured marble | Good, soft veining | Few, caulked | Moderate |
| Solid surface | Good, matte or satin | Can be invisible | Moderate to high |
| Laminate or PVC panels | Fair to good, printed | Visible trim or joints | Low |
| Porcelain slabs | Excellent, crisp veining | Thin grout or caulk line | High |
Realism matters most when you want a bold look such as calacatta shower walls with dramatic gray and gold veins. Printed panels can mimic that style, but a repeating pattern becomes obvious when two identical sheets sit side by side. Porcelain slabs and solid surface come in more varied patterns and can be book-matched on some lines.
Cost Ranges to Expect
Prices vary by region, shower size and how much custom cutting is needed, so treat these as broad ranges for a standard 60-inch alcove shower:
- Marble-look PVC or laminate panel kits: a few hundred dollars to around $1,500 in materials; DIY friendly, with pro installation adding roughly $500 to $1,500.
- Cultured marble: often $1,500 to $4,000 installed, including the wall panels and trim pieces.
- Solid surface: roughly $2,500 to $6,000 installed depending on thickness and pattern.
- Porcelain slabs: commonly $4,000 to $9,000 or more installed, because slabs need specialized handling, cutting and waterproofing.
Compare that with natural marble slab, which frequently runs well past the top of those ranges before you add sealing and maintenance. Tear-out of an old tile surround, backer board replacement and plumbing trim changes are usually extra on every option.
Seams, Trims and Water Management
Seams are where synthetic surrounds succeed or fail. A grout-free wall is the whole appeal, so plan the layout to put joints in inside corners where possible. Corners are less visible and are naturally sealed with a silicone bead.
- Cultured marble and solid surface usually need only corner seams on a standard alcove. Solid surface can be seamed flat with matching adhesive and sanded smooth.
- Panels join with a factory tongue-and-groove edge or an H-trim profile. Tongue-and-groove gives a cleaner line; trim profiles are more forgiving for DIY.
- Porcelain slabs meet at a tight 1/16 to 1/8 inch joint filled with color-matched grout or silicone.
Every option also needs a proper bottom detail. Panels should sit on the tub flange or shower pan lip, with a small gap left for a flexible sealant rather than rigid grout. Penetrations for the valve and shower arm need sealing gaskets or a quality silicone, because a hole cut 1/4 inch oversized is the most common leak point in any surround.
How to Install a Panel or Cultured Marble Surround
A professional should set porcelain slabs, but many homeowners handle panels and even cultured marble with care. Here is the general sequence.
Tools and materials
- Tape measure, level, pencil and cardboard for templates
- Fine-tooth saw or circular saw with a fine blade, and a hole saw for valve openings
- Panel adhesive approved by the panel maker, plus a caulk gun
- 100 percent silicone or the maker’s recommended sealant
- Painter’s tape, bracing boards or spring clamps
- Safety glasses, gloves and a dust mask for cutting
Steps
- Turn off the water and remove trim. Shut off the supply to the shower, remove the handle, escutcheon and shower arm flange, and cap or protect the valve.
- Check the substrate. Walls should be flat, dry and solid. Over old tile, confirm it is firmly bonded and clean; over studs, install cement board or another water-resistant backer per the panel instructions.
- Make templates. Cut cardboard to each wall, mark plumbing centers, then transfer to the panels. Measure twice; marble-look panels show every gap.
- Dry fit. Set each panel in place without adhesive to confirm fit, leaving the sealant gaps the maker specifies.
- Apply adhesive. Use the bead pattern from the instructions, usually vertical beads or dabs, and keep adhesive back from edges so it does not squeeze into joints.
- Set and brace. Press panels firmly and brace them until the adhesive grabs, typically 24 hours.
- Seal. Run silicone along corners, the tub flange and around penetrations, then let it cure fully before the first shower.
Mold and Moisture Safety
A faux slab is only as good as what is behind it. Before you cover a wall, fix the moisture source first: leaky valves, failed tub flanges and poor ventilation will keep feeding mold behind even a perfectly sealed panel. If you remove old tile and find soft drywall, blackened studs or a musty smell, cut out the damaged material and let the cavity dry fully.
Waterproof properly for the material you choose. Porcelain slabs need a liquid or sheet membrane behind them. Panels and cultured marble rely on their own nonporous face plus sealed joints, but the backer behind them should still be water resistant. Run a bath fan rated for the room size for at least 20 minutes after each shower. If you find mold covering more than about 10 square feet, hire a mold remediation professional rather than tackling it yourself.
Cleaning and Long-Term Care
Most synthetic surfaces clean up with a soft cloth and a pH-neutral or mild bathroom cleaner. Skip abrasive powders and scouring pads on cultured marble and printed panels, since they dull the gelcoat or wear the print. Solid surface tolerates gentle abrasive pads for scuffs. Porcelain is the toughest, but its grout or caulk joints still need attention.
- Squeegee walls after showering to limit hard-water film.
- Inspect silicone joints yearly and replace any that peel or darken.
- Avoid hair dye and harsh solvents on panels, which can stain or soften the surface.
- Repair chips in cultured marble promptly with a gelcoat kit to keep water out of the core.
Troubleshooting Common Problems
Panels bowing or popping loose: usually not enough adhesive contact or a wavy substrate. Remove, flatten the wall and reset with the full bead pattern.
Water behind the surround: check the bottom sealant line and penetrations first, then the valve itself.
Dull or cloudy finish on cultured marble: often caused by abrasive cleaners. A fine polishing compound made for gelcoat can restore the shine.
Visible repeating pattern: flip or rotate panels during dry fit so identical veining is not side by side.
When to Call a Pro
Hire a pro for porcelain slabs, any job involving moving or replacing the shower valve, and walls with hidden rot or mold. Plumbing changes should follow local code and may need a permit, so bring in a licensed plumber if you are unsure. A professional fabricator can also seam solid surface invisibly, which is difficult to match without the right tools. For a straightforward panel kit over sound walls, a careful DIYer can usually finish synthetic marble shower walls in a weekend.
Frequently Asked Questions
Are synthetic marble shower walls waterproof?
The faces of cultured marble, solid surface, PVC panels and porcelain are waterproof, but the system depends on sealed joints, penetrations and a proper bottom detail at the tub or pan.
Can I install marble shower wall panels over existing tile?
Many panel and cultured marble systems allow it if the tile is flat, clean and firmly bonded. Check the maker’s instructions and confirm there is no moisture damage behind the tile first.
Which faux marble option looks the most real?
Large porcelain slabs have the crispest, most natural veining. Solid surface and cultured marble look good but softer, while printed panels can show repeating patterns.
How long do synthetic marble walls last?
With good installation and gentle cleaning, cultured marble and solid surface often last 20 years or more, porcelain even longer, and quality panels 10 to 20 years.
Do synthetic marble walls need sealing like real marble?
No. The surfaces are nonporous, so they do not need stone sealer. You only maintain the silicone or grout joints.