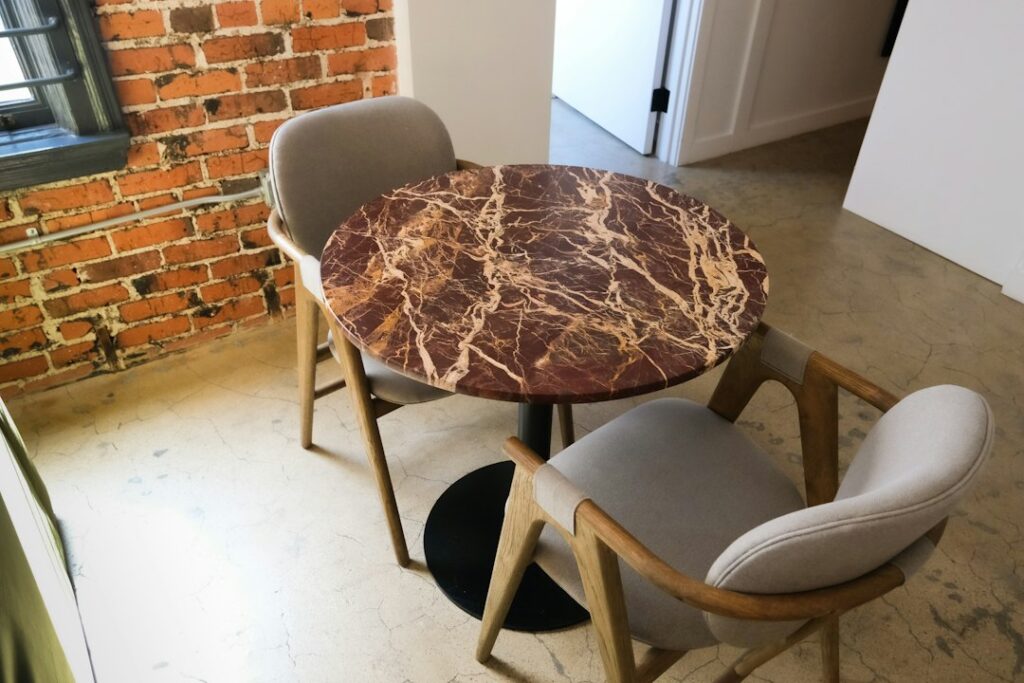
Real marble costs a small fortune and weighs as much as a small car, yet a convincing imitation can come out of a few cans of paint and a feather. Marble effect paint techniques have been used for centuries on church columns, mantels and grand entry halls, and the same layered approach works on a powder room wall or a thrifted side table today. The secret is not artistic talent. It is building the finish in thin, translucent layers so the eye reads depth instead of flat lines.
Part of our Countertops guide — explore the full guide →
Here is the quick version: apply a smooth base coat in a light neutral, sponge or rag on a soft secondary tone, draw thin irregular veins that branch and fade, soften everything with a dry brush, then add a tinted glaze and a protective clear coat. A tabletop takes a weekend including drying time. A full accent wall may take two or three days. You will get the best results on smooth surfaces, and practicing on a sample board first saves frustration.
Materials, the full step-by-step method, choosing a marble style, and fixes for the most common mistakes are all covered here.
Where Marble Effect Paint Works Best
Faux marbling suits surfaces where real stone would make sense visually. That keeps the illusion believable. Good candidates include:
- Accent walls and powder rooms: A single wall behind a vanity or bed gives a luxe look without overwhelming a space.
- Fireplace surrounds and mantels: Painted brick or wood surrounds can mimic stone slabs. Keep paint outside the firebox and observe heat clearances.
- Tabletops and furniture: Coffee tables, side tables, dressers and plant stands are classic projects.
- Columns, trim and baseboards: Historic houses often used marbled baseboards and columns.
- Decorative objects: Lamps, trays, frames and planters make great practice pieces.
Avoid using faux marble paint on surfaces that see standing water or heavy abrasion, like shower walls or floors, unless the product system is specifically rated for it. Countertops are a separate category that calls for dedicated countertop coating kits with tougher topcoats.
Choosing a Marble Style
Before you buy paint, pick a reference stone. Pull up photos or a sample slab and keep it beside you while you work. Common looks include:
- White marble with gray veining: The most popular style. Soft white base, dove-gray secondary tones and fine charcoal veins.
- Bold white with dramatic veins: Bright white base with thick, sweeping gray or gold veins.
- Black marble: Near-black base with crisp white or gold veining. Striking on small pieces and accent walls.
- Green marble: Deep green base with lighter green and white veins, popular in vintage and Art Deco spaces.
- Warm cream marble: Beige and cream base with tan and soft brown veins, gentle in traditional rooms.
Tools and Materials
A faux finishing kit can bundle many of these, or you can gather them yourself:
- Primer suited to the surface (bonding primer for laminate or glossy finishes)
- Base coat paint in eggshell or satin
- Two or three accent colors (latex or acrylic craft paint works for veins)
- Clear glazing medium
- Natural sea sponge and lint-free rags
- Fine liner brush or artist’s rigger brush
- Large feather (turkey or goose) for veining
- Soft, wide blending brush or softening brush
- Spray bottle with water
- Water-based clear polyurethane or acrylic topcoat
- Painter’s tape, drop cloth, 220-grit sandpaper, tack cloth
- Sample boards for practice
Step-by-Step Faux Marble Technique
1. Prepare the surface
Smoothness is everything. Sand furniture or trim with 150-grit and then 220-grit paper, fill dents, and remove dust with a tack cloth. Walls should be patched and sanded flat; heavy texture breaks up the illusion. Prime glossy or slick surfaces with a bonding primer. If you are working on an older piece or a pre-1978 home, test existing paint for lead before sanding.
2. Apply the base coat
Roll or brush two thin coats of your base color and let each dry fully. An eggshell or satin sheen gives the glaze some slip so it can be moved and softened. Flat paint grabs glaze too fast.
3. Mix your glazes
Combine each accent color with clear glazing medium, usually around 1 part paint to 3 or 4 parts glaze. This makes the color translucent and extends working time to 10 to 20 minutes. Mix a light secondary tone (for example, pale gray on a white base) and a darker veining tone.
4. Create soft background clouds
Dab the lighter glaze onto the base with a damp sea sponge or crumpled rag, working in diagonal drifts rather than spots. Leave plenty of base color showing. Immediately soften the patches with a dry blending brush, sweeping lightly in one direction until edges disappear. The goal is subtle variation, like mist in the stone.
5. Draw the veins
Dip the edge of a feather or liner brush into the darker glaze, then drag it across the surface while twisting and wobbling your hand. Real veins are irregular: they thicken, thin, split and fade. Run most of them in the same general diagonal direction, branch smaller veins off the main lines, and avoid parallel stripes or perfect zigzags. Lighter pressure creates fine hairline veins.
6. Soften and layer
While the veins are still wet, gently feather them with a dry blending brush so some sections blur into the background. Leave others crisp. Contrast between sharp and soft veins is what makes marble effect paint look convincing. A light mist of water can help move glaze if it starts to grab.
7. Add depth with a second layer
Once the first layer is dry, add a few more fine veins and a light wash of translucent glaze over areas that look flat. Some finishers add a few white highlight lines next to dark veins to suggest crystalline depth.
8. Seal the finish
After everything has cured at least 24 hours, apply two or three thin coats of water-based polyurethane in satin or gloss, sanding lightly with 320-grit between coats. Gloss reads more like polished marble; satin looks like honed stone. Water-based sealers yellow less over white bases than oil-based ones.
Applying Marble Effect Paint for Walls
Walls require planning because you cannot cover a large area before the glaze sets. Divide the wall into imaginary slab sections about 2 by 3 feet or larger, and work one section at a time, connecting veins across the seams. Some people mask faint grout lines with tape to suggest separate marble panels, which also makes the job manageable.
Work from top to bottom and keep a wet edge. Two people help a lot on large walls: one applies glaze and the other softens and veins. Expect the wall to take most of a day per coat of glazing, plus drying time. On walls in bathrooms, choose a satin or semi-gloss topcoat to resist humidity, and make sure the room has a working exhaust fan.
Troubleshooting Common Mistakes
Veins look like lines drawn with a marker
Veins that are too uniform or too opaque look fake. Thin your glaze more, vary pressure, and soften some sections. Study your reference photo and copy the rhythm.
Glaze dries before you can blend
Add more glazing medium, work in smaller sections, mist lightly with water, and avoid painting in direct sun or near heating vents.
The finish looks muddy
Overworking mixes colors into a gray soup. Let layers dry between steps and use a clean, dry blending brush. Wipe the brush often.
Topcoat turned yellow
Oil-based sealers amber over time, especially on white bases. Use a non-yellowing water-based clear coat.
You hate a section
While wet, wipe it away with a damp rag. Once dry, repaint the base color over that area and try again. That forgiveness is one of the best things about faux finishing.
Cost and Time
A DIY faux marble project usually costs $40 to $150 in materials depending on scale. Sample paints, glazing medium, brushes and a quart of clear coat cover most furniture jobs. A wall uses more base paint and glaze but still costs far less than real stone. A boxed faux finishing kit generally falls in a similar range and can save time sourcing tools.
Hiring a decorative painter is a different story. Skilled faux finishers often charge by the project or square foot, and a marbled accent wall or fireplace surround can run from several hundred to a few thousand dollars depending on detail. Plan on a weekend for furniture and two to three days for a wall, mostly drying time.
When to Call a Pro
Bring in a decorative painter for large walls, staircases, columns in tall foyers or high-visibility areas where a mistake would be costly. Fireplace surrounds close to the firebox need heat-rated paints and clearances, so check the fireplace manual or ask a pro. Anyone with pre-1978 painted surfaces should test for lead before sanding and use lead-safe practices or a certified renovator.
Frequently Asked Questions
Can I use marble effect paint on a countertop?
Standard faux finishing paints are not durable enough for daily kitchen use. Countertops need a dedicated coating kit with a hard, food-safe topcoat designed for heat, water and scratches.
What is the best tool for painting marble veins?
A feather or a fine liner brush works best. Feathers create natural, irregular lines when you twist and drag them. Liner brushes offer more control for fine detail.
Do I need glaze for faux marble paint?
Yes. Glaze makes the colors translucent and extends working time, which lets you blend and soften veins. Straight paint dries too fast and looks flat.
How long does a faux marble finish last?
Sealed with a quality clear coat, walls and decorative pieces can look good for many years. Tabletops may need a fresh topcoat every few years with heavy use.
Can beginners faux marble walls?
Yes. Practice on sample boards first, keep a reference photo nearby and work in small sections. The layered process is forgiving because you can wipe off or repaint mistakes.