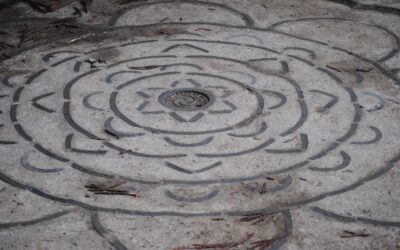
A plain gray slab can look like hand-painted cement tile for a fraction of the cost of real tile. Using a stencil for concrete floor projects in basements, garages, sunrooms, and laundry rooms lets you lay down a repeating pattern with paint, then lock it in with a clear topcoat. The result is durable, washable, and easy to refresh years later.
Part of our Epoxy, Concrete & Garage Floors guide — explore the full guide →
The process comes down to five stages: clean and profile the slab, apply a solid base coat, stencil the pattern with a stippling brush or dense foam roller, touch up, and seal with a clear coat rated for foot traffic. Pattern choice matters more than many people expect, because large-scale motifs hide small imperfections while fine geometric lines reveal every wobble. Budget two to four days for most rooms, including drying time.
This guide focuses on interior slabs. It covers pattern selection, tools, step-by-step application, troubleshooting, costs, and the safety precautions that matter when working with coatings indoors.
Choosing a Stencil for Concrete Floor Designs
Floor stencils come in a few broad families, and each suits a different look and skill level.
- Faux cement tile: Moroccan, Spanish, and encaustic-style motifs sized to 12 or 16 inches. These are the most popular choice for basements and laundry rooms.
- Geometric repeats: hexagons, diamonds, and interlocking shapes. Crisp but unforgiving of misalignment.
- Faux stone or grout-line stencils: tape-style or cut stencils that mimic large-format tile or flagstone joints.
- Borders and medallions: a single centerpiece or a perimeter band, useful when a full-floor pattern feels too busy.
Look for stencils cut from thick mylar, around 10 to 14 mil, which holds up to dozens of repeats without tearing. Registration marks, small notches that help you line up each repeat, save enormous time. A larger stencil covers ground faster, but a smaller one is easier to handle along walls and around pipes or posts.
Tools and Materials
- Concrete floor stencil with registration marks, plus an optional smaller edge stencil
- Degreaser, stiff brush, and a shop vacuum
- Concrete etcher or a floor grinder, depending on the surface
- Crack and hole filler rated for concrete
- Primer compatible with your paint system
- Base-coat paint: a floor-rated porch and floor paint, acrylic concrete stain, or epoxy system
- Pattern color in the same product family as the base coat
- Stippling brushes and dense foam rollers, 4 inches wide
- Painter’s tape, chalk line, level, and tape measure
- Clear topcoat: water-based polyurethane or polyaspartic for traffic areas
- Respirator per product label, nitrile gloves, and safety glasses
Step-by-Step: Stenciling an Interior Slab
- Test for moisture. Tape a square of plastic sheeting to the floor for 24 hours. If condensation forms underneath or the concrete darkens, address moisture before coating, or the paint will peel.
- Clean thoroughly. Remove oil, adhesive residue, and dust with a degreaser and stiff brush. Rinse well and let dry.
- Profile the surface. Etch or lightly grind so the concrete feels like medium sandpaper. Sealed or glossy slabs will not hold paint without this step.
- Repair defects. Fill cracks and pits, let cure, and sand flush.
- Prime and base coat. Apply primer if the system calls for it, then roll two thin coats of base color. Let the base cure as long as the label directs, typically 24 hours or more, so the stencil tape does not lift it.
- Plan the layout. Snap a chalk line down the center of the room in both directions. Starting at the center keeps the pattern symmetrical and pushes cut repeats to the walls where furniture hides them.
- Apply the first repeat. Tape the stencil down, load a foam roller lightly, and offload excess paint on a paper towel. Roll with light pressure. For crisp edges, stipple with a nearly dry brush using an up-and-down pounding motion.
- Lift and advance. Peel the stencil straight up, align the registration marks, and repeat. Work in a checkerboard sequence if paint is still wet so you are not laying mylar on fresh color.
- Handle edges. Bend the stencil up the baseboard or cut a flexible edge section. Touch up gaps with an artist’s brush.
- Seal. Once the pattern has fully dried, apply two to three thin clear coats. Water-based polyurethane is easy for basements; polyaspartic or a clear epoxy topcoat holds up better where hot tires or heavy traffic occur.
Stippling vs Rolling: Which Technique to Use
Rolling with a dense foam roller is faster and works well for bold, open patterns. The main risk is paint squeezing under the stencil edges, so less paint is always better. Stippling takes longer but gives sharp detail and a slightly handmade, hand-printed look that suits faux-tile designs. Many experienced painters roll the large areas of a repeat and stipple the fine lines. Whichever method you choose, clean the back of the stencil every few repeats so wet paint does not transfer to the floor.
Where Stenciled Concrete Works Best
Basements are the most common application because the slab is already there and budgets are often limited. Sunrooms benefit from UV-stable topcoats since sunlight can yellow some clear coats. Garages are a tougher environment: hot tires can lift standard floor paint, so an epoxy base and polyaspartic topcoat are the safer combination. Laundry rooms and mudrooms need a topcoat with good abrasion resistance and some grit additive for slip resistance when wet.
Color choice shapes the final look as much as the pattern itself. High-contrast combinations, such as charcoal on white or navy on cream, read as bold cement tile and show the design from across the room. Low-contrast pairings, like two neighboring grays or a tan on sand base, feel subtle and hide dust and footprints better in a busy mudroom. Before committing a whole room, paint a sample board or a hidden corner and live with it for a day under the room’s actual lighting. That small test prevents the most common regret with any stencil for concrete floor project: a color scheme that looked great on a screen but overwhelms the real space.
Chemical Safety and Ventilation
Floor coatings release vapors, and interior rooms with low ceilings concentrate them quickly. Open windows and run a box fan exhausting to the outside. Wear a respirator as specified on the product label, especially with solvent-based stains, epoxies, and polyaspartics. Nitrile gloves and safety glasses protect against etchers and degreasers. Never mix cleaning chemicals, such as acidic etchers with bleach-based cleaners. Keep flammable vapors away from pilot lights on water heaters, furnaces, and dryers; turn gas appliances off or relight them only after the space has fully aired out according to the label. If the slab has old tile or black mastic adhesive dating from before the 1980s, test for asbestos before grinding or scraping.
Troubleshooting
Paint bleeds under the stencil
Too much paint on the roller or brush. Offload more, use spray adhesive on the back of the stencil for a tighter seal, and touch up bleed lines with base color.
Base coat peels with the tape
The base had not cured long enough, or the slab was not profiled. Allow full cure time and use low-tack painter’s tape.
Pattern drifts out of alignment
Small errors compound across a room. Recheck against the chalk lines every few repeats and adjust gradually rather than all at once.
Topcoat turns cloudy or white
Moisture trapped during application, or coats applied too thick. Apply thin coats in moderate humidity and allow proper dry time between coats.
Cost Ranges
A DIY stenciled floor is one of the most economical ways to add pattern. A quality reusable stencil typically costs from a modest amount to around a hundred dollars, and floor paint, primer, and clear coat for a medium basement usually land in the low hundreds. Epoxy and polyaspartic systems cost more. Professional decorative concrete painters charge several dollars per square foot, with prices rising for intricate patterns, grinding, and moisture mitigation.
When to Call a Pro
Bring in a flooring or decorative concrete contractor if the slab shows active moisture, large cracks that change width, or heaving. Hire professionals for grinding floors that may contain asbestos-bearing adhesive, for polyaspartic coatings that cure very quickly and require experience, or for large commercial-grade garage systems. A pro can also advise on vapor barriers and moisture mitigation before any coating goes down.
Frequently Asked Questions
What paint should I use with a stencil for concrete floor projects?
Use a floor-rated paint or stain in the same product family for both base and pattern colors, then seal with a clear coat. Epoxy systems suit garages; porch and floor paint works well in basements.
Do I need to seal a stenciled concrete floor?
Yes. A clear topcoat protects the pattern from scuffs and cleaning. Two to three thin coats of water-based polyurethane or polyaspartic are typical.
How long does a stenciled concrete floor last?
With good prep and a quality topcoat, several years in a basement or sunroom. Garages and high-traffic areas may need a fresh clear coat sooner.
Can I stencil over an existing painted floor?
Often, if the old paint is firmly bonded. Clean, scuff-sand, and test adhesion with tape. Peeling or flaking coatings must be removed first.
How long should I wait before walking on it?
Light foot traffic is usually fine after 24 to 48 hours, but full cure for furniture and vehicles may take several days. Follow the topcoat label.