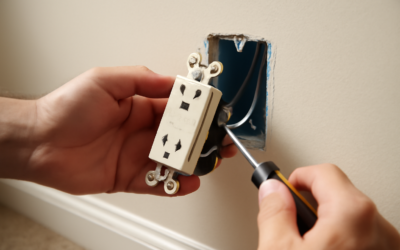
If your plug suddenly refuses to go into a brand-new outlet, the outlet is probably doing its job. A tamper resistant GFCI combines two protections in one device: internal spring-loaded shutters that block a hairpin or key from reaching the contacts, and a ground-fault circuit that cuts power in a fraction of a second when current leaks to ground. In most US homes built or renovated in the last fifteen years, that combination is not optional wherever GFCI protection is required.
The short answer to what most people are asking: yes, the National Electrical Code requires tamper-resistant receptacles in nearly all 15- and 20-amp, 125-volt and 250-volt locations in dwelling units, and it separately requires GFCI protection in kitchens, bathrooms, garages, outdoors, basements, laundry areas, and near sinks. Where both rules apply, you need a device stamped with the letters TR and the GFCI test/reset buttons. Outdoors and in other damp or wet locations, add WR (weather resistant) to that list.
- What a Tamper Resistant GFCI Actually Does
- Code Rules: Where TR and GFCI Overlap
- How to Read TR and WR Markings
- Why Plugs Feel Stiff (and Insertion Tips)
- Tools and Materials for Replacing a Receptacle
- Step-by-Step: Installing a Tamper Resistant GFCI Receptacle
- Troubleshooting Common Problems
- Typical Costs
- When to Call a Licensed Professional
- Frequently Asked Questions
This guide explains what the shutters actually do, how to read the tiny markings on the face of the receptacle, why plugs feel stiff, how a replacement is done on a dead circuit, and where the line sits between a homeowner swap and a job for a licensed electrician.
What a Tamper Resistant GFCI Actually Does
Behind each pair of slots on a TR receptacle sits a small plastic shutter mechanism. The shutters only slide open when pressure hits both slots at the same moment, which is what happens when a two-prong or three-prong plug goes in straight. Push a paperclip into just one slot and the shutter stays locked. That simple mechanism addresses a real problem: thousands of children every year are treated for shocks and burns after pushing objects into outlets, and plastic plug-in caps are easy to lose or pry off.
The GFCI half of the device works independently. It constantly compares current flowing out on the hot conductor with current returning on the neutral. If the difference exceeds roughly 4 to 6 milliamps, the device trips and opens the circuit, usually within about 1/40 of a second. A tamper proof GFCI therefore protects against two different hazards: a child probing the slots, and anyone touching a faulty appliance while standing on a wet floor.
Many homeowners assume the shutters make the GFCI less sensitive or more likely to trip. They don’t. The shutters are purely mechanical and have no effect on the ground-fault sensing circuit.
Code Rules: Where TR and GFCI Overlap
The NEC’s tamper-resistant requirement for dwelling units is found in Section 406.12. It covers receptacles in essentially every habitable space of a house or apartment, plus garages, accessory buildings, and outdoor locations. A few narrow exceptions exist, such as receptacles located more than about 5 1/2 feet above the floor, receptacles that are part of a light fixture or appliance, and a single receptacle dedicated to an appliance that is not easily moved, but local inspectors interpret those exceptions differently.
GFCI requirements live in a different part of the code and have expanded with nearly every edition. Recent editions extended protection to all kitchen receptacles rather than just countertop ones, to basements whether finished or not, to laundry areas, and to many outdoor outlets. Because states and municipalities adopt code editions on different schedules, the rule that applies to your house depends on your local jurisdiction. A quick call to your building department answers that question for free.
The practical takeaway is straightforward. When you replace a receptacle in a location that requires GFCI protection, you are generally expected to bring it up to current requirements, which means installing a tamper resistant GFCI receptacle rather than an older non-TR model. Most hardware stores no longer stock 15- and 20-amp residential GFCIs without the TR feature anyway.
Where You Will Commonly Need a TR GFCI
- Kitchen receptacles, including those serving countertops and islands
- Bathrooms, regardless of distance from the sink
- Garages and unfinished accessory buildings
- Outdoor receptacles on porches, decks, and exterior walls (TR plus WR)
- Basements, crawl spaces, and laundry rooms
- Any receptacle within about 6 feet of a sink, tub, or shower
How to Read TR and WR Markings
The markings are small and molded into the face or the back of the device, so a flashlight helps. On a tamper resistant device you will see TR stamped between or beside the slots, often next to the manufacturer logo. Weather-resistant devices carry WR, and a device rated for both carries both letters, sometimes printed as a combined WR TR GFCI label on the packaging.
A WR GFCI receptacle uses UV-stabilized plastics and corrosion-resistant metal parts so it can survive humidity, salt air, and temperature swings. Code calls for weather-resistant receptacles in damp and wet locations for 15- and 20-amp, 125- and 250-volt devices. Keep in mind that WR alone does not make an outlet waterproof. Outdoors, it still needs an in-use (bubble) cover that stays closed while something is plugged in.
| Marking | Meaning | Typical Location |
|---|---|---|
| TR | Tamper-resistant shutters | All dwelling receptacles |
| WR | Weather-resistant materials | Damp and wet locations |
| TR + WR + GFCI | All three protections | Outdoor, patio, garage exterior |
| 15A / 20A (T-slot) | Amp rating of the device | Match to circuit breaker and wire |
Also look for the listing mark from a nationally recognized testing laboratory and the amp rating. A 20-amp receptacle has a sideways T on one neutral slot. You may install 15-amp receptacles on a 20-amp circuit when there are two or more outlets on that circuit, but never install a 20-amp device on a circuit wired with 14-gauge wire and a 15-amp breaker.
Why Plugs Feel Stiff (and Insertion Tips)
Complaints about stiff plugs are the most common reason people search for alternatives to TR outlets. The feel is normal, especially on new devices. Here are techniques that reliably help:
- Push straight in. Both prongs must hit the shutters at the same time. Angling the plug, or leading with one prong, keeps a shutter locked.
- Use a firm, steady push. A slight wiggle up and down while pushing helps the shutter slide without forcing it.
- Check the plug. Bent, loose, or corroded prongs won’t open the shutters evenly. Straighten or replace damaged cords.
- Try a different device. Shutter stiffness varies noticeably between manufacturers and product lines, so a premium-grade model is often smoother.
- Give it time. Shutters loosen slightly after a few dozen insertions.
Never lubricate the slots with oil, graphite, or silicone spray. Lubricants attract dust, may degrade the plastic, and can create a conductive path inside the device.
Tools and Materials for Replacing a Receptacle
- New TR GFCI receptacle, 15A or 20A to match the circuit (WR if damp/wet)
- Non-contact voltage tester
- Insulated screwdrivers (flat and #2 Phillips)
- Wire stripper and needle-nose pliers
- Plug-in outlet tester with GFCI test button
- Painter’s tape and a marker for labeling wires
- New cover plate, and an in-use cover for outdoor locations
Step-by-Step: Installing a Tamper Resistant GFCI Receptacle
Swapping a standard receptacle for a GFCI protected receptacle is a common DIY task in many jurisdictions, though some require a permit or a licensed electrician even for like-for-like replacement. Check your local rules first.
- Turn off the breaker and confirm power is off with a non-contact voltage tester. Test the tester on a known live outlet first, then check every slot and every wire in the box once the cover is off. Some boxes contain more than one circuit.
- Remove the old receptacle. Unscrew the cover plate and mounting screws, then gently pull the device out without touching the terminals until you have confirmed they are dead.
- Identify line and load. If there are two cables, one brings power in (line) and one continues to downstream outlets (load). Since you cannot test live wires safely, a reliable method is to separate the cables, cap each wire individually with a wire connector, fold them back, and have a licensed electrician identify them, or trace the cable path back toward the panel with the power still off. If the box has only one cable, it is the line.
- Label the wires. Mark the line cable with tape so there is no mix-up.
- Connect the line cable to the LINE terminals. Black (hot) goes to the brass LINE screw, white (neutral) to the silver LINE screw, and bare or green to the green ground screw. Leave the yellow tape over the LOAD terminals unless you intend to protect downstream outlets.
- Connect the load cable (optional). Attach it to the LOAD terminals if you want the GFCI to protect outlets further along the circuit. Those downstream outlets should then get “GFCI Protected” stickers.
- Tighten and fold. Use screw-clamp or back-wire pressure plates rather than push-in stab holes. Fold the wires neatly into the box; GFCIs are deep and a crowded box may need an extension ring.
- Mount the device and cover plate. Keep the device plumb and snug without cracking the plastic yoke.
- Restore power and test. Flip the breaker back on. Most modern devices show a status light. Press TEST (power should cut), then RESET. Finish with a plug-in outlet tester to confirm correct wiring.
Troubleshooting Common Problems
The GFCI Won’t Reset
Current devices are designed so they will not reset if line and load are reversed or if the device has no power. Turn the breaker off, confirm power is off with your non-contact tester, and recheck which cable is the line. If the wiring is correct, the device may be defective out of the box.
It Trips Constantly
Repeated tripping usually points to a faulty appliance, moisture in an outdoor box, or a long run of downstream outlets with minor leakage adding up. Unplug everything and reset. If it holds, plug devices back in one at a time to find the culprit. If it trips with nothing plugged in, the device or the wiring needs attention from a professional.
Plugs Still Won’t Go In
Straighten the prongs and try the straight-push technique. A few older cords with oversized or non-standard prongs simply won’t fit TR shutters; replacing the cord is the correct fix.
Typical Costs
A standard 15-amp tamper resistant GFCI generally runs in the low-to-mid teens to around twenty-some dollars, while 20-amp and WR TR combination models cost somewhat more. Self-test and premium-grade devices sit at the top of the range. Hiring an electrician to replace a single receptacle usually includes a service-call minimum, so it often makes sense to bundle several outlets into one visit. New circuits, outdoor boxes that need a new cable run, and whole-house TR upgrades cost considerably more and vary by region.
When to Call a Licensed Professional
Replacing a receptacle on an existing, properly wired circuit is within reach for a careful homeowner, but many situations call for a licensed electrician. Always turn off the breaker and confirm power is off with a non-contact voltage tester before touching anything, and never work on energized wires. Beyond that, bring in a pro when:
- You find aluminum branch wiring, cloth-insulated wire, or no ground conductor
- You cannot confidently identify line and load cables
- The job requires a new circuit, a new outdoor box, or panel work
- The breaker trips immediately or you see scorching, melted plastic, or a burning smell
- Your jurisdiction requires a permit or licensed installer under local NEC adoption
An electrician can also tell you which code edition your area follows and whether a GFCI breaker or dual-function breaker makes more sense than individual receptacles for your layout.
Frequently Asked Questions
Is a tamper resistant GFCI required in every room?
Tamper-resistant receptacles are required in nearly all dwelling locations, but GFCI protection is only required in specific areas such as kitchens, bathrooms, garages, basements, laundry areas, and outdoors. Where both apply, you need a device that carries both the TR marking and GFCI function.
What does WR TR GFCI mean on the package?
It means the receptacle is weather resistant, tamper resistant, and provides ground-fault protection. That combination is the right choice for porches, patios, decks, and other damp or wet locations.
Can I replace a tamper proof GFCI with a regular outlet?
Not in a location where code requires GFCI and TR protection. Removing either feature leaves the outlet noncompliant and removes safety protection that code intends for that space.
Why won’t my plug go into my new tamper resistant GFCI receptacle?
The shutters need even pressure on both slots. Push the plug straight in with a firm, steady motion and check that the prongs are straight. Stiffness eases slightly with use.
Does a GFCI protected receptacle downstream need to be TR too?
Yes. Downstream outlets protected through the LOAD terminals still need their own tamper-resistant rating, since the GFCI upstream does not add shutters to them.