Those tiny piles that look like coffee grounds or fine sawdust on your sill are one of the most reliable early warnings a house can give you. Finding termite droppings on a window sill almost always points to drywood termites actively feeding inside the frame, casing, or wall framing directly above the pile. Homeowners sweep these piles away for months thinking they’re dirt blowing in through the screen, and by the time someone investigates, the colony has hollowed out the jamb. Here’s how to confirm what you’re looking at, how serious it is, and exactly what to do in the first 48 hours.
Part of our Windows & Doors guide — explore the full guide →
- What Termite Droppings Actually Look Like
- Why the Window Sill Is Ground Zero
- Step One: Confirm It's Active
- Drywood vs. Subterranean: Why It Matters
- Treatment Options That Actually Work
- Repairing the Window After Treatment
- Preventing the Next Colony
- When to Worry — and When Not To
- Questions Homeowners Ask Most
What Termite Droppings Actually Look Like
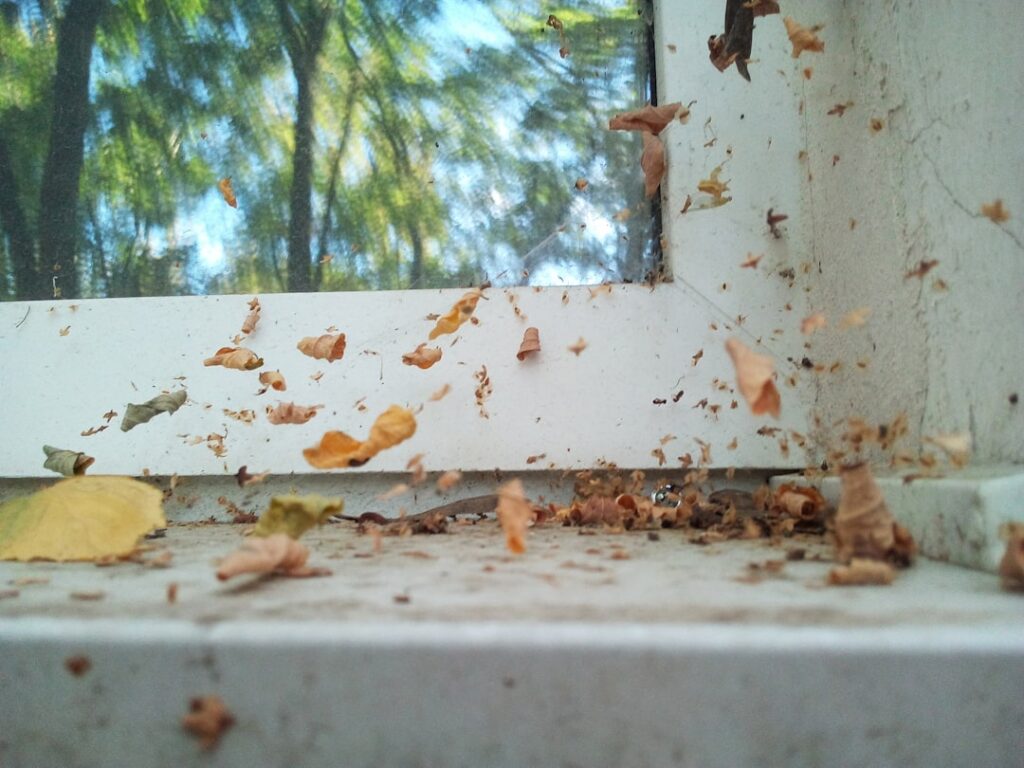
Drywood termite droppings — the technical term is frass — are hard, dry, six-sided pellets about 1 millimeter long, roughly the size of poppy seeds or coarse ground pepper. Color ranges from tan to dark brown to nearly black depending on the wood being eaten, so a single pile often looks multicolored, like tiny salt-and-pepper granules. Under a magnifying glass you can see the distinct hexagonal shape with rounded ends and six concave sides. That geometry is the giveaway: no other household debris has it.
Before you panic, compare your pile against photos of confirmed termite droppings; window sill piles from drywood colonies have a distinctive granular, uniform look that most lookalikes lack. Frass gets confused with three things constantly. Carpenter ant debris is shaggier — it contains insect body parts and wood shavings that look like pencil sharpener output. Actual sawdust from sanding or drilling is soft, irregular, and lighter. And dirt or roof grit washed in around a leaky window is dull and crumbles to powder when pressed. Termite pellets are hard; roll one between your fingers and it feels like a grain of sand that won’t crush easily.
Why the Window Sill Is Ground Zero
Drywood termites don’t need soil contact. Winged reproductives (alates) land on the exterior of your house during swarm season — typically late spring through early fall, and nearly year-round in Florida, coastal California, Texas, Arizona, and Hawaii — and crawl into cracks around window frames, fascia, and trim. A window frame offers everything they want: exposed end grain, old caulk gaps, and paint that has weathered enough to expose bare wood.
Once inside, termites keep their galleries clean by chewing small “kick-out holes” about 1-2 millimeters wide and pushing pellets out. Gravity does the rest, and the sill below becomes the collection tray. So a pile on the sill usually means the colony is in the header, side jamb, or wall framing above the pile — not necessarily in the sill itself. Look up, not just down.
Step One: Confirm It’s Active
Clean the sill completely with a vacuum, then mark the date on a piece of painter’s tape nearby. Check daily. Fresh pellets reappearing within a few days to two weeks confirm an active infestation — drywood colonies push out frass continuously as they feed. If nothing reappears after 3-4 weeks, you may be looking at an old, treated, or dead colony, though a professional inspection is still worth the roughly $75-150 fee (many companies inspect free if they also sell treatment).
While you wait, do a screwdriver test. Press the tip of a flathead screwdriver into the window trim, jamb, and sill every few inches. Sound wood resists; infested wood punches through with almost no pressure, sometimes revealing galleries packed with pellets. Tap the trim too — hollowed wood sounds papery and dull compared to the sharp knock of solid lumber. Also scan for the kick-out holes themselves: tiny round openings, sometimes with a pellet stuck in the exit.
Drywood vs. Subterranean: Why It Matters
Only drywood termites leave pellet piles. Subterranean termites — the more destructive species east of the Rockies — use their feces to build mud tubes and line tunnels, so you’ll never see loose frass from them. If you see pencil-width mud tubes running up the foundation or inside a wall void near the window, you’re dealing with subterranean termites, and that changes the treatment entirely (soil-applied termiticide or bait stations rather than wood injection or fumigation).
This distinction drives cost. Localized drywood treatment might run $300-1,000. Whole-structure fumigation for widespread drywood infestation runs $1,200-4,000 for an average home, priced around $1-4 per square foot of tented volume. Subterranean treatment with a liquid barrier like Termidor typically costs $3-16 per linear foot of foundation, landing most homes between $1,500 and $3,000.
Treatment Options That Actually Work
Localized (Spot) Treatment
When the infestation is confined to one window assembly, a pest control tech drills small holes into the galleries and injects a foaming termiticide (Termidor Foam) or a borate. Orange oil (d-limonene) injections are marketed heavily in California; they kill on contact but have zero residual, so success depends entirely on hitting every gallery. Expect $300-1,000 per treatment area, with reputable companies offering a 1-2 year warranty on the treated zone.
Whole-Structure Fumigation
If pellets are showing up at multiple windows, in the attic, or along baseboards in different rooms, spot treatment becomes a game of whack-a-mole. Tent fumigation with sulfuryl fluoride (Vikane) kills every drywood colony in the structure in one shot. You’ll be out of the house 2-3 nights, and food and medications get double-bagged in nylon fume bags. It does not prevent reinfestation, so pair it with the prevention steps below.
DIY Borate Treatment
For a genuinely small, accessible infestation, homeowners can inject a borate like Bora-Care (about $85-100 per gallon concentrate) into kick-out holes and paint it onto exposed bare wood. It’s legitimate chemistry — borates are what pre-treated framing lumber uses — but it can’t reach galleries deep in a header behind drywall. If pellets return after a DIY attempt, stop experimenting and call a licensed operator.
Repairing the Window After Treatment
Treatment kills termites; it doesn’t restore wood. Probe the sill, jambs, and casing after treatment. Cosmetic galleries in otherwise solid wood can be consolidated with a two-part epoxy system — Abatron WoodEpox and LiquidWood run about $60-90 for a kit that handles one window. Structurally compromised sills or jambs need replacement: a carpenter will charge roughly $200-600 to rebuild a sill and casing, while a full replacement window installed runs $450-1,500 depending on size and material. If the framing header above the window is eaten, budget more — opening the wall, sistering or replacing the header, and patching drywall can push repairs past $1,500.
Preventing the Next Colony
Drywood swarmers pick houses with easy entry points, so make yours boring to them:
- Caulk and seal: Fill gaps around window frames, trim joints, and fascia with a quality exterior sealant. Swarmers exploit cracks as thin as 1/16 inch.
- Keep paint intact: Termites rarely bore through sound paint film. Scrape and repaint weathered sills before bare wood shows.
- Screen attic and foundation vents: Use 20-mesh or finer screen; standard 1/4-inch hardware cloth won’t stop a swarmer.
- Fix moisture problems: Drywood termites tolerate dry wood, but leaky windows soften wood and invite carpenter ants and fungus too. Reflash or recaulk any window that shows water staining.
- Annual inspections: In high-pressure states like Florida, California, and Hawaii, a yearly termite inspection ($75-150, often free with a service contract) catches new colonies while spot treatment is still an option.
When to Worry — and When Not To
A single small pile of frass does not mean your house is about to collapse. Drywood colonies grow slowly — a mature colony holds a few thousand insects, versus hundreds of thousands or millions for subterranean species, and it can take 5+ years for one colony to do serious structural damage. What the pellets demand is action, not panic. Confirm activity, get two treatment quotes, and ask each company to specify exactly which areas their warranty covers and for how long.
The mistake that costs homeowners real money is the opposite one: wiping the sill clean every week for two years while a colony quietly finishes off the header. Termite droppings on a window sill are the house telling you where to look. Take the hint early, and this is a $500 problem instead of a $5,000 one.
Questions Homeowners Ask Most
Can frass appear on a sill without termites in that window? Occasionally. Pellets can fall from an infestation in the wall or ceiling above and drift onto the nearest ledge, and open windows can let pellets blow in from an infested exterior fascia. Trace the vertical line above the pile first, and check the exterior trim on that wall too.
Are termite droppings dangerous to touch or breathe? No — frass is essentially digested wood and isn’t toxic, though sweeping large amounts can kick up dust worth avoiding. Vacuum rather than sweep, and wash your hands afterward like you would with any debris.
Will sellers’ disclosure or a pest inspection catch this? A WDI (wood-destroying insect) inspection during a home sale specifically looks for frass, kick-out holes, and damaged wood, and in many states an active infestation must be disclosed. If you’re buying a house and see pepper-like piles on any sill during the walkthrough, ask for a termite inspection contingency before closing — treatment plus repairs is a legitimate negotiating item worth $1,000-5,000.