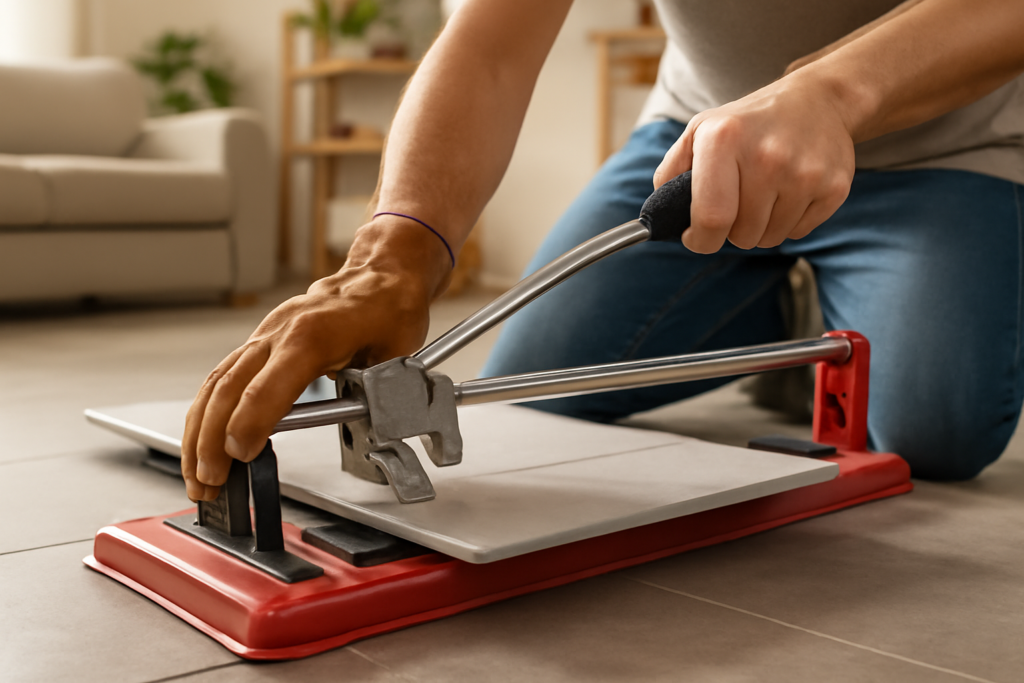
A good tile snapper is the most underrated tool in tile work: no cord, no dust, no water tray, and cleaner straight cuts than most beginners manage on a wet saw. Also called a manual snap cutter or rail cutter, it scores the glaze with a small carbide wheel and then snaps the tile along that line using a breaker foot. For straight cuts on ceramic and porcelain, a $30 to $150 snapper often outperforms an expensive powered saw, once you know how to use it.
Part of our Tile & Grout guide — explore the full guide →
- What a Tile Snapper Is and How It Works
- How to Use a Tile Snapper Step by Step
- Choosing the Right Tile Snapper
- Tile Snapper Recommendations by Budget
- When a Tile Snapper Beats a Wet Saw
- When You Still Need a Wet Saw
- Caring for Your Tile Snapper
- Common Tile Snapper Mistakes
- Getting Clean Results From Your Tile Snapper
What a Tile Snapper Is and How It Works
A tile snapper is a simple mechanical device built around two or three chrome guide rails, a sliding carriage that carries a scoring wheel, and a hinged breaker foot. You place the tile against a fixed fence, run the wheel across the surface to score a shallow line, then press down so the tile fractures cleanly along that score.
Because it works by controlled fracture rather than grinding through the tile, a snapper produces zero dust and no slurry. That makes it ideal for indoor work, occupied homes, and anyone who does not want to set up a hose and a wet vac. The catch is that it only makes straight cuts. For L-shaped notches, curves, or holes, you still need nippers, a grinder, or a wet saw.
How to Use a Tile Snapper Step by Step
Clean cuts are more about technique than tool price. Follow this sequence and even a budget snapper delivers professional edges:
- Measure and mark. Mark your cut line on the tile face with a pencil or fine marker, accounting for grout-line spacing.
- Set the tile. Place the tile flat against the fence so your mark lines up directly under the scoring wheel.
- Score once. Pull or push the carriage in a single smooth, firm pass from the far edge to the near edge. You want one clean scratch, not repeated passes.
- Position the breaker. Slide the breaker foot over the scored line, centered on the tile.
- Snap. Press down firmly and decisively. The tile breaks along the score with a clean, sharp edge.
The cardinal rule is score only once. Running the wheel back and forth creates competing scratches and leads to chipped, wandering breaks. If a tile refuses to snap cleanly, the culprit is almost always a dull wheel or too little pressure on that first pass.
Choosing the Right Tile Snapper
Not all snappers are built the same, and the price gap reflects real differences in accuracy and durability. Focus on these features when you shop:
- Cutting length: Match it to your tile. A 14-inch snapper handles standard tile, while 24-inch and 36-inch models cut large-format planks and diagonal cuts on big tile.
- Rail system: Twin hardened-steel rails with linear bearings glide far smoother and straighter than a single stamped rail. This is the biggest quality difference between a $30 tool and a $120 one.
- Scoring wheel quality: A tungsten carbide wheel handles ceramic; a titanium-coated wheel lasts far longer in dense porcelain.
- Breaker design: A wide, well-padded breaker foot spreads pressure evenly and prevents corner chips.
- Adjustable angle guide: A swiveling fence lets you make repeatable diagonal and miter cuts.
Tile Snapper Recommendations by Budget
Here is roughly what your money buys across the range:
- $25 to $50 (occasional DIY): QEP and similar entry-level snappers cut standard ceramic wall and floor tile fine for a single room. Expect a stiffer action and a shorter wheel life.
- $60 to $150 (serious DIY and remodels): Rubi TX and Sigma entry models bring smoother rails, better scoring wheels, and the accuracy to cut hard porcelain confidently.
- $200 and up (professional): Top Sigma and Montolit cutters glide effortlessly, hold precise alignment over thousands of cuts, and handle the largest planks without flexing.
For most homeowners doing a bathroom, kitchen backsplash, or a mudroom floor, the $60 to $150 tier is the sweet spot. It cuts porcelain without a fight, lasts for years, and costs less than renting a wet saw twice.
When a Tile Snapper Beats a Wet Saw
A snapper wins any time you value speed, cleanliness, and quiet over versatility. Picture cutting a full room of straight-edge floor tile: you can set, score, and snap a tile in seconds without ever leaving the room to manage water or dust. There is no cord to trip over, no motor noise, and no cleanup beyond sweeping up a few slivers.
The snapper also produces a surprisingly clean edge on the visible face, since the glaze breaks along a scored line rather than being ground through. For subway tile, plank tile, and standard floor layouts where the cuts are all straight, a snapper is faster and tidier than any powered saw.
When You Still Need a Wet Saw
A snapper has clear limits, and knowing them saves frustration. It cannot cut curves, cannot make interior cutouts for outlets or pipes, and struggles with very thin strips under about 1 inch wide, which tend to break unevenly. Natural stone like marble and slate, and extremely thick or textured porcelain, also cut more reliably on a wet saw.
The smart approach is to own both. Use the tile snapper for the 80 percent of cuts that are straight and simple, and keep a wet saw or an angle grinder with a diamond blade on hand for notches, holes, and stone. That combination covers every cut a typical tile job throws at you.
Caring for Your Tile Snapper
A snapper is a simple tool, but a little upkeep keeps it cutting accurately for years. The rails and carriage need to glide freely, so wipe off glaze dust after each use and apply a drop or two of light machine oil along the rails and the carriage bearings. Grit is the enemy of a smooth score; if the carriage starts to feel gritty or sticky, clean it before you keep cutting.
The scoring wheel is the one consumable part, and it is inexpensive to replace. When you notice you are pressing harder to score, or tiles start chipping at the snap, install a fresh wheel rather than fighting a dull one. Keep a spare wheel matched to your cutter’s brand and axle size in your kit so a worn wheel never stalls a project. Store the snapper flat and dry so the rails do not rust or bend.
Common Tile Snapper Mistakes
A few habits separate clean cuts from wasted tile:
- Scoring multiple times: The single most common error. One firm pass only.
- Cutting strips too narrow: Pieces under about 1 inch wide snap unevenly; use a wet saw or nippers instead.
- Rushing the alignment: A tile that shifts off the fence produces a crooked score and a crooked break.
- Ignoring a dull wheel: A worn wheel makes even a great snapper perform like a cheap one.
Slow down for the setup, score once, and keep the wheel sharp, and the snapper rewards you with fast, clean cuts every time. It also helps to score with the tile at room temperature; a cold tile straight from a garage in winter is more brittle and more prone to breaking off the line. Give each tile a moment to warm up before you cut, and it will snap more predictably.
Getting Clean Results From Your Tile Snapper
A quality tile snapper rewards good technique with fast, dust-free, professional-looking cuts, and it pays for itself against a single wet-saw rental. Buy a model with twin steel rails and a sharp carbide or titanium wheel sized to your tile, score in one confident pass, and snap with firm pressure. Keep the rails lightly oiled, replace the scoring wheel the moment it starts to skip, and reserve the wet saw for curves and stone. Do that, and the snapper becomes the tool you reach for first on nearly every tile project.
Prefer to explore on your own?
See how new flooring looks in your actual room in seconds — free, no signup.
Try the free Floor Studio →