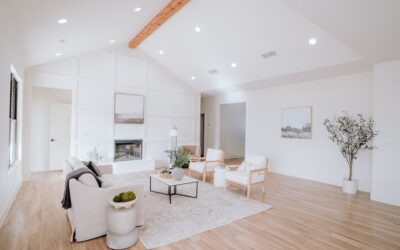
Corners are the most wasted real estate in most living rooms, and mounting your television across one is often the smartest layout you can choose. Putting a tv in corner of living room on wall frees up your main walls for furniture and art, angles the screen toward an L-shaped sectional, and can solve tricky window or doorway placements that a flat mount cannot. It looks intentional, saves floor space, and once you understand the bracket and wiring basics, it is very much a weekend project.
I have installed screens across corners in everything from tight apartments to open great rooms, and the results are consistently better than homeowners expect. The catch is that corner mounting has a few rules of its own. Get the bracket, the height, and the wire management right and the finished wall looks custom. Below is everything you need to plan and execute it cleanly.
Why a Corner Mount Often Wins
Corner placement solves problems that stump a standard flat installation. If your seating wraps around two walls in a sectional, a corner puts the screen at the natural focal point where both sofa sections face. It also keeps the television out of the path of a large window, so daytime glare washing across the panel becomes far less of an issue than it is on a wall between two windows.
There is a practical space benefit too. A corner that previously held a floor lamp or a half-dead houseplant becomes productive, and your longer walls stay open for a console table, bookshelves, or a gallery arrangement. In smaller rooms under about 200 square feet, that reclaimed square footage genuinely changes how the space functions. The angled screen also tends to feel more immersive because it faces the room rather than sitting parallel to a wall.
Choosing the Right Corner Bracket
The single most important decision is the mount itself. A fixed or tilting flat-wall bracket will not sit correctly across a corner, so you want a full-motion articulating mount with a long extension arm. These brackets swing the TV out from the corner and let you angle it precisely toward your seating. Look for an arm that extends at least 16 to 20 inches, since a short arm leaves the screen buried in the corner at an awkward angle.
Match the mount to your screen size and weight. A VESA 400×400 pattern covers most 55 to 75-inch sets, but always check your TV’s exact VESA holes and weight, then buy a bracket rated 20 to 30 pounds above that figure for a safety margin. A quality articulating corner mount runs about $60 to $130. Cheap arms sag over time under a heavy panel, so this is not the place to save $30. Confirm the mount’s stated maximum, and never exceed it.
Finding Studs and Anchoring Safely
Corner mounting has one structural wrinkle: the two walls meeting at the corner do not always give you a stud exactly where you want it. In standard framing, a corner is built from two or three studs bunched together, which usually means there is solid wood within a few inches of the corner on at least one wall. Use a good stud finder and mark every stud within 24 inches of the corner before you drill anything.
Anchor the bracket into at least two studs using the lag bolts supplied with the mount, typically 5/16-inch by 2.5-inch. If your preferred angle leaves you with only one usable stud, mount a 3/4-inch plywood cleat, painted to match the wall, spanning two studs and attach the bracket to that. Never trust drywall anchors alone to hold a 50-pound television on an extended arm; the leverage from that long arm multiplies the load dramatically. A few extra minutes locating solid framing is what keeps the screen on the wall for good.
Getting the Height and Angle Right
Comfortable viewing height does not change just because the TV is in a corner. The center of the screen should sit near seated eye level, which for most sofas puts the middle of the panel about 42 inches off the floor. On a 65-inch set, that lands the bottom edge around 24 inches up. Resist the urge to mount a corner TV high near the ceiling; the neck strain is the same as with any too-high screen.
Angle is where the articulating arm earns its keep. Once the bracket is up, sit in your primary seat and swing the screen until you are looking straight at it, then check the other main seats. A slight toe-in toward the center of the seating usually satisfies everyone. If afternoon light hits the panel, a small downward tilt of 5 to 10 degrees cuts reflections. Take the time to fine-tune this before you hide the wires, because you may want to nudge the arm a degree or two after living with it for a day.
Hiding the Wires in a Corner
Loose cables snaking down from a corner-mounted TV undo all your careful work. The cleanest solution is an in-wall power relocation kit, which places a recessed receptacle behind the screen and a second outlet near the floor, joined by low-voltage conduit that carries your HDMI and power cords hidden inside the wall cavity. Kits cost about $70 to $120, and the corner framing often gives you an easy chase to drop cables straight down.
If you would rather avoid cutting drywall, a paintable cord raceway channels the wires down the corner where the two walls meet, and painted to match it nearly disappears. Because the arm extends and retracts, leave 12 to 18 inches of service loop on every cable so nothing pulls tight when you swing the screen out. Run one spare HDMI while the wall is open for a future console or streaming device. Neat wiring is the difference between a mount that looks professionally installed and one that looks improvised.
Styling the Corner Around the Screen
A television floating alone in a bare corner can look stranded, so give it some context. A slim corner console or a low media cabinet beneath the screen grounds the arrangement and hides your soundbar, cable box, and gaming gear. Flanking the corner with a tall plant on one side and a floor lamp on the other frames the TV and softens the hard angle where the walls meet.
You can also treat the corner as a mini accent zone. A couple of narrow floating shelves on the adjacent wall, styled with books and a small piece of art, tie the screen into the room’s decor rather than leaving it looking like an afterthought. Keep the styling loose and asymmetrical so it does not compete with the picture. Done thoughtfully, the corner becomes a designed feature instead of the spot where the TV simply ended up.
Final Checks Before You Commit
Before drilling, dry-fit everything. Hold the bracket in place, mark the stud locations, and sit in each seat to confirm sightlines with a cardboard cutout of the screen taped to the wall if you want to be thorough. Verify the arm has clearance to swing without hitting an adjacent wall or window trim, and confirm the outlet plan works with your run of conduit or raceway.
Once mounted, tug firmly on the installed bracket before hanging the TV to make sure it is rock solid in the studs. Level the panel, dress the cables, and step back to enjoy a layout that turns dead space into the best seat in the house. A well-planned corner TV mount is one of those upgrades that quietly makes a living room work better every single evening, and it costs a fraction of a full remodel to pull off.