The right lighting can make a kitchen counter twice as usable and a display shelf look like it belongs in a boutique, often for under $50 and an afternoon of work. Under shelf LED lighting delivers crisp task light exactly where you need it and a warm glow where you want ambiance, all from fixtures slim enough to hide completely beneath a shelf or cabinet. From puck lights to flexible strips, today’s options are bright, energy-efficient, and easy to install without an electrician. This guide explains the types, the specs that matter, and how to install them cleanly.
What Under-Shelf Lighting Does Best
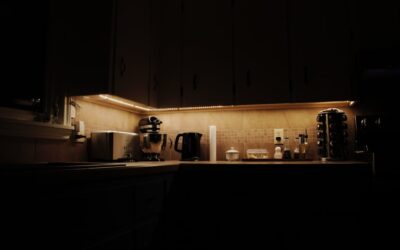
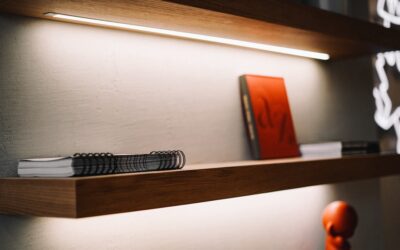
Under-shelf and under-cabinet lighting solves two distinct problems. The first is task lighting: overhead fixtures cast shadows onto countertops as you work, and a light mounted beneath the upper cabinets eliminates those shadows so you can chop, read recipes, and prep safely. The second is accent lighting: a soft glow under floating shelves, bookcases, or display cabinets highlights objects and adds depth to a room.
Beyond function, this lighting transforms the mood of a space. A kitchen with warm under-cabinet light feels finished and inviting, and a display shelf with discreet LEDs looks intentional and high-end. Because LEDs run cool and sip electricity, you can leave them on for ambiance without worrying about heat or cost.
Types of Under-Shelf LED Fixtures
There are several form factors, each suited to different shelves and goals.
- LED strip lights — Flexible adhesive ribbons that bend around corners and cut to length. The most versatile and popular choice for continuous, even light.
- Light bars — Rigid linear fixtures that link together, offering bright, uniform task light under cabinets.
- Puck lights — Small round fixtures that create pools of light, good for accenting specific spots or short shelves.
- Tape with diffuser channels — LED tape set into an aluminum channel with a frosted cover for a clean, dot-free line of light.
For a long counter, strips or linked light bars give the most even coverage. For highlighting a few decorative items, puck lights are simpler and look great. A diffuser channel is worth the extra cost where the strip will be visible, since it hides the individual LED dots.
Choosing the Right Specs
Three specifications determine how the lighting looks and performs. Get these right and the result feels professional.
- Color temperature — Measured in Kelvin. Warm white (2700K to 3000K) feels cozy; neutral white (3500K to 4000K) is crisp for task work; cool white (5000K+) is very bright and clinical. Most kitchens look best around 3000K.
- Brightness — Measured in lumens. For task lighting over a counter, aim for higher output; for accent lighting, lower is plenty.
- Color rendering (CRI) — Look for a CRI of 90 or above so food, skin, and objects appear in true color.
- Dimmability — Choose dimmable fixtures and a compatible dimmer or remote if you want to adjust brightness for tasks versus mood.
Tunable products that shift between warm and cool on demand cost a little more but let you use bright light for cooking and warm light for evenings.
Power Options
How you power the lights affects both installation difficulty and convenience. Plug-in LED strips and bars are the easiest, drawing from a standard outlet through a low-voltage transformer; no wiring knowledge required. Battery-powered or rechargeable puck lights and strips need no outlet at all and suit closets, cabinets, and renters, though you will recharge or swap batteries periodically.
Hardwired systems give the cleanest look with no visible cords and integrate with wall switches, but they involve connecting to household wiring and are best left to a licensed electrician where local code requires it. For most homeowners, a quality plug-in or rechargeable system delivers the same light with far less hassle.
How to Install LED Strip Lighting
Installing adhesive strip lighting is one of the most beginner-friendly home upgrades. The process is straightforward when you prep correctly.
- Measure and plan — Measure the length you need and plan where the strip will start, where it turns corners, and where the power connection sits.
- Clean the surface — Wipe the underside of the shelf with rubbing alcohol so the adhesive bonds firmly and does not sag later.
- Cut to length — Cut strips only at the marked cut lines; mid-segment cuts disable a section.
- Mount toward the front — Stick the strip toward the front edge of the shelf bottom so light falls on the counter, not the backsplash.
- Connect and conceal — Run the wire to the transformer, tucking and clipping the cord up and out of sight, then plug in and test.
A small dab of mounting tape or clips at intervals keeps long runs from peeling over time, a common issue with adhesive-only installs in warm kitchens.
Best Uses Around the Home
Under-shelf LEDs are versatile enough to improve nearly every room. In the kitchen, they are most valuable beneath upper cabinets, eliminating counter shadows for safer, easier prep, and a low warm setting doubles as a gentle nightlight. Home offices benefit from a strip under a shelf or hutch that lights the desk without the glare of an overhead fixture.
For display, LEDs under floating shelves, bookcases, and curio cabinets turn ordinary shelving into a showcase, drawing the eye to artwork, collectibles, or glassware. Closets gain a lot from battery or rechargeable strips that need no wiring, making it easy to see clothing and shelves in a space that rarely has good light. Even bathrooms, under a vanity shelf or floating cabinet, gain a soft, modern glow that flatters the room. Because the fixtures are small and the power draw is tiny, you can add them almost anywhere a little extra light would help.
Design Tips for a Polished Look
A few finishing touches separate a clean install from an obvious one. Always mount the light source toward the front edge so the fixture itself stays hidden and only the cast light is visible. Use a diffuser channel anywhere the strip might be seen from a seated or standing angle to avoid a row of glaring dots. Keep color temperature consistent throughout a room so the lighting reads as cohesive rather than piecemeal.
Finally, consider adding a dimmer or smart controller so you can dial the under shelf LED lighting from bright task mode down to a gentle evening glow. With the right type, the right specs, and a tidy installation, this simple upgrade delivers a remarkable amount of function and atmosphere for very little money.