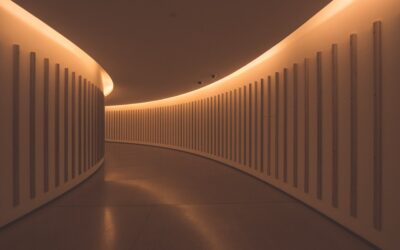
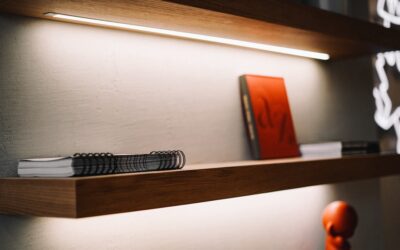
Hidden, glare-free light has become the signature of modern interiors, and the tool behind it is the recessed LED lighting strip set into an aluminum channel. Instead of dotting a ceiling with visible fixtures, a recessed strip tucks into a groove and casts a continuous, seamless line of light that seems to come from nowhere. It works in cove ceilings, along staircases, under cabinets, and inside floating shelves. This guide covers the channel systems, how to size the power supply, and the installation details that separate a clean professional result from a flickering, uneven mess.
What Makes a Strip “Recessed”
A standard LED strip is a flexible ribbon of tiny diodes with adhesive backing that you can stick almost anywhere. A recessed strip is that same ribbon mounted inside an aluminum extrusion, called a channel or profile, which is then set flush into a surface. The channel does three jobs at once: it hides the raw strip, it acts as a heat sink to extend LED life, and it holds a frosted diffuser lens that blends the individual diodes into one smooth line.
That diffuser is the key visual upgrade. Without it, you see a row of bright dots, sometimes called the “hot spot” effect. With a good frosted lens, the light softens into an even glow that looks built-in and intentional, which is exactly the point of recessing it.
Choosing the Right Channel
Channels come in shapes tailored to where the strip will live. Picking the correct profile for your surface makes the installation clean and the light aim correctly.
- Recessed/flush-mount channel — has side flanges that sit inside a routed groove, finishing level with drywall or wood
- Surface-mount channel — sits on top of a surface, simplest to install where recessing is not possible
- Corner channel — 45-degree profile for coves and cabinet undersides, aiming light outward
- Drywall/plaster-in channel — designed to be mudded directly into the ceiling for a trimless, seamless line
For a truly hidden look in a ceiling, the plaster-in channel is worth the extra effort because it disappears entirely into the drywall, leaving only the line of light. For cabinets and shelving, a shallow recessed profile routed into the wood gives the same tidy result with far less fuss.
Understanding Strip Specs
Not all LED strips are equal, and a handful of specifications determine how good your light looks. Read these numbers before buying, because a cheap strip undermines even the nicest channel.
- Color temperature — 2700K to 3000K for warm cozy rooms, 3500K to 4000K for kitchens and workspaces
- CRI (color rendering index) — choose 90 or above so colors and skin tones look natural
- LED density — more diodes per meter means a smoother line; look for high-density strips to avoid dotting
- Voltage — 12V for short runs, 24V for longer runs with less brightness drop-off
Voltage drop is a common rookie problem. On a long 12V run, the far end dims noticeably as power fades along the strip. A 24V strip carries current farther with far less fade, making it the better choice for anything beyond about 15 feet.
Sizing the Power Supply
Every LED strip needs a transformer, called a driver or power supply, to convert household 120V AC down to the strip’s low-voltage DC. Undersizing the driver is a frequent cause of failure and flicker, so calculate the load properly.
Find the strip’s wattage per foot on the spec sheet, multiply by your total length, then add at least 20 percent headroom so the driver never runs at full capacity. A strip drawing 4 watts per foot over 20 feet needs 80 watts, so a 100-watt driver is the right pick. Running a driver at its absolute limit shortens its life and can cause the strip to buzz or dim, whereas a little overhead keeps everything cool and steady.
Step-by-Step Installation
Installing a recessed strip is a satisfying weekend project. Plan the run, cut the channel to length, and dry-fit everything before you commit adhesive or power.
- Route or cut the groove for a recessed channel, sized to the profile’s width and depth
- Cut the aluminum channel to length with a hacksaw or miter saw, deburring the ends
- Cut the LED strip only at the marked copper pads, never mid-segment
- Peel the backing and press the strip firmly into the channel, keeping it straight
- Connect the strip to the driver with solder or a clip connector, then snap in the diffuser lens
- Test before final mounting, then secure the channel and tuck the driver in an accessible spot
Always leave the driver reachable for future service; burying it inside a sealed wall cavity guarantees a headache if it ever fails. A junction box or an accessible cabinet interior works well.
Dimming and Smart Control
Half the appeal of hidden lighting is setting the mood, so plan your control method up front. LED strips dim beautifully, but only when the driver and dimmer are compatible. A standard wall dimmer works with a mains-dimmable driver, while low-voltage PWM dimmers or smart controllers handle color-changing and app-based strips.
If you want warm-dimming that shifts toward candlelight as you lower the brightness, look for strips and drivers specifically rated for it. For smart-home integration, choose a controller compatible with your ecosystem so the recessed line can join scenes with your other lights.
Common Mistakes to Avoid
A few errors trip up most first-time installers. Skipping the aluminum channel altogether lets the strip overheat and shortens its lifespan dramatically, since the extrusion is what pulls heat away from the diodes. Buying a low-CRI strip saves a few dollars and then makes your whole room look flat and gray.
Mismatched color temperature between the strip and your other fixtures is another giveaway of a rushed job; keep your Kelvin numbers consistent throughout a room. And never exceed the manufacturer’s maximum run length off a single feed, or you will chase voltage-drop dimming forever.
Best Rooms and Applications
Knowing where a recessed strip earns its keep helps you plan the biggest visual payoff. In kitchens, a strip recessed under the upper cabinets bathes the countertop in shadow-free task light, while a strip hidden in the toe-kick below the base cabinets adds a floating nighttime glow. Living rooms benefit from cove lighting, where a strip tucked into a ceiling ledge washes the ceiling with soft indirect light that makes the whole room feel larger.
- Staircases — strips recessed into the wall or under each tread nose for safety and drama
- Bathrooms — behind a floating vanity or mirror for a modern, hotel-like effect
- Bedrooms — above a headboard niche or around a tray ceiling for ambient warmth
- Shelving and display niches — a thin strip highlighting objects without visible fixtures
The common thread is indirect, hidden placement. Recessed strips are at their best when the source is concealed and only the glow is visible, which is precisely what the aluminum channel and diffuser make possible.
Waterproofing and Special Environments
Not every location is a dry living room, and strips used near water need the right rating. LED strips carry an IP rating that describes their resistance to dust and moisture. A standard IP20 strip is fine for a dry ceiling or cabinet, but a bathroom vanity, a covered outdoor soffit, or a kitchen splash zone calls for an IP65 or higher rating with a sealed silicone coating.
Using an unrated strip in a damp spot invites corrosion of the copper contacts and eventual failure. If you are lighting a shower niche or an exterior cove, verify both the strip and its connectors are rated for the exposure, and keep the low-voltage driver in a dry, ventilated location away from moisture. Matching the IP rating to the environment is a small detail that decides whether the installation lasts one season or ten years.
Is It Worth the Effort?
For the polished, architectural look it delivers, a recessed LED lighting strip is one of the highest-impact upgrades a homeowner can tackle. A quality channel, a high-CRI 24V strip, and a properly sized driver for a typical run cost $80 to $200 in materials, and the payoff is lighting that looks custom and expensive. Take your time with the channel routing and driver sizing, choose warm high-CRI diodes, and you will end up with a clean line of hidden light that elevates any room it touches.