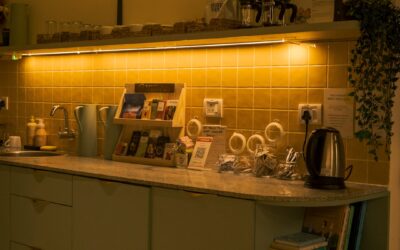
Plug-in light bars are easy, but the cords snaking down your backsplash to an outlet give away that it was a shortcut. Choosing LED under cabinet lighting direct wire fixtures means the wiring hides inside the wall and cabinet, the lights connect to a switch or dimmer, and the result looks like it was built with the kitchen. Direct-wire, or hardwired, systems cost a bit more effort up front but deliver a cleaner, more permanent, and often brighter result. This guide covers how the systems work, what you need, and the step-by-step process to wire them safely.
Part of our Kitchen Remodeling guide — explore the full guide →
- Direct Wire Versus Plug-In: What Changes
- Understanding Line Voltage and Low Voltage Systems
- Tools and Materials You’ll Need
- Planning the Circuit and Power Source
- Step-by-Step: Wiring the Fixtures
- Choosing Color Temperature and Brightness
- Dimming, Linking, and Troubleshooting
- Safety, Code, and When to Call a Pro
- Hiding Wires for a Clean Finished Look
- Layering Under-Cabinet Light With Your Kitchen Design
- Longevity, Warranties, and Replacement Planning
Direct Wire Versus Plug-In: What Changes
The core difference is where the power comes from. Plug-in fixtures run to a wall outlet through a visible cord and often a bulky transformer. LED under cabinet lighting direct wire fixtures instead connect to your home’s 120-volt wiring through a junction box, with the low-voltage conversion handled either inside each fixture or by a hidden remote driver. That means no cords, no wasted outlet, and control from a wall switch or dimmer just like your ceiling lights. The trade-off is that you are working with household wiring, so the install involves a junction box and, ideally, a switched circuit.
Understanding Line Voltage and Low Voltage Systems
Not all direct-wire systems are identical. Some fixtures are line-voltage, meaning each light bar contains its own driver and connects straight to 120 volts. Others are low-voltage, powered by a single remote transformer that steps household current down to 12 or 24 volts, then feeds multiple fixtures with small gauge wire. Low-voltage systems shine when you want to link many fixtures across a long run of cabinets, since one driver powers them all and the interconnect wiring is thin and easy to route. Line-voltage puck and bar lights are simpler for a short run. Decide which architecture fits your layout before buying.
Tools and Materials You’ll Need
Gather everything before cutting power. A well-stocked cart keeps the job to a single afternoon:
- Direct-wire LED bars or a linkable low-voltage kit with driver
- Old-work junction box and a switch if adding one
- Non-contact voltage tester and a multimeter
- Wire strippers, lineman’s pliers, and wire nuts or lever connectors
- 14/2 or 12/2 NM cable to match your circuit, plus staples
- Drill, spade bits, fish tape, and a drywall saw
- Cable clamps and low-voltage interconnect leads supplied with the kit
Match your cable gauge to the circuit breaker: 14-gauge for a 15-amp circuit, 12-gauge for a 20-amp circuit. LED loads are tiny, so wire size is about code compliance, not capacity.
Planning the Circuit and Power Source
The cleanest installs tap power from an existing switched circuit or add a new switch leg. A common approach pulls power from a receptacle circuit above the counter and routes it up into the cabinet, then to a wall switch. If you want dimming — and with LEDs you almost always do — plan for a compatible dimmer from the start. Map where the driver or junction box will live, usually inside an upper cabinet or in the toe-kick, keeping it accessible for future service. Sketch the run so you know how many feet of fixture and interconnect cable to buy, and confirm the total wattage stays well within the driver’s rating.
Step-by-Step: Wiring the Fixtures
With the circuit planned, the physical work follows a predictable order. Kill the breaker first, then verify the wires are dead with your non-contact tester before touching anything.
- Mount the junction box inside the cabinet or in the wall where power enters.
- Run NM cable from the switch to the junction box, securing it with staples every few feet and within 8 inches of the box.
- Connect the incoming hot, neutral, and ground inside the junction box to the fixture leads or the low-voltage driver, matching black to black, white to white, and ground to ground.
- For low-voltage kits, run the thin interconnect leads from the driver to each light bar, daisy-chaining fixtures with the supplied jumpers.
- Tuck excess wire neatly and secure fixtures to the underside of the cabinets with the included screws or clips, positioned toward the front edge for even counter coverage.
Positioning the bars about one to two inches back from the front edge of the cabinet throws light forward onto the counter rather than back at the wall, which reduces glare in your eyes when seated.
Choosing Color Temperature and Brightness
The look of the finished kitchen hinges on two specs: color temperature and lumen output. Color temperature, measured in Kelvin, sets the mood. A 2700K to 3000K warm white flatters wood tones and reads cozy, while 3500K to 4000K neutral white gives a crisp, task-friendly light that most cooks prefer over a counter. Many quality bars now offer selectable color temperature so you can dial it in. For brightness, aim for roughly 200 to 300 lumens per linear foot of counter for solid task lighting. Also look for a high color rendering index, ideally 90 CRI or better, so your food and finishes show true colors.
Dimming, Linking, and Troubleshooting
Getting dimming right is where many installs stumble. LEDs need a dimmer rated for LED loads, and even then some fixtures flicker or drop out at low levels if the dimmer and driver are mismatched. Buy a dimmer the fixture maker lists as compatible whenever possible. When linking multiple bars, respect the maximum run length and total wattage the driver supports — overloading it causes the far fixtures to dim or the driver to shut down. If a linked run flickers, check every interconnect for a seated connection, since a single loose jumper interrupts the chain. Uneven brightness across a long low-voltage run usually points to too much load on one driver.
Safety, Code, and When to Call a Pro
Working with 120-volt wiring carries real risk, so respect it. Always confirm the circuit is dead with a tester, make every splice inside an approved junction box, and never bury a connection behind drywall where it cannot be accessed. Many jurisdictions require a permit for new wiring, and adding a circuit or switch may need inspection. If your kitchen lacks a convenient power source, or if opening walls and fishing cable feels beyond your comfort, an electrician can complete the job in a couple of hours for $200 to $500. Done correctly, LED under cabinet lighting direct wire fixtures give you a cord-free, switch-controlled, dimmable glow that elevates both the function and the finished look of your kitchen for well over a decade of use.
Hiding Wires for a Clean Finished Look
The whole point of hardwiring is a cord-free result, so wire management deserves attention. Route the interconnect leads along the back inside edge of the upper cabinets where the light rail meets the wall, using the adhesive clips or channel supplied with the kit to keep the wire tight and invisible from below. Where cable must cross a gap between two cabinets, drill a small hole through the adjoining cabinet sides and pass the wire through rather than letting it dangle in the open. A shallow trim molding or light rail mounted along the front underside of the cabinets not only diffuses glare but also conceals the fixtures and any wiring from anyone standing in the kitchen. Take the extra ten minutes to tuck and secure every run; it is the difference between a professional installation and one that looks like a DIY afterthought.
Layering Under-Cabinet Light With Your Kitchen Design
Under-cabinet lighting works best as one layer in a well-considered plan rather than a standalone fix. It serves as task lighting, illuminating the countertop workspace that overhead cans typically shadow when you stand at the counter. Pair it with your ambient ceiling lights and any accent lighting, ideally on separate switches or dimmers, so you can set the mood independently. Many homeowners run the under-cabinet lights at full brightness for cooking and prep, then dim them to a soft glow as nighttime accent lighting after the kitchen closes. Matching the color temperature of the under-cabinet LEDs to your other kitchen lighting keeps the whole room feeling cohesive rather than patched together from mismatched bulbs. Thinking about the fixtures as part of a layered scheme, not an isolated strip, is what makes the finished kitchen feel designed.
Longevity, Warranties, and Replacement Planning
Quality LED fixtures are rated for tens of thousands of hours, often 30,000 to 50,000, which translates to well over a decade of typical evening use before noticeable dimming. Because they run cool and have no filament to burn out, they rarely fail suddenly the way old halogen pucks did. Still, choose fixtures from a reputable maker that offers a multi-year warranty and, ideally, replaceable components rather than a fully sealed unit — a linkable system where a single bad bar can be swapped is far more serviceable than a monolithic strip. Keep a note of the exact model and color temperature you installed so a future replacement matches the rest of the run. With a well-chosen, properly wired system, the most maintenance you are likely to face over the years is an occasional dusting of the lenses to keep the light output bright and even.