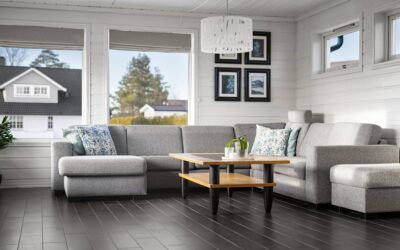
If you searched vinyl fliser, you’re likely a Scandinavian-American homeowner or someone who came across the term shopping European flooring imports. “Fliser” is Norwegian and Danish for tile, so vinyl fliser simply means vinyl tile — known in the US as LVT (luxury vinyl tile) or VCT (vinyl composition tile). The product itself is identical whether you buy it in Oslo or Orlando, but the US market offers more brands, better warranties, and lower per-square-foot pricing. Here’s everything you need to choose, install, and maintain it.
What Vinyl Tile Actually Is
Vinyl tile is a multi-layer flooring product cut into squares (typically 12×12, 12×24, or 18×18 inches) instead of long planks. The construction mirrors LVP:
- Clear urethane wear layer, 6 mil to 30 mil
- Photo decor layer mimicking stone, ceramic, or marble
- PVC or SPC core for rigidity
- Foam, cork, or felt backing on premium products
You’ll find both glue-down and click-lock formats. Glue-down LVT is the gold standard in commercial spaces because it stays flat and handles rolling loads. Click-lock is more popular in DIY residential installs.
Why Choose Vinyl Tile Over Ceramic
Real ceramic and porcelain tile remain the most durable floors made, but vinyl tile wins in several practical ways:
- Warmer underfoot: Vinyl insulates where ceramic conducts cold
- Softer on feet and dropped dishes: Less fatigue, fewer broken plates
- Easier install: No mortar, grout, or wet saw required
- Cheaper labor: $1.50-$3 per sq ft vs $5-$10 for ceramic
- Renter-friendly: Loose-lay options remove cleanly
The honest tradeoffs: vinyl tile won’t last 50 years like quality porcelain, it can be punctured by sharp objects, and high-end real-stone visuals are noticeably more convincing in actual ceramic.
Best Use Cases
Vinyl tile shines in specific rooms:
- Kitchens: Waterproof core handles spills, softer landing for dropped items
- Bathrooms: Click-lock or glue-down works as long as edges are sealed at tubs
- Mudrooms and entries: Easy to clean salt, slush, and mud
- Basements: Tolerates concrete moisture better than wood-based products
- Laundry rooms: Low risk of water damage from washing machine leaks
Avoid it in three-season porches with sustained temperatures above 95°F or below 50°F, where dimensional stability suffers.
What Vinyl Tile Costs in the US
Pricing depends on wear layer and core type:
- Entry-level glue-down VCT: $0.99-$1.79/sq ft material
- Mid-range click LVT: $2.49-$3.99/sq ft
- Premium SPC tile: $4.49-$6.99/sq ft
- Luxury stone-look LVT: $5-$8/sq ft
Add labor of $1-$3 per square foot for installation. Total project cost on a 150 sq ft kitchen typically runs $700-$1,500 installed.
Top Brands and Patterns
Several manufacturers consistently deliver good vinyl tile:
- Karndean Da Vinci: Premium glue-down, photorealistic stone visuals, 20-year warranty
- Armstrong Alterna: Engineered tile with grout-line option, $4-$6/sq ft
- Mannington Adura Max: Floating LVT with attached underlayment, easier DIY
- LifeProof Marble-Look: Home Depot exclusive, $2.99-$3.99/sq ft
- Tarkett Permastone: Commercial-grade, 28 mil wear, ideal for rentals
Look for stone-look tiles with at least 12 unique pattern variations per box to avoid visible repetition.
Installation Methods
Three common approaches, each suited to different situations:
- Full-spread adhesive: Best for commercial and high-traffic. Use S-288 or similar acrylic adhesive. Permanent install
- Pressure-sensitive adhesive: Pre-applied or rolled on, allows future removal. Good for DIY
- Click-lock floating: No glue, easiest install, but requires very flat subfloor
Subfloor flatness matters more for tile than plank because seams are more visible. Aim for 1/8 inch over 6 feet on glue-down installs.
Grout Lines and Realism
Premium vinyl tile offers integrated grout simulation. Two approaches:
- Beveled edges: Each tile has a small chamfer that reads as grout from above
- Real grout option: Tiles like Armstrong Alterna allow actual sanded grout in joints, blurring the line between vinyl and ceramic
For maximum realism, the grout-line option is worth the extra labor. Use a urethane or epoxy grout designed for vinyl — standard cementitious grout cracks at the flexible vinyl interface.
Care and Maintenance
Vinyl tile is among the lowest-maintenance floors in the home:
- Sweep or vacuum weekly
- Damp mop with pH-neutral cleaner — Bona, Method, or diluted dish soap
- Skip wax on modern urethane-finished products
- Felt pads under furniture prevent indentation
- Walk-off mats at entries cut grit damage by 70%
Avoid steam mops, ammonia-based cleaners, and abrasive scrub pads. They strip the wear layer prematurely.
Sizes, Layouts, and Patterns
Vinyl tile comes in more layout options than ceramic. Standard 12×12 squares are the most common and easiest to install. Larger 18×18 inch tiles read more contemporary and have fewer seams. Plank-shaped tiles in 9×36 or 12×24 dimensions create wood-look or stone-plank visuals. For visual interest, mix square sizes in modular patterns — a 16×16 with a 16×8 accent makes a Versailles-style layout that elevates an entry hall without the cost of real stone.
Diagonal installs add 8-12% extra material due to angled cuts but make small bathrooms appear larger. Herringbone with plank-shaped LVT delivers a luxe pattern at a fraction of real wood parquet pricing.
Common Mistakes to Avoid
Three errors account for most failed vinyl tile installs:
- Skipping subfloor prep — uneven surfaces telegraph through within months
- Choosing too thin a wear layer for the room’s traffic level
- Installing in temperature-extreme rooms without acclimation
Acclimate boxes flat in the install room for 48 hours at 65-85°F before laying the first tile.
The Bottom Line
Vinyl fliser — vinyl tile — is one of the smartest flooring choices for kitchens, baths, and basements in any US home. Choose a 20 mil or higher wear layer for whole-house installs, prep the subfloor properly, and budget $3-$5 per square foot installed. The result is a floor that looks like ceramic, feels warmer underfoot, and lasts 15-20 years with almost no maintenance.
Prefer to explore on your own?
See how new flooring looks in your actual room in seconds — free, no signup.
Try the free Floor Studio →