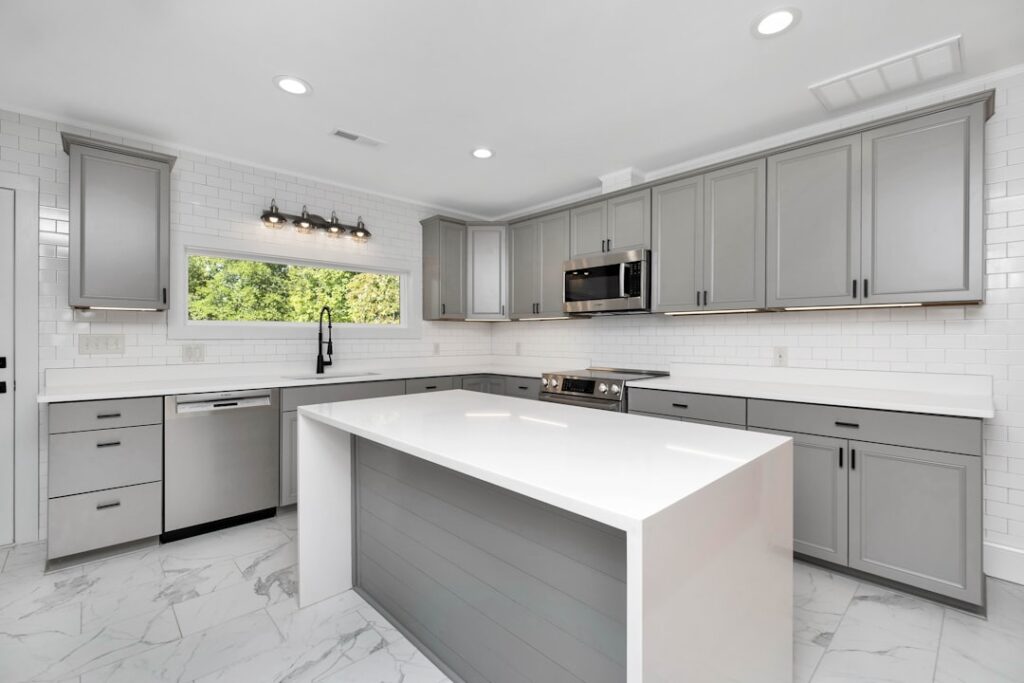
If your kitchen looks dated but a full remodel is out of reach, learning to vinyl wrap kitchen cabinets can transform the room for a fraction of the cost of new doors. Vinyl wrapping uses self-adhesive film to cover existing cabinet surfaces, giving you a fresh color or finish in a weekend rather than weeks. It is one of the most accessible upgrades a confident DIYer can take on, and the results can look surprisingly close to a professional refacing job when the prep work is done right.
Part of our Kitchen Remodeling guide — explore the full guide →
This guide walks you through what vinyl wrap actually is, how to prepare your cabinets, the step-by-step application process, realistic durability expectations, and what you should budget. Along the way, you will learn the small details that separate a smooth, lasting finish from a bubbled, peeling mess.
What Is Vinyl Wrap for Cabinets?
Vinyl wrap is a thin, flexible adhesive film, often the same category of material used for vehicle wraps and furniture refinishing. It comes on rolls in a wide range of finishes, including matte, gloss, woodgrain, and solid colors. The film conforms to flat panels and gentle curves, and many products use an air-release adhesive backing with tiny channels that let trapped air escape as you smooth it down.
The appeal is obvious: you keep your existing cabinet boxes and doors, avoid demolition, and skip the dust and fumes of sanding and spray painting. The trade-off is that vinyl is a surface treatment, so it hides cosmetic wear but does nothing to fix sagging hinges, swollen particleboard, or doors that no longer sit square. Address structural issues first, because no film will mask a door that does not close properly.
Will Vinyl Wrap Work on Your Cabinets?
Vinyl adheres best to smooth, non-porous surfaces. Before committing, assess what your cabinets are made of:
- Laminate and thermofoil: Excellent candidates, since the slick surface gives vinyl a clean base once cleaned and lightly scuffed.
- Painted or sealed wood: Works well if the existing finish is sound and not flaking.
- Raw or bare wood: Needs sealing or priming first, because porous grain can telegraph through the film and weaken adhesion.
- Heavily textured or deeply routed doors: Difficult, as vinyl struggles to wrap into tight grooves without lifting over time.
Run your hand over the doors. Flat-panel and shaker styles with shallow profiles are the most forgiving. Ornate raised-panel doors with intricate detailing are far harder and may be better suited to paint.
Tools and Materials You Will Need
Gather everything before you start so you are not scrambling mid-application. A basic kit includes:
- Quality self-adhesive vinyl film, with about 15 to 20 percent extra to allow for mistakes and pattern matching
- A felt-edged squeegee or applicator to push out air bubbles
- A sharp utility or craft knife with spare blades for crisp edges
- A measuring tape, straightedge, and pencil
- A degreaser or mild trisodium phosphate substitute, plus clean cloths
- Fine-grit sandpaper (around 320 grit) for light scuffing
- A screwdriver or drill to remove doors and hardware
- A heat gun or hair dryer to help the film conform around edges
Work in a clean, well-ventilated space, and follow the manufacturer’s instructions for the specific film you buy, since adhesives and recommended application temperatures vary by product.
Step-by-Step: How to Vinyl Wrap Cabinets
Patience during prep is what makes the finish last. Follow these steps in order:
- Remove doors and hardware. Unscrew hinges, handles, and drawer fronts, and label each piece so reassembly is painless. Wrapping flat on a table is far easier than working on hung doors.
- Clean thoroughly. Kitchens accumulate grease that destroys adhesion. Degrease every surface and let it dry completely.
- Scuff and wipe. Lightly sand glossy surfaces, then wipe away all dust. The film needs a slightly dull, clean surface to grip.
- Measure and cut. Cut each piece of vinyl with at least an inch of overhang on all sides. Trimming excess later is easy; adding material is not.
- Apply slowly. Peel back a few inches of backing, align the top edge, and squeegee from the center outward in firm strokes to push out air as you go.
- Wrap the edges. Warm the film gently with a heat gun so it stretches around corners and tucks behind edges without creasing.
- Trim and reassemble. Cut the overhang with a sharp blade, reinstall hardware, and rehang the doors.
If a bubble appears, lift the film and re-lay it rather than puncturing it, which leaves a permanent mark. Take your time on the first door to learn the material’s behavior before moving to the rest.
How Durable Is a Vinyl Wrap?
Well-applied vinyl on properly prepped cabinets can last several years, often in the range of five to ten depending on the film quality and how hard the kitchen is used. The most vulnerable spots are edges near sinks and stoves, where heat, steam, and constant handling slowly work the adhesive loose. Lifting corners can sometimes be re-warmed and pressed back down, which buys you more time.
Treat wrapped surfaces gently. Avoid abrasive scrubbers, wipe up spills promptly, and keep the film away from direct heat sources. Used carefully, a vinyl finish holds up to everyday cooking and cleaning, though it will never match the impact resistance of a factory-baked finish.
What Does It Cost?
Cost is the headline reason people choose this route. As a rough estimate, vinyl film for an average kitchen often falls somewhere in the range of a few hundred dollars in materials, far below the cost of new cabinet doors or a full refacing. Larger kitchens, premium films, and patterned woodgrains that require careful matching push the figure higher. Treat any number you see as a ballpark, because pricing varies by film brand, finish, and how many doors and drawers you have. If you hire a professional installer instead of doing it yourself, labor will add meaningfully to the total, so get a written quote before deciding.
When to Hire a Professional
DIY is realistic for flat or shaker doors and a homeowner comfortable with careful, methodical work. Consider hiring a professional if your cabinets have complex profiles, if you want a seamless high-gloss look that shows every flaw, or if you simply want a guaranteed result. A skilled installer brings experience with edge wrapping and pattern alignment that is hard to replicate on your first attempt. Whichever path you choose, sound prep and the right film are what make the project succeed.
Done thoughtfully, choosing to vinyl wrap kitchen cabinets gives you a budget-friendly refresh that buys years before you commit to a full remodel, and it lets you experiment with color and finish without the permanence of paint or new millwork.
Prefer to explore on your own?
See how new flooring looks in your actual room in seconds — free, no signup.
Try the free Floor Studio →