
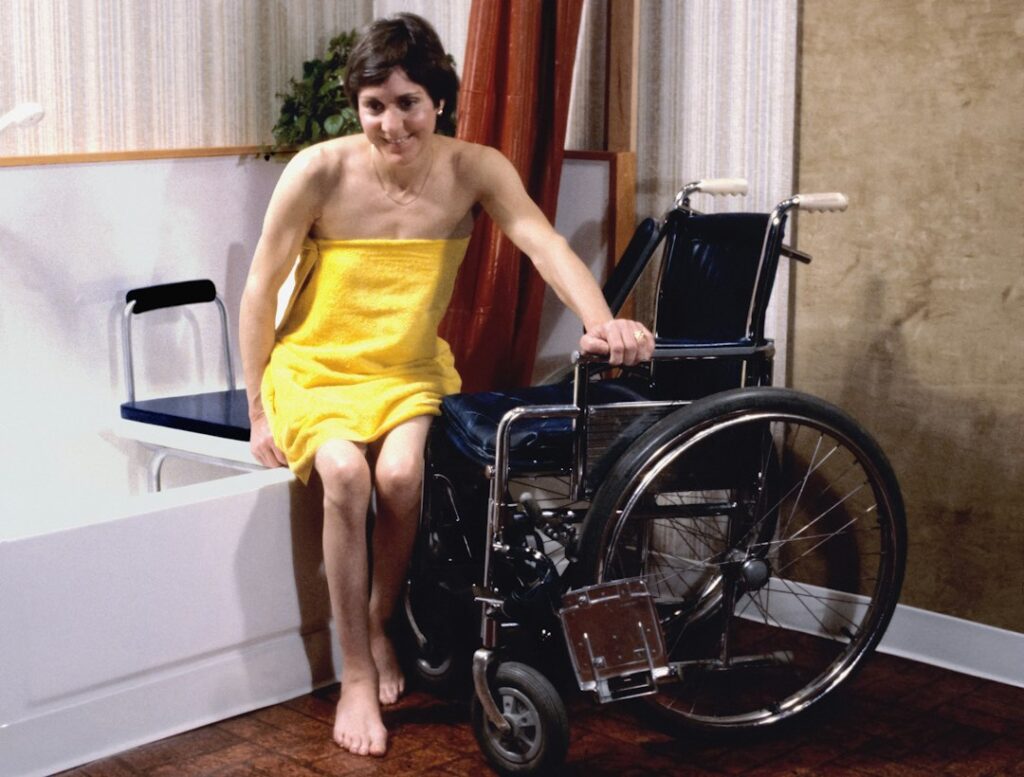
Stepping over a 14- to 16-inch tub wall is one of the most common places for an older adult to fall at home, yet ripping out a bathtub and installing a full walk-in model can cost $5,000 to $15,000 or more. A walk in tub conversion kit offers a middle path: it modifies the tub you already own so you can step or walk through the side instead of climbing over it. Done well, the upgrade takes a day or less, keeps your existing tile and plumbing, and costs a fraction of a full remodel. Here is how the kits work, what they cost, who they suit, and what to check before anyone cuts into your tub.
- What Is a Walk in Tub Conversion Kit?
- Who Benefits Most From a Conversion
- Cost Breakdown: Kit vs Full Walk-In Tub
- Is Your Existing Tub Compatible?
- How the Installation Works
- Add These Safety Upgrades at the Same Time
- Hiring an Installer and Funding Options
- Pros and Cons at a Glance
- Maintenance and Long-Term Care
- Frequently Asked Questions
What Is a Walk in Tub Conversion Kit?
A walk in tub conversion kit is a set of components that turns a standard alcove bathtub into an easier-access bathing space by removing a section of the front apron and finishing the opening. There are two broad designs, and the difference matters a great deal for how you will actually use the tub afterward.
Step-through (cut-out) kits
An installer cuts a U-shaped section out of the tub wall, typically lowering the step-in height to just a few inches above the tub floor. The raw edges are sealed and capped with a molded insert that bonds to the tub. You get a lower threshold, but the tub can no longer hold water for a soak, so it becomes a shower-only space. This is the most affordable option.
Door-insert kits
The opening is cut the same way, but a watertight door with a gasket and latch is fitted into it. Close the door and the tub can be filled for a bath again, usually to a height just below the door frame. Door kits cost more and require careful fitting, but they preserve the option to soak, which many people value for joint pain or relaxation.
Who Benefits Most From a Conversion
These kits are a good match when the person bathing can stand, walk short distances, and step over a low threshold with or without a grab bar. They are also popular for aging-in-place planning, before mobility becomes a serious issue, and in rental or multigenerational households where a full remodel is not practical.
They are a poor match for someone who uses a wheelchair full-time, who cannot bear weight to transfer, or who needs a caregiver to assist from both sides. In those situations, a curbless roll-in shower or a transfer bench setup is usually safer. Before choosing, ask for a home safety evaluation from an occupational therapist (OT). An OT can observe how the person moves, measure a safe step height, and recommend where grab bars, benches, and handheld showers belong. That assessment often changes the product choice, and it is far cheaper than buying the wrong solution.
Cost Breakdown: Kit vs Full Walk-In Tub
| Option | Typical installed cost | Can still take a bath? |
|---|---|---|
| Step-through cut-out kit | About $500 to $1,500 | No, shower only |
| Watertight door-insert kit | About $1,200 to $4,000 | Yes |
| Full walk-in tub replacement | About $5,000 to $15,000+ | Yes, with seated soak |
| Tub-to-shower conversion | About $3,000 to $10,000+ | No |
Prices vary by region, tub material, and whether grab bars, a handheld shower, or a bench are bundled in. Kits sold for DIY installation may list for a few hundred dollars, but the cutting and bonding step is unforgiving, so most homeowners hire a certified installer.
Is Your Existing Tub Compatible?
Not every bathtub can be converted. Before you order anything, check these points or have the installer do it during a site visit:
- Material: Fiberglass, acrylic, porcelain-enameled steel, and cast iron can all be cut, but cast iron requires specialized tools and more time, and some installers will not touch it.
- Apron style: Standard alcove tubs with a straight front apron are the easiest. Clawfoot, drop-in, and corner whirlpool tubs are usually not candidates.
- Condition: Cracked, flexing, or badly refinished tubs should be repaired or replaced rather than cut.
- Wall height: Most kits are sized for tubs with an apron roughly 14 to 16 inches tall. Deeper soaking tubs may need a custom solution.
- Floor support: The tub should sit on a solid mortar or foam bed. A tub that flexes underfoot can crack at the new cut edges.
How the Installation Works
- Measure and mark. The installer centers the opening on the tub front, often 24 to 30 inches wide, and marks the cut height based on the kit and the user’s step ability.
- Protect the bathroom. Floors and fixtures are covered, and dust extraction is set up, since cutting fiberglass and enamel creates fine particles.
- Cut the opening. A diamond or carbide blade removes the section, with care to avoid supply lines and the overflow drain.
- Prep and bond. Edges are ground smooth, cleaned, and the insert or door frame is bonded with a waterproof adhesive and sealant, then cured.
- Fit the door (if any). Hinges, latch, and gasket are adjusted until the door closes smoothly and seals under a test fill.
- Water test. The installer fills the tub or runs the shower to confirm there are no leaks at the seams or gasket.
Most conversions are finished in four to eight hours, with a 12- to 24-hour cure before use. Your tile surround, valve, and drain typically stay in place.
Add These Safety Upgrades at the Same Time
A lower threshold solves only part of the fall-risk problem. Pair the conversion with a few inexpensive upgrades while the installer is already on site:
- Grab bars mounted 33 to 36 inches above the tub floor on the back wall, plus a vertical bar near the entry, anchored into studs or blocking and rated for at least 250 pounds.
- A handheld shower on a slide bar so a seated user can reach it easily.
- A shower seat or transfer bench for anyone who tires standing.
- Slip-resistant tub surface treatment or textured mats.
- Anti-scald protection, such as a pressure-balancing or thermostatic valve, or a water heater set to about 120°F.
- Brighter, glare-free lighting and a nightlight on the path from the bedroom.
Never rely on towel bars or soap dishes as grab points. They are not designed for body weight and can tear out of drywall.
Hiring an Installer and Funding Options
Look for a contractor who has specific experience with tub cut-outs and door inserts, and ideally one who holds the Certified Aging-in-Place Specialist (CAPS) designation from the National Association of Home Builders. CAPS-trained remodelers understand clearances, grab bar placement, and how to plan for changing needs. Ask for references, photos of past conversions, proof of insurance, and a written warranty covering both the insert and any leaks.
On funding, several types of programs may help some households with accessibility modifications, including certain veterans’ home adaptation grants, state or county aging services, Medicaid waiver programs in some states, nonprofit home repair groups, and local rehabilitation loans. Rules, eligibility, and amounts vary widely by location and individual circumstances, and none is guaranteed. Contact your local Area Agency on Aging or a veterans’ benefits office to learn what might apply, and keep your OT’s written recommendation, since some programs ask for documentation of need. Standard Medicare generally does not cover bathroom remodeling, so confirm any coverage claims directly with the program before signing a contract.
Pros and Cons at a Glance
- Pros: Low cost compared with full replacement, fast install, keeps existing tile and plumbing, reversible with some kits, immediately reduces step-over height.
- Cons: Cut-out versions end bathing, door seals need periodic inspection, not suitable for full-time wheelchair users, can affect resale appeal for buyers who want a standard tub.
Some door-insert kits are designed so the door can later be replaced with a solid filler panel, restoring the tub’s original look if the home is sold. Ask about this if resale is a concern.
Maintenance and Long-Term Care
Inspect door gaskets every few months for cracks, stiffness, or mildew, and clean them with a mild, non-abrasive bathroom cleaner. Avoid bleach-heavy products on rubber seals. Check that the latch closes firmly and that the sealant along the cut edges remains intact. If you notice water on the floor after a bath, stop using the tub until the seal is checked, since slow leaks can rot the subfloor under the apron and damage ceilings below. Most manufacturers sell replacement gaskets, and swapping one is usually a quick service call.
For many families, a walk in tub conversion kit is the most practical first step toward a safer bathroom. Start with an OT evaluation, confirm your tub is compatible, pick the design that fits how the person actually bathes, and pair it with properly anchored grab bars. That combination delivers real fall-risk reduction without the cost and disruption of a full remodel.
Frequently Asked Questions
Can I still take a bath after a tub conversion?
Only with a watertight door-insert kit. A simple step-through cut-out removes part of the tub wall, so the tub can no longer hold water and works as a shower only.
How long does a walk-in tub conversion take?
Most installations take four to eight hours, followed by a curing period of roughly 12 to 24 hours before the tub is used.
Can the conversion be reversed?
Some door-insert systems allow the door to be swapped for a filler panel that restores the look of a standard tub. A permanent cut-out is harder to reverse, so ask the manufacturer before buying if resale matters.
Does insurance pay for a walk-in tub conversion kit?
Coverage is uncommon and varies by plan and program. Some grants or assistance programs for accessibility modifications may help certain households, but eligibility and amounts are never guaranteed, so verify directly with the program.


