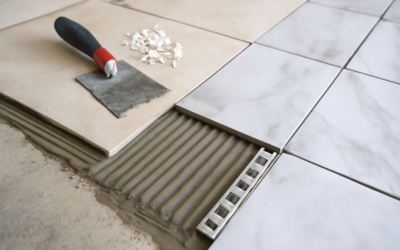
Every tiled wall has an edge where the last row meets bare drywall, an outside corner, or a window return, and that transition is where installations either look custom or unfinished. Wall tile trim covers those exposed edges, protects the fragile glazed rim from chipping, and gives a project a deliberate, professional border. Choosing the right wall tile trim before the thin-set goes on saves you from grinding cuts or ugly caulk lines later.
Part of our Tile & Grout guide — explore the full guide →
Homeowners often treat trim as an afterthought, then discover the tile edges look raw once the field is set. Planning the profile, material, and size during layout is the difference between a five-minute upgrade and a weekend of frustration. Below is a practical walkthrough of the options, dimensions, prices, and installation methods that actually matter.
Why Edge Trim Matters
Raw tile edges are more than a cosmetic problem. The unglazed cut edge of porcelain or ceramic is porous, sharp, and prone to spalling if bumped by a vacuum, a shoulder, or a piece of furniture. In a shower or backsplash, an unsealed edge also lets moisture wick behind the tile over time, which can loosen the bond and stain the substrate.
Trim solves three problems at once: it hides the raw edge, it creates a smooth surface that resists chipping, and it defines a crisp visual boundary. On outside corners, where two tiled planes meet at 90 degrees, trim is nearly essential unless you can source mitered or bullnose pieces. A well-chosen profile reads as intentional design rather than a fix.
Common Types of Wall Tile Trim
Trim falls into a handful of categories, each with a distinct look and price point. Knowing the differences lets you match the trim to both the tile and the room’s style.
- Bullnose tile: A field tile with one rounded, glazed edge. It matches your tile exactly and gives a soft, traditional finish. Best when the manufacturer offers a bullnose in your line.
- Metal profiles (Schluter-style): Anodized aluminum, stainless steel, or brass strips that cap the edge in a square, rounded, or bevel shape. Modern, durable, and available in dozens of finishes.
- PVC and plastic trim: The budget option, sold in white, ivory, and a few colors. Good for utility spaces and rental turnovers where cost drives the decision.
- Pencil and quarter-round liners: Narrow decorative strips, often in ceramic or glass, that add a slim accent line while finishing the edge.
- Chair rail and cove base: Larger molded profiles used as horizontal borders or where a tiled wainscot meets a painted wall.
Bullnose vs. Metal vs. PVC
Bullnose delivers the most seamless look because it is literally the same tile, so color and sheen match perfectly. The catch is availability: many trendy tiles, especially rectified porcelain and handmade zellige-style pieces, are sold without a matching bullnose, forcing you toward metal or a mitered edge.
Metal profiles have become the default for contemporary work. A brushed-nickel or matte-black Schluter strip runs roughly $8 to $18 per 8-foot length depending on finish and metal, and it holds up to daily abuse better than any glaze. Stainless and solid brass cost more but never corrode. PVC trim, at $3 to $7 per length, is serviceable but can yellow, dent, and look plasticky up close, so reserve it for low-visibility areas like a garage sink or laundry backsplash.
Choosing the Right Size and Profile
Metal and PVC trims are sold by the thickness of tile they accommodate, measured in millimeters or fractions of an inch. Common sizes run from 3/8 inch (about 10 mm) up to 5/8 inch (about 16 mm). The trim’s vertical leg should equal your tile thickness plus the thin-set bed, typically an extra 1/16 to 1/8 inch. If the leg is too short the tile stands proud; too tall and the metal lip sits above the surface and catches dirt.
Profile shape is a style choice. Square-edge (sometimes called “quadrant” or “L”) profiles read modern and architectural. Rounded profiles soften the corner and hide minor alignment errors. Reducer and transition profiles bridge two different tile thicknesses or a tile-to-drywall step. Measure your tile with calipers or a tape before ordering, and buy 10 percent extra to cover miscuts.
How to Install Wall Tile Trim
Trim is embedded in the same thin-set that holds the tile, so timing matters. Work the trim into the layout before the adjacent field tiles set.
- Cut the trim to length with a hacksaw and metal blade or a miter box; use tin snips for tight notches.
- For inside and outside corners, cut a 45-degree miter so the two lengths meet cleanly, or use a matching corner piece.
- Spread thin-set on the wall, press the trim’s perforated flange into it, and comb it flat.
- Set the field tile against the trim’s face, leaving your normal grout-joint gap between the tile and the trim edge.
- Check that the trim is plumb and flush, then wipe excess thin-set before it cures.
Grout the joint between tile and trim just as you would any other seam. Where trim meets a dissimilar surface, a countertop, or a tub, use color-matched silicone caulk instead of grout so the joint can flex.
Cost and Where to Buy
Budget for both material and a little waste. A typical backsplash needs 12 to 20 linear feet of trim; a full shower surround can run 40 to 60 feet once you count both vertical edges and the top border. At metal-profile prices, most kitchen backsplashes land between $30 and $80 in trim, while a shower may reach $100 to $200. Bullnose priced per piece can be comparable or higher for premium lines.
Home centers stock the common metal and PVC profiles and basic bullnose, while tile showrooms and online specialty retailers carry the widest range of finishes and matching corner pieces. Order corners and end caps at the same time as the straight lengths, since finishes vary between production runs and a late reorder may not match.
Common Mistakes to Avoid
Forgetting to buy trim until the field is set is the classic error; retrofitting an edge profile means grinding grout and prying tile. Decide on trim during layout. Another frequent slip is mismatched thickness, where a 3/8-inch profile is used on 1/2-inch tile, leaving a shadow line that collects grime.
Cutting metal miters freehand rarely produces a tight corner, so use a miter box or a jig. Finally, resist the urge to skip trim on outside corners by simply grouting the raw edges together, as that exposed line chips within months. A few dollars of trim buys years of durability and a finish that looks like a pro installed it.
Final Thoughts
The right edge detail is the last five percent of a tile job that people actually notice. Match the profile to your tile thickness, pick a material that suits both the room’s exposure and your budget, and set the trim as part of the tile layout rather than an add-on. Whether you choose classic bullnose, a sleek metal profile, or economical PVC, finished edges protect your investment and elevate the whole installation from amateur to polished.
Prefer to explore on your own?
See how new flooring looks in your actual room in seconds — free, no signup.
Try the free Floor Studio →