Bullnose tile trim is the detail that separates a polished tile job from an amateur one. It is the rounded-edge tile that caps the exposed perimeter of a tiled surface, hiding the raw, unglazed edge of the field tile and giving the installation a clean, finished border. Whether you are tiling a backsplash, a shower wall, or a countertop, knowing your edge-finishing options, with bullnose being the classic one, helps you avoid the unfinished look of exposed tile edges.
What Bullnose Tile Trim Is
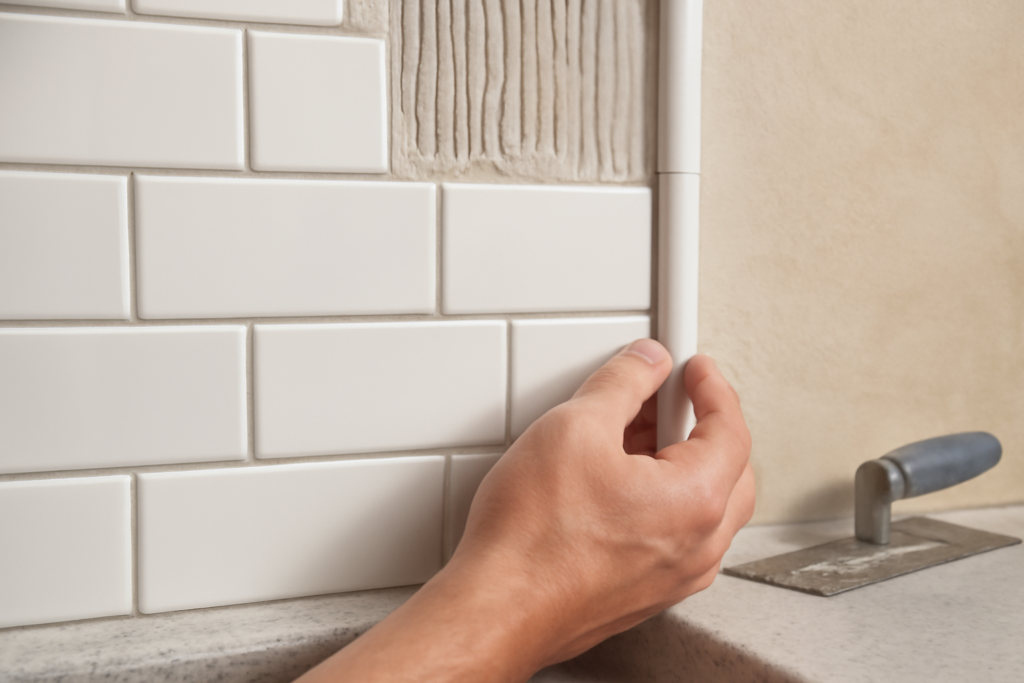
A bullnose tile is a piece with one rounded, glazed edge designed to terminate a run of tile cleanly. Field tiles are typically glazed only on the face, leaving a rough clay edge on the sides. Where tile meets a wall, a countertop, or simply ends, that raw edge would otherwise show. Bullnose hides it with a smooth, finished curve. Tiles come as single bullnose (one rounded edge) and double bullnose (two rounded edges, for corners and exposed-on-two-sides applications).
Where You Need an Edge Treatment
Any time tile stops and the side edge would be visible, you need a finishing detail. Common spots include:
- The top edge of a backsplash where it meets the wall.
- The outside corners of a tiled shower niche or wall.
- The front edge of a tiled countertop or windowsill.
- The perimeter of a tiled tub surround.
- Wainscoting and partial-height wall tile.
Skipping the edge treatment leaves a sharp, unglazed line that reads as unfinished and can chip over time.
Alternatives to Bullnose
Not every tile is available with a matching bullnose, especially modern porcelain and large-format tiles. In those cases, several alternatives finish the edge just as cleanly:
- Metal edge trim (Schluter-style profiles): Aluminum, stainless, or brass profiles installed under the tile edge for a crisp, modern line.
- PVC and composite trim: Budget-friendly edging in many colors.
- Rail or pencil liner tiles: Decorative narrow trim pieces that cap and accent an edge.
- Mitered edges: Cutting two tiles at 45 degrees so the glazed faces meet at a corner. It looks seamless but takes skill.
Metal profiles have become the most popular modern choice because they suit large-format tiles that have no bullnose option and give a clean, contemporary edge.
How to Install Bullnose Trim
Bullnose installs much like field tile, with a few extra considerations. Plan for it from the start, because the bullnose typically goes on last around the perimeter and its placement affects your layout. Set the field tile first, leaving the perimeter row for the bullnose so the rounded edge lines up flush with the surface beneath. Butter the back with thinset, set it to align with the field tile face, and maintain consistent grout-joint spacing. Grout the joints as usual, and caulk rather than grout any change-of-plane corners, such as where a backsplash meets the counter.
For metal profiles instead of bullnose, the trim is bedded in thinset behind the final row of tile, with the tile edge tucked into the profile, so it must be installed together with that last row.
Matching and Ordering
The biggest frustration with bullnose is availability. Many tile lines offer matching bullnose, but some, particularly trendy porcelain patterns, do not. Confirm matching trim is available before you fall in love with a field tile, or plan on a metal profile instead. Order trim along with your field tile and from the same batch when possible, because dye lots vary and a mismatched bullnose stands out.
Cost Expectations
Bullnose tiles usually cost more per piece than field tile because they are specialty items, often running $2 to $8 per linear piece depending on the tile line. Metal edge profiles typically cost roughly $10 to $30 per length of trim depending on the material, with stainless and solid brass at the higher end. Either way, edge trim is a small fraction of a tile budget and a worthwhile one, because it is the detail people notice when it is missing.
If a matching bullnose is unavailable and you do not want a metal profile, a fabricator can sometimes create a custom bullnose edge on a regular tile, grinding and polishing the cut edge to a rounded finish. This costs more and is reserved for situations where you want the bullnose look on a tile line that does not offer it. For most homeowners, choosing a tile line with factory bullnose or opting for a metal profile is the simpler and cheaper route.
Bullnose vs Metal Profiles: Which to Choose
When a matching bullnose exists, the decision comes down to style. Bullnose gives a soft, traditional rounded edge that suits classic and transitional kitchens and baths, and because it is the same tile as the field, the color matches perfectly. Metal profiles give a crisp, straight, contemporary line and come in finishes like brushed nickel, matte black, brass, and chrome that can either blend in or become a deliberate design accent. For modern and large-format tile installations, metal is often the only practical option and happens to look right at home.
There is also a durability angle. A metal profile protects the tile edge from chipping at outside corners better than bullnose in high-traffic areas, which is one reason you see it so often on shower curbs and exposed corners.
Avoiding Common Edge Mistakes
The biggest mistake is not planning the edge until the field tile is already set, which can leave you scrambling for a trim that does not exist or that arrives in a mismatched dye lot. Decide your edge treatment during the design phase, before you order tile. Another frequent error is grouting a change-of-plane corner that should be caulked, such as where a backsplash meets the countertop; rigid grout cracks there, so a color-matched flexible caulk is correct. Finally, measure your linear footage of edges carefully and add extra, because trim pieces are easy to under-order and annoying to source later.
Final Thoughts
Bullnose tile trim is the traditional way to give a tile job a finished edge, and it still looks great when a matching piece is available. When it is not, a metal profile delivers an equally clean, more modern, and often more durable result. Plan your edges before you start, confirm trim availability and dye lots, caulk the corners that need caulking, and your tile work will look professionally finished right down to the last inch.
Prefer to explore on your own?
See how new flooring looks in your actual room in seconds — free, no signup.
Try the free Floor Studio →