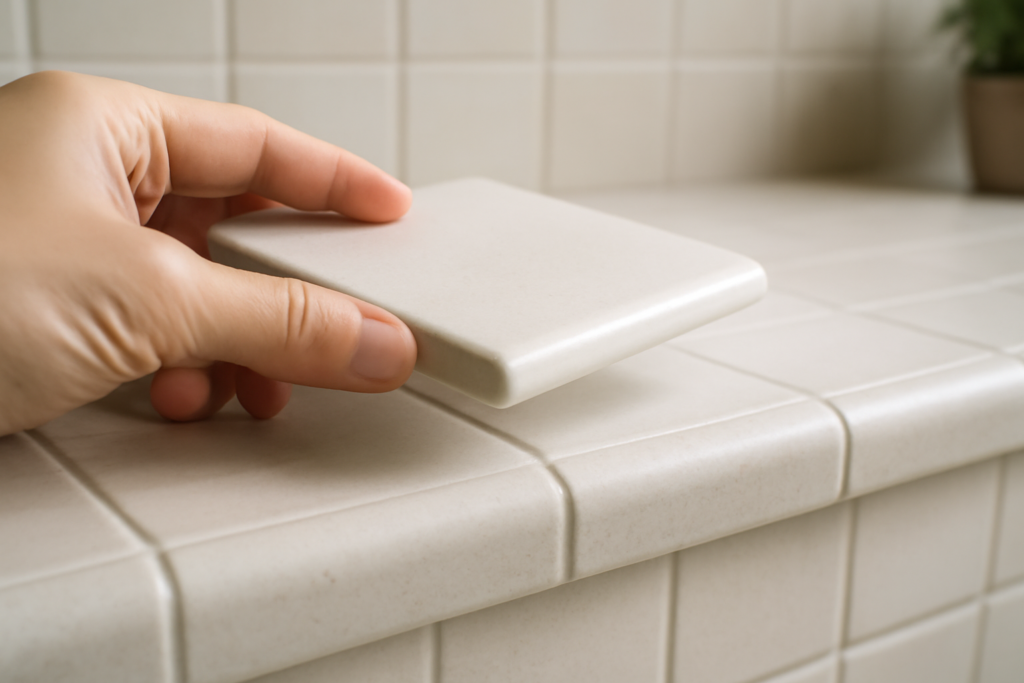
If you have ever run your fingers along a finished tile wall and felt a smooth, rounded lip instead of a sharp factory edge, you have met a bullnose tile edge. A bullnose is a trim piece with one rounded, glazed edge designed to cap the exposed border of a tiled surface. It hides the raw, unglazed body of the tile, protects the edge from chipping, and gives a project that finished look most homeowners are after.
Choosing the right edge treatment is one of those small decisions that quietly separates a clean installation from an amateur one. Get it wrong and you are staring at exposed tile bodies, mismatched grout lines, or a wobbly metal strip. Get it right and the eye glides past the transition without a second thought.
What a Bullnose Tile Edge Actually Is
A bullnose tile is simply a tile with at least one edge that has been rounded over and glazed to match the field tile. Manufacturers fire that curved profile right into the piece, so the finish wraps the corner instead of stopping abruptly. The result is a soft, durable lip that feels good to the touch and resists the nicks that plague square-cut edges.
You will see two common versions. A single bullnose has one finished long edge, used along the top of a backsplash or the perimeter of a wall. A double bullnose carries the rounded glaze on two adjacent edges, which is handy at outside corners like the end of a half wall or the front lip of a shower curb. Quarter-round and pencil trim are close cousins, but a true bullnose keeps the same body and glaze as your field tile.
Where Bullnose Edges Work Best
Bullnose trim shines anywhere tile meets open space rather than another wall. Common spots include the top edge of a 4-inch backsplash, the borders of a tub surround, the outer edge of a shower niche, windowsills wrapped in tile, and the cap of a wainscot line in a bathroom.
It is most natural with ceramic and many porcelain lines because manufacturers offer matching bullnose pieces in the same color and glaze. Natural stone and large-format porcelain often do not come with a matching bullnose, which pushes you toward the alternatives below. Before you buy your field tile, check whether a coordinating bullnose exists in that exact run and dye lot.
Bullnose vs. Other Edge Treatments
The bullnose is not your only option, and the right call depends on tile type, budget, and the look you want.
- Bullnose trim: Best match in color and glaze, soft rounded feel, no extra materials. Limited to tile lines that offer it.
- Metal edge profile (Schluter-style): A brushed nickel, brass, or anodized strip that caps the edge. Works with any tile, including stone and thick porcelain, and gives a crisp modern line. Costs roughly $8 to $20 per piece.
- Mitered edge: Two tiles cut at 45 degrees and joined to form a seamless wrapped corner. The most high-end look, but it demands a wet saw and patience, and the thin glaze edge can chip.
- Rail or pencil trim: A slim decorative bar that frames the field. More ornamental than a clean bullnose.
For a classic subway-tile bathroom, matching bullnose usually wins. For marble or a 24-inch porcelain plank, a metal profile or miter is the practical choice.
How to Plan and Order Bullnose
Measure the linear footage of every exposed edge, then divide by the length of the bullnose piece to get a count. Most pieces run 6 inches, 8 inches, or 12 inches long. Add 10 to 15 percent for cuts and breakage. Order the bullnose at the same time as your field tile so it comes from the same production batch; glaze colors can drift between lots, and a slightly off cap on a white tile reads as a mistake.
If your chosen tile has no matching bullnose, decide on your alternative before installation day. Metal profiles get set into the thinset behind the last row of tile, so you cannot easily add one after the fact.
Installing a Bullnose Tile Edge
Setting bullnose is similar to setting any tile, with extra attention to the finished edge sitting flush and level. Work in good light and keep your tools clean.
- Dry-lay your field tile first and plan the layout so the bullnose lands in a logical spot, ideally avoiding tiny sliver cuts at the edge.
- Spread thinset with the correct notched trowel for your tile size, back-buttering the bullnose if coverage looks thin.
- Set the bullnose so its rounded edge aligns with the surface below or wraps the corner cleanly. The glazed lip should sit slightly proud of or flush with adjacent finishes, never recessed.
- Use tile spacers to hold the same grout joint width you used across the field.
- Let the thinset cure per the manufacturer’s timeline, usually 24 hours, before grouting.
- Grout the joints, wipe with a damp sponge, and buff off haze once it dries.
If you are cutting bullnose to length, use a wet saw and cut from the unglazed end so the factory-finished edge stays intact. Wear safety glasses, keep fingers clear of the blade, and follow the saw manufacturer’s instructions. Tile and thinset can irritate skin and lungs, so work in a ventilated space and consider a dust mask when cutting dry.
Costs, Care, and Common Mistakes
Matching bullnose pieces typically run $2 to $8 each for ceramic and more for premium or imported lines, so a small backsplash edge might add $30 to $80 in trim. That is cheap insurance against a raw, chip-prone border.
Care is easy. Clean a bullnose edge the same way you clean the field tile, with a pH-neutral cleaner and a soft cloth. Avoid harsh abrasives that can dull the glaze over time. Inspect the grout line at the edge once a year and reseal cement grout as needed to keep moisture out.
The most common mistakes are ordering bullnose from a different lot, forgetting to plan the edge before tiling, and leaving the glazed lip standing too proud where it can catch and chip. A little planning up front avoids all three.
Is a Bullnose Right for Your Project?
If your tile line offers a matching piece and you want a soft, low-maintenance, classic finish, a bullnose tile edge is hard to beat. If you are working with stone, oversized porcelain, or chasing a sharp contemporary line, a metal profile or mitered corner may serve you better. Either way, decide on your edge treatment before the first tile goes up, and your finished surface will look intentional from every angle.
Prefer to explore on your own?
See how new flooring looks in your actual room in seconds — free, no signup.
Try the free Floor Studio →