Two LED strips can both say “warm white” on the box and look completely different once they are glowing under your cabinets. A warm white LED strip is usually rated somewhere between 2700K and 3000K, but the color temperature is only half the story. Color rendering index (CRI), LED density, and the diffuser you mount it in decide whether your countertop looks inviting or oddly yellow and flat.
For most homes, the answer is simple: pick 2700K for bedrooms, living rooms, and toe-kick accent lighting, 3000K for kitchens that need a slightly crisper look, and CRI 90 or higher everywhere food, wood, or skin tones will be seen. Reserve 4000K for task areas like garages and craft tables, and 5000K to 6500K for displays or workshops where you want a bright daylight look.
If you cannot decide, tunable-white strips let you slide between warm and cool with a controller. They cost more and need a compatible controller, but they solve the “cozy at night, bright during the day” problem in one run.
Warm White LED Strip Color Temperatures Explained
Color temperature is measured in kelvin (K). Lower numbers look more amber, like incandescent or candlelight; higher numbers look whiter and bluer. Here is how the common strip ratings compare in real rooms:
- 2200K to 2400K: Very warm, almost amber. Good for bars, bedrooms, and night lighting.
- 2700K: Classic warm white, closest to a traditional incandescent bulb. The most popular choice for living spaces.
- 3000K: Soft white. Still warm, but cleaner on white cabinets, quartz, and marble.
- 3500K to 4000K: Neutral white. An LED strip at 4000K suits laundry rooms, closets, garages, and home offices.
- 5000K to 6500K: Daylight to cool daylight. A daylight LED strip or 6500K LED strip works for display cases, aquariums, workbenches, and photo areas, but can feel harsh in living spaces.
Consistency matters as much as the number. Keep every strip, puck, and bulb in the same room within about 300K of each other. Mixing a 2700K cabinet strip with 4000K recessed lights makes both look wrong.
Reading a Strip Spec Sheet
Packaging tends to highlight brightness and color names, but the spec sheet tells you what you are actually buying. Check these numbers before you add anything to your cart:
- Lumens per foot: Around 200 to 400 lumens per foot suits under-cabinet task lighting; accent and cove lighting can be lower.
- Watts per foot: Needed to size the driver correctly.
- Voltage: 12V strips are common for short runs; 24V handles longer runs with less voltage drop.
- LED density: Measured in LEDs per meter. Higher density means a smoother line of light.
- Binning or MacAdam step: A lower step number means tighter color consistency from reel to reel.
A 2700K warm white LED strip from a reputable maker with tight binning will look the same in every cabinet, while cheaper reels can drift noticeably warmer or pinker from one section to the next.
Why CRI 90+ Matters for Strips
CRI rates how accurately a light source shows colors compared with a reference source, on a scale up to 100. Inexpensive strips often land around CRI 80, which makes reds and wood tones look muddy. A CRI 90+ strip shows the true color of oak floors, butcher block, paint, and food.
Look beyond the headline number when you can. Some spec sheets list R9, the saturated red value, which is where cheap LEDs fall short. An R9 above 50 is a good sign. Full spectrum LED strip products typically advertise CRI 95 or higher with strong R9 values; they cost more but look noticeably richer, especially at warm color temperatures.
Picking Strips by Room
Kitchens
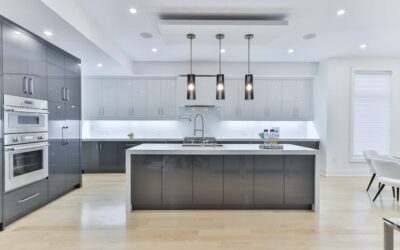
Under-cabinet lighting is task lighting. Choose 2700K or 3000K to match your ceiling lights, CRI 90+, and a high-density strip (120 LEDs per meter or COB strips) inside an aluminum channel with a frosted diffuser. That combination avoids the “dotted” reflection on glossy countertops.
Bedrooms and Living Rooms
Cove lighting, headboards, and TV backlighting look best at 2200K to 2700K and dimmable. Warm white LED strip lights on a dimmer can replace a lamp for evening reading-to-relaxing transitions.
Displays, Closets, and Workshops
Display cabinets, collections, and closets benefit from neutral to daylight temperatures so colors read accurately. Workshops and garages often use 4000K to 5000K for alertness and visibility.
Tunable White
Tunable strips carry two LED channels, warm and cool, blended by a controller. They are ideal for kitchens and multipurpose rooms. Confirm that the controller, driver, and dimmer are all compatible before buying.
Tools and Materials
- LED strip in your chosen color temperature, CRI, and voltage (12V or 24V)
- UL-listed LED driver (power supply) sized to the total load
- Compatible dimmer or controller
- Aluminum mounting channel with diffuser lens
- Solderless connectors or soldering iron, heat-shrink tubing
- Low-voltage wire of the proper gauge for the run length
- Isopropyl alcohol and a lint-free cloth
- Tape measure, scissors, drill, and mounting clips
Installation Steps
- Plan runs and measure. Measure each location and note where the power feed will enter. For long runs, 24V strips reduce voltage drop compared with 12V.
- Calculate the load. Multiply the strip’s watts per foot by total length. Choose a driver rated at least 20 percent above that total so it is not running at its limit.
- Clean the surface. Wipe the mounting surface or channel with isopropyl alcohol; adhesive fails on grease and dust, especially in kitchens.
- Cut only on marked lines. Strips have designated cut points, usually marked with a scissors icon. Cutting elsewhere kills a section.
- Mount in a channel. Press the strip into an aluminum channel, which improves heat dissipation and gives a smooth, diffused line of light.
- Connect and route wiring. Use connectors or solder, observe polarity, and keep low-voltage wires tidy and protected.
- Test before finishing. Connect the driver, confirm every section lights evenly, and then snap on diffusers.
If the driver needs to be hardwired into a junction box or a new switch location, turn off the breaker, confirm power is off with a non-contact voltage tester, and hire a licensed electrician for any line-voltage work you are not qualified to do.
Safety and Heat
LED strips run cooler than incandescent lighting, but they still produce heat that must escape. Never leave a strip coiled on its reel while powered, bunch excess length behind furniture, or bury it under insulation or fabric. Heat shortens LED life and can damage adhesive and wiring. Use a UL-listed (or equivalent listed) driver matched to the strip voltage, never exceed its rated wattage, and give the driver itself ventilation. For outdoor use, choose strips and drivers rated for damp or wet locations.
Troubleshooting
- Far end looks dimmer or more orange: Voltage drop. Feed power from both ends, use 24V, or run a heavier feed wire to the middle.
- Flicker when dimmed: Dimmer and driver are not compatible. Use a matched dimmer or a driver designed for your dimmer type.
- Colors don’t match between sections: Strips from different batches or brands vary. Buy all strips for one room at the same time.
- Adhesive falling off: Surface was not cleaned or gets hot. Use mounting clips or an aluminum channel.
- Visible dots on countertop: Low LED density or no diffuser. Switch to a high-density or COB strip in a frosted channel.
Typical Costs
Basic strips with CRI around 80 are inexpensive per foot, while CRI 90+, full spectrum, COB, and tunable-white products cost noticeably more. The driver, dimmer, and aluminum channels often add as much again as the strip itself, particularly for kitchens with many short runs. Professional installation costs rise if an electrician must add outlets, junction boxes, or switched circuits for the drivers.
When to Call a Pro
Plug-in kits are easy DIY projects. Call a licensed electrician for hardwired drivers, new switches or outlets inside cabinets, integration with existing line-voltage dimmers, or outdoor installations. A well-chosen warm white LED strip, installed with the right driver and channel, should last many years and make the room look finished rather than improvised.
Frequently Asked Questions
What kelvin is warm white for LED strips?
Warm white strips are typically 2700K to 3000K. Anything around 2200K to 2400K is extra warm, while 3500K to 4000K is considered neutral white.
Is 4000K too cold for a kitchen?
For most homes, 4000K looks cool next to warm ceiling fixtures. It works in modern white kitchens or task-heavy spaces, but 3000K is the safer choice for a warm, inviting look.
What CRI should I look for in an LED strip?
Aim for CRI 90 or higher for any area where colors matter, such as kitchens, closets, and display cabinets. A high R9 value is a bonus for rendering reds accurately.
Can I cut an LED strip anywhere?
No. Cut only at the marked cut points, which are spaced every few inches depending on the strip voltage and LED density.
Why is my LED strip dimmer at the end?
That is voltage drop over a long run. Use a 24V strip, feed power at both ends, or run a heavier wire to the far end.