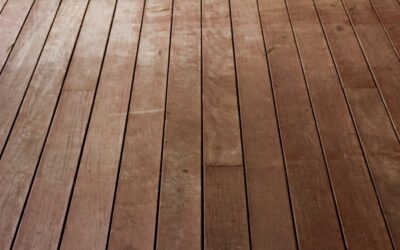
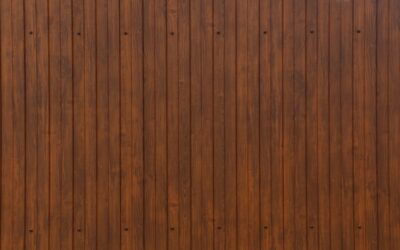
A brand-new cedar fence that turns dull, splintery gray within two summers isn’t defective, it’s untreated. Wood fence stain and sealer is the single most important thing standing between your fence and the relentless assault of sun, rain, and freeze-thaw cycles that break bare wood down fiber by fiber. Skip it and you’ll be replacing pickets in five years. Do it right and the same fence looks handsome and stays solid for two decades. This guide covers the stain types, how to choose between them, the exact application process, and the timing that trips up most homeowners.
Part of our Decks & Outdoor guide — explore the full guide →
- Why Bare Wood Needs Protection
- Stain vs. Sealer vs. Combination Products
- Oil-Based vs. Water-Based Formulas
- Timing: When to Stain a New Fence
- Step-by-Step Application
- How Much Stain You Need and What It Costs
- How Often to Reapply
- Choosing the Right Color and Opacity
- Tools and Application Methods Compared
- Getting Lasting Results
Why Bare Wood Needs Protection
Wood is under attack from three directions the moment it’s exposed outdoors. Ultraviolet light breaks down the lignin that holds wood fibers together, bleaching the surface to that familiar silver-gray and roughening it into splinters. Water soaks into the grain, swelling and shrinking the boards with every rain and dry spell until they cup, crack, and loosen their fasteners. And persistent moisture invites mildew, mold, and eventually rot fungi that eat the wood from within.
A quality stain and sealer fights all three at once. Pigment blocks UV, water-repellent resins shed rain, and mildewcides discourage growth. The result is wood that keeps its structural integrity and its looks far longer than nature alone allows.
Stain vs. Sealer vs. Combination Products
The terminology confuses buyers, so it helps to separate what each product actually does before you shop.
- Clear sealer: A water repellent with little or no pigment. It stops water but offers minimal UV protection, so the wood still grays over time. Needs frequent reapplication.
- Toned or semi-transparent stain: Adds pigment that blocks UV while still letting the grain show through. The best balance of protection and natural looks for most fences.
- Semi-solid and solid stain: Heavier pigment that hides more grain but delivers the longest color life and UV defense, closer to paint in coverage.
- Stain-and-sealer combination: Most modern products combine pigment and water repellent in one, so a single application both colors and seals.
For a typical residential fence, a semi-transparent stain-and-sealer combo hits the sweet spot. It shows off the cedar or pine grain, blocks enough UV to prevent graying, and repels water in one product. If your fence is older and weathered, a semi-solid hides imperfections better.
Oil-Based vs. Water-Based Formulas
Beyond opacity, you’ll choose a base, and each has real tradeoffs. Neither is universally better, it depends on your wood and priorities.
- Oil-based: Penetrates deep into the grain, nourishes the wood, and excels on rough-sawn and older lumber. It weathers gracefully but has stronger fumes and longer dry times.
- Water-based: Lower odor, easy soap-and-water cleanup, fast drying, and better color retention over time. It sits more on the surface and resists mildew well.
Oil-based products have long been the traditional choice for their penetration, but modern water-based hybrids have closed much of the gap and are gaining ground for their easier cleanup and lower VOCs. Match whichever you choose to the wood species and never apply water-based over an oil-based coat without proper prep.
Timing: When to Stain a New Fence
This is where good intentions go wrong. Newly installed pressure-treated lumber is often too wet to accept stain, since the treatment leaves it saturated. Apply too soon and the stain won’t penetrate or adhere, leaving a blotchy, peeling mess.
The classic test: sprinkle water on the wood. If it beads up, the wood is still too wet or too mill-glazed to stain, so wait. If it soaks in within a minute or two, the wood is ready. Pressure-treated fences often need to dry for several weeks to a few months depending on climate. Cedar and other untreated woods can usually be stained much sooner, sometimes within a week or two, but still need to be clean and dry.
Step-by-Step Application
Preparation determines the result far more than the brand of stain. Rushing straight to the roller over dirty wood guarantees a short-lived finish.
- Clean the fence thoroughly, removing dirt, mildew, and any old flaking finish with a wood cleaner or a pressure washer on a low setting.
- Let the fence dry completely, typically 24 to 48 hours of dry weather, so the stain can penetrate.
- Check the forecast for a clear, mild stretch, ideally 50°F to 80°F with no rain for at least 24 to 48 hours after application.
- Apply with a stain brush, roller, or sprayer, working in the direction of the grain and coating one or two boards at a time top to bottom.
- Back-brush any sprayed sections to work the stain into the grain and avoid drips and lap marks.
- Apply a second coat if the product calls for it, following the recommended wait time, then let the fence cure fully.
Avoid staining in direct hot sun, which flash-dries the stain before it can soak in, and never stain when rain threatens. A shaded, mild day gives the finish time to penetrate and bond.
How Much Stain You Need and What It Costs
Coverage varies with the wood’s roughness and thirst. A gallon of fence stain typically covers 150 to 300 square feet, but rough or weathered wood drinks far more than smooth boards, sometimes cutting coverage in half. Measure both sides of the fence you plan to coat.
Budget-wise, quality wood fence stain and sealer runs about $25 to $50 per gallon. A standard backyard fence of a few hundred linear feet might take several gallons for two coats on both sides. Factor in a cleaner, brushes or a sprayer, and painter’s tape, and a DIY project for an average yard often lands between $150 and $400 in materials, a fraction of what premature fence replacement costs.
How Often to Reapply
No finish lasts forever, and reapplication intervals depend on the product and exposure. Clear sealers may need refreshing every one to two years. Semi-transparent stains generally last two to three years, while semi-solid and solid stains can stretch to four or five. South-facing sections and horizontal rails weather fastest because they catch the most sun and hold the most water.
The water-bead test tells you when it’s time. When water stops beading and starts soaking into the wood, the repellent has worn off and it’s time to reapply. Catching it before the wood grays badly means a simple cleaning and recoat instead of a heavy restoration.
Choosing the Right Color and Opacity
The pigment level you choose affects both looks and longevity, so it’s worth matching to your goals. More pigment means more UV protection and a longer-lasting finish, but it also hides more of the wood’s natural grain. A clear or lightly toned finish showcases beautiful cedar grain but grays sooner, while a solid stain protects longest but reads closer to paint.
- Natural and cedar tones: Enhance the wood’s own color for a warm, organic look that suits most yards.
- Brown and walnut tones: Add richness and hide weathering on older fences.
- Gray and driftwood tones: A modern choice that mimics natural weathering intentionally rather than letting it happen unevenly.
- Solid colors: White, black, or custom hues for a bold, architectural fence, with the longest color life.
For a newer cedar or redwood fence you want to show off, a semi-transparent stain in a natural or brown tone is the sweet spot. For an older, weathered pine fence, a semi-solid or solid stain hides imperfections and buys you more years between recoats.
Tools and Application Methods Compared
How you apply the stain affects both speed and quality, and the best approach depends on your fence size and finish. A brush gives the most control and works the stain deepest into the grain, making it ideal for detailed work and rough wood, though it’s the slowest method for a long fence. A roller covers flat pickets fast but struggles with gaps and grooves and doesn’t penetrate as well.
A pump or airless sprayer is by far the fastest way to coat a large fence, laying down stain quickly across pickets and hard-to-reach spots. The catch is that spraying alone leaves stain sitting on the surface rather than worked into the grain, so the pros always back-brush after spraying, following up with a brush to push the stain in and eliminate drips and lap marks. For most homeowners, spraying and back-brushing offers the best combination of speed and lasting penetration, while a brush alone remains the gold standard for smaller fences and detail work.
Getting Lasting Results
A well-chosen and properly applied wood fence stain and sealer transforms a fence from a disposable item into a decades-long feature of your yard. Pick a semi-transparent combo for the best mix of looks and protection, confirm the wood is dry enough with the water-bead test before you start, and treat preparation and weather timing as seriously as the staining itself. Recoat on schedule before the finish fully fails, and your fence will resist rot, shrug off UV graying, and keep its rich color through years of sun and storms, all for a fraction of the cost and hassle of replacing rotted boards.