
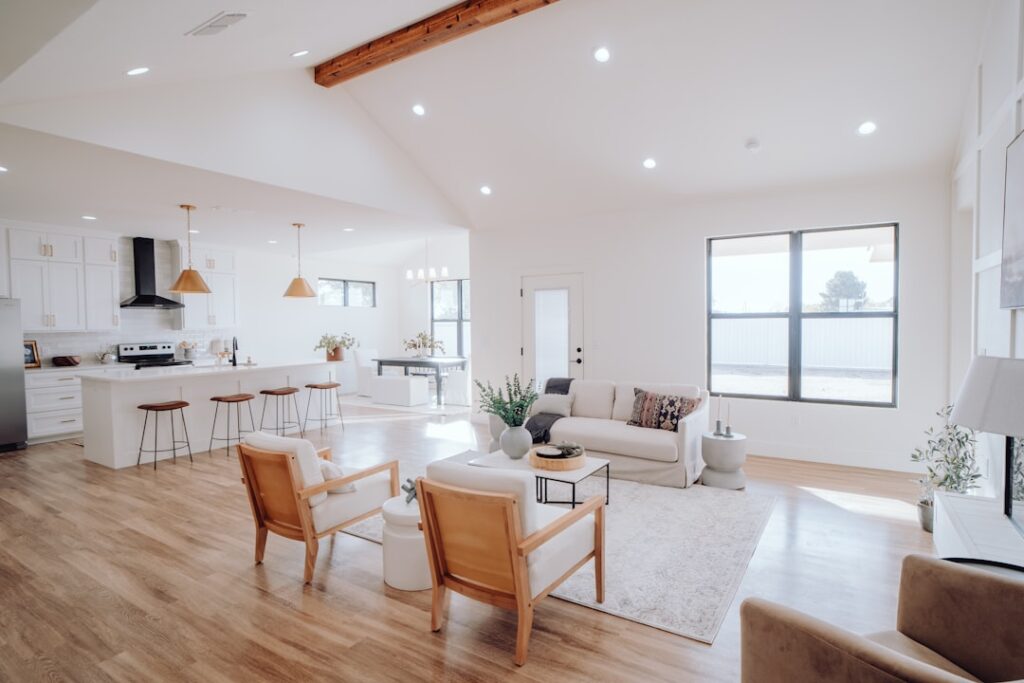
A wood floor renew project restores the shine, color, and protection of tired hardwood without the mess and expense of a full sand-down. If your floors look dull, scuffed, or lightly scratched but the boards themselves are sound, a renewal is almost always the smarter first move. Done right, it buys you five to seven more years of wear for a fraction of what a complete refinish costs.
Homeowners often assume that faded floors mean it is time to rent a drum sander or call a crew. In most cases, the damage sits only in the finish layer, not the wood. Understanding that difference is the key to saving money and getting a professional-looking result in a single weekend.
- What Wood Floor Renewal Actually Means
- Screen-and-Recoat: The Professional Method
- Step-by-Step DIY Renewal
- Choosing the Right Finish and Sheen
- Common Mistakes That Ruin a Renewal
- Maintenance to Extend the Life of Your Floors
- Tools and Supplies You Will Need
- How Long a Renewed Floor Lasts
- Renew, Refinish, or Replace?
What Wood Floor Renewal Actually Means
Renewal refers to any process that refreshes the surface finish without removing the wood veneer. The two most common methods are a screen-and-recoat (also called buff-and-coat) and a chemical abrasion kit sold for DIY use. Both roughen the existing polyurethane just enough for a fresh coat to bond, then seal the floor with a new protective layer.
This differs sharply from refinishing, which sands down to bare wood, removes 1/32 inch or more of material, and rebuilds the finish from scratch. A hardwood floor can only be fully refinished four to six times over its lifetime because each pass removes wood. Renewal removes no wood at all, so you can repeat it many times.
When Renewal Is the Right Call
- Surface scratches you can feel with a fingernail but that do not reach bare wood
- A dull, hazy, or worn sheen, especially in walkways and near doorways
- Light gray water spots that have not penetrated the stain layer
- A finish that is 3 to 10 years old and simply looks tired
If you see bare wood, deep gouges, cupping, pet stains that reached the grain, or black water damage, renewal will not fix it. Those problems require a full sand-and-refinish.
Screen-and-Recoat: The Professional Method
The gold standard for a wood floor renew is the screen-and-recoat. A pro uses a floor buffer fitted with a fine sanding screen, typically 120 to 150 grit, to lightly abrade the entire surface. This creates microscopic scratches that give the new coat something to grip. After a thorough vacuum and tack-cloth wipe, one or two coats of polyurethane go down.
Expect to pay a contractor between $1.00 and $2.00 per square foot for a screen-and-recoat, or roughly $400 to $800 for a 400-square-foot living room. Compare that to $3.00 to $8.00 per square foot for a full refinish, and the savings are obvious. The job usually finishes in a single day, with the floor walkable in socks after about 8 hours.
Step-by-Step DIY Renewal
Confident homeowners can rent a buffer for around $40 to $60 a day, or use a no-sand liquid etching kit that costs $40 to $130 and skips the machine entirely. Here is the general sequence.
- Clear and clean. Remove all furniture and vacuum thoroughly. Wash the floor with a dedicated hardwood cleaner and let it dry for at least two hours.
- Test for wax. Rub a little mineral spirits on a hidden spot. If a waxy residue lifts, you must strip the wax first, because polyurethane will not bond over wax.
- Abrade the surface. Buff with a 150-grit screen or apply the chemical etcher per the label, working in 4-by-4-foot sections.
- Vacuum and tack. Remove every speck of dust. Even fine grit ruins a smooth topcoat.
- Apply finish. Use a T-bar or microfiber applicator to lay down water-based poly along the grain. Keep a wet edge and avoid overworking.
- Cure and recoat. Wait 2 to 4 hours, then apply a second coat if the product calls for it.
Water-based polyurethane dries fast and stays clear, while oil-based poly adds warm amber tones but takes longer and smells stronger. For most renewals, a water-based product in satin or semi-gloss delivers the cleanest, most forgiving result.
Choosing the Right Finish and Sheen
Sheen matters more than most people expect. A high-gloss finish looks striking in photos but shows every dust mote, footprint, and micro-scratch. Satin and matte finishes hide wear far better and are the practical choice for busy households with kids or dogs.
Quality water-based finishes from brands like Bona, Loba, and Rubio Monocoat resist yellowing and cure hard within a week. Budget around $40 to $70 per gallon, and plan on one gallon covering roughly 500 to 600 square feet per coat. Buy 10 to 15 percent extra so you never run dry mid-project.
Common Mistakes That Ruin a Renewal
The single biggest failure is poor adhesion. If the old floor still carries wax, furniture polish, or an oily cleaner residue, the new coat will peel within weeks. Never use vinegar-and-water or oil-soap products in the months before a renewal, and always do the mineral-spirits wax test.
Dust is the second culprit. A gritty topcoat feels like sandpaper and looks cloudy. Shut off HVAC fans during application, seal doorways, and tack every section. Rushing between coats is the third error; recoating before the previous layer flashes off traps solvents and leaves a soft, gummy surface that never fully hardens.
Maintenance to Extend the Life of Your Floors
Once your renewed floor cures, protect that investment. Place felt pads under all furniture legs and swap them out yearly. Use walk-off mats at every exterior door to trap grit, which is the number-one cause of surface scratching.
Clean weekly with a pH-neutral hardwood cleaner and a dry or barely damp microfiber mop. Standing water is hardwood’s enemy, so wipe spills immediately. Keep indoor humidity between 35 and 55 percent to stop boards from cupping or gapping through the seasons. With this routine, most homeowners can stretch the interval between renewals to a comfortable five to seven years.
Tools and Supplies You Will Need
Gathering the right gear before you begin keeps a renewal moving smoothly. A rented orbital or square-buff floor sander, or alternatively a no-sand chemical etching kit, forms the core of the job. Random-orbit machines are the most forgiving for first-timers because they are far harder to gouge with than an aggressive drum sander.
- 150-grit sanding screens or maroon buffing pads
- Shop vacuum with a fine-dust filter and a HEPA bag
- Tack cloths and lint-free microfiber applicator pads
- A T-bar applicator or high-quality synthetic bristle brush for cut-in edges
- Water-based or oil-based polyurethane in your chosen sheen
- Painter’s tape, plastic sheeting, and a respirator rated for finishes
Budget roughly $150 to $300 for supplies if you already own a shop vac. Renting the buffer for a single day and buying two gallons of finish covers most rooms up to 500 square feet, leaving a comfortable margin for a second coat.
How Long a Renewed Floor Lasts
A properly executed recoat typically holds up for five to seven years in a busy household and even longer in a low-traffic formal room. High-wear zones like kitchen walkways and stair landings will show wear first, and there is nothing wrong with spot-buffing and recoating just those areas when they dull. Because renewal removes no wood, you can repeat it as often as the finish demands, stretching the decades before a full sand becomes unavoidable.
Renew, Refinish, or Replace?
Choosing the right level of intervention saves both money and heartache. A wood floor renew is your first line of defense whenever the wood is structurally fine and only the finish looks worn. Reach for a full refinish when scratches reach bare wood or when you want to change the stain color entirely. Consider replacement only when boards are cracked, water-damaged beyond repair, or worn so thin that no wood remains to sand.
For the vast majority of homes, renewal delivers 90 percent of the visual improvement of a full refinish at 25 percent of the cost and disruption. Before you assume your hardwood is beyond saving, test a hidden corner, run through the checklist above, and you may find that a single day of work brings your floors back to life.
Prefer to explore on your own?
See how new flooring looks in your actual room in seconds — free, no signup.
Try the free Floor Studio →

