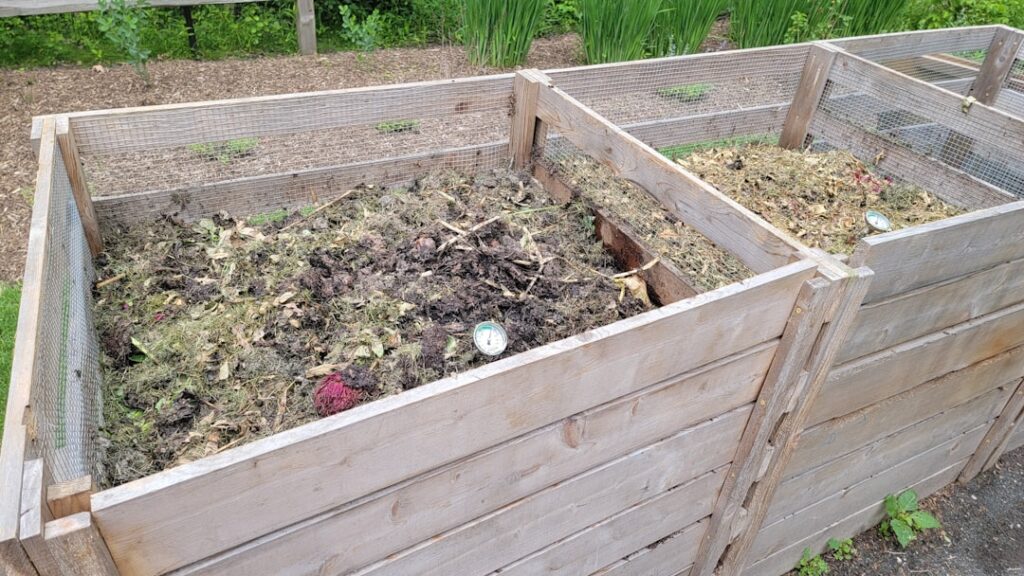
A yard compost bin is one of the simplest, most rewarding additions you can make to your property, turning grass clippings, fallen leaves, and kitchen scraps into rich, free soil amendment for your garden. Instead of bagging yard waste for the curb, you let nature recycle it into dark, crumbly compost that improves soil structure, feeds plants, and reduces the need for store-bought fertilizer. Setting up a bin takes an afternoon, and the payoff lasts for years.
This guide explains the types of compost bins, how to set one up, what to add and avoid, and how to keep the process running smoothly.
Why Compost in Your Yard
Composting solves two problems at once: it diverts organic waste from the landfill and produces a premium soil conditioner you would otherwise buy. Finished compost loosens heavy clay, helps sandy soil retain moisture, and introduces beneficial microorganisms that support healthy plant roots. For anyone with a garden or even a few flower beds, a yard compost bin pays for itself quickly.
It also reduces the volume of yard waste you haul away, especially in fall when leaves pile up by the dozens of bags.
Types of Compost Bins
Several bin styles suit different yards, budgets, and effort levels. Choose based on how much material you generate and how fast you want results.
- Stationary bins: Simple enclosed boxes or wire cages that hold material while it breaks down; affordable and low-effort.
- Tumbler bins: Sealed drums you rotate to mix the pile; faster composting and good rodent resistance, though smaller in capacity.
- Three-bin systems: A series of bins that let you turn material from one to the next as it matures; ideal for larger yards.
- Open piles: The cheapest option, just a heap in a corner; effective but less tidy and slower.
Where to Place Your Bin
Location affects how well your compost works. Pick a spot that is convenient yet practical so you actually use it year-round.
- Choose a level, well-drained area with partial sun to keep the pile warm but not bone-dry.
- Place it within easy reach of the kitchen and garden so adding scraps is no chore.
- Set stationary bins directly on soil so worms and microbes can move in from below.
- Keep it a reasonable distance from the house to avoid any odor or pest concerns.
What to Add and What to Avoid
Successful compost balances two ingredient types: nitrogen-rich greens and carbon-rich browns. A rough mix of one part greens to two or three parts browns keeps the pile active without turning slimy or smelly.
Add These
- Greens: grass clippings, vegetable and fruit scraps, coffee grounds, fresh garden trimmings
- Browns: dry leaves, shredded paper and cardboard, straw, small twigs, sawdust from untreated wood
Avoid These
- Meat, fish, dairy, and greasy foods, which attract pests and smell
- Pet waste from dogs and cats, which can carry pathogens
- Diseased plants and weeds gone to seed
- Treated or painted wood and glossy printed paper
How to Keep Compost Working
Compost needs three things to thrive: air, moisture, and a balanced mix. Turn the pile every week or two with a fork or by rotating a tumbler to introduce oxygen, which speeds decomposition and prevents a sour smell. Keep the pile as damp as a wrung-out sponge; if it dries out, sprinkle water, and if it gets soggy, add more browns.
A healthy, active pile heats up in the center, sometimes reaching 130°F to 150°F, which breaks material down fast and kills many weed seeds. If your pile stays cold and inactive, it usually needs more greens, more moisture, or a good turning.
Troubleshooting Common Problems
Even a well-built compost bin occasionally misbehaves, but nearly every issue has a simple fix once you know what is causing it.
- Bad smell: A rotten-egg or ammonia odor usually means too many greens or too much moisture; add browns and turn the pile to add air.
- Pile not heating up: Often a sign of too few greens, a pile that is too small, or one that is too dry; add nitrogen-rich material and water.
- Pests and rodents: Keep meat, dairy, and grease out, bury food scraps in the center, and consider a closed bin or tumbler.
- Slow decomposition: Chop or shred materials smaller and turn the pile more often to speed things along.
Composting Through the Seasons
Compost activity rises and falls with the weather. In warm summer months, a well-tended pile breaks down quickly and may need extra water to stay moist. In winter, decomposition slows or pauses as temperatures drop, but the process resumes when the pile warms again in spring. You can keep adding material year-round; it will simply sit until conditions favor breakdown.
Fall is prime composting season because of the abundance of fallen leaves, which make excellent brown material. Stockpile a few bags of dry leaves to mix with nitrogen-rich greens throughout the year, ensuring you always have the right balance on hand.
Harvesting Finished Compost
Depending on the method and season, compost is typically ready in two months to a year. You will know it is finished when it looks dark and crumbly, smells earthy, and the original materials are no longer recognizable. Screen out any large uncomposted chunks and toss them back into the active pile.
Spread the finished compost as a top dressing on beds, mix it into garden soil before planting, or steep it to make a nutrient-rich liquid feed. With a little routine attention, your yard compost bin will deliver a steady supply of free, high-quality soil amendment season after season.
Getting started is easier than many homeowners expect, and you do not need a perfect setup to succeed. Begin with a simple bin in a convenient spot, alternate layers of greens and browns, keep the pile moist and aerated, and let nature do the rest. Over time you will develop a feel for the right balance and rhythm, adjusting as the seasons change. The reward is a tidier yard, less waste headed to the landfill, and a rich, free soil booster that makes your garden healthier and more productive year after year. Few home projects offer this much return for so little ongoing effort.