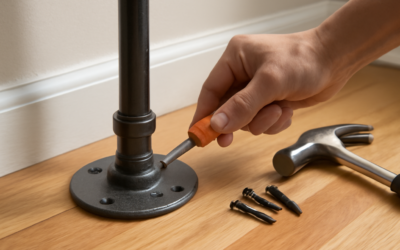
Few fittings punch above their weight quite like the humble 2 inch floor flange. Whether you are anchoring a length of pipe to a subfloor, building an industrial-style shelf, or connecting a drain line beneath a shower, a 2 inch floor flange gives you a flat, bolt-down mounting surface where a threaded pipe would otherwise leave you nothing to fasten. That small circle of metal or plastic bridges the gap between plumbing hardware and the structure it needs to grip, and understanding its sizing quirks saves you a frustrating return trip to the store.
This guide walks through what the term actually means, the two very different products that share the name, how to measure correctly, and the installation details that separate a wobbly mount from one that holds for decades.
What a Floor Flange Actually Is
A floor flange is a fitting with a flat, circular base drilled with three or four mounting holes and a threaded or hubbed center that accepts pipe. The base screws down to a floor, wall, ceiling, or bench, while the center receives the pipe run. Because the base spreads load across several fasteners, it turns a single vertical pipe into a rigid, freestanding structure.
Two products dominate the category, and confusing them causes most homeowner headaches. The first is the plumbing drain flange, used with DWV (drain-waste-vent) systems and toilet or shower connections. The second is the pipe-fitting flange used for structural and decorative builds, threaded to accept standard black iron or galvanized nipples. Both come in a nominal 2-inch designation, but they are not interchangeable.
Decoding the “2 Inch” Measurement
Pipe sizing trips up almost everyone the first time. The “2 inch” in a plumbing flange refers to nominal pipe size, not the diameter of the base or the physical dimension you measure with a tape. A 2-inch DWV flange actually accepts pipe with an outside diameter of about 2.375 inches, and its mounting base can span 4 to 5 inches across.
For threaded pipe-fitting flanges, the story is different again. A “2 inch” black pipe flange threads onto 2-inch nominal pipe, which measures roughly 2.375 inches OD, and its cast base typically runs 5.5 to 6 inches in diameter with four bolt holes. If you are building furniture, always check whether the listing means the pipe size or the base size, because a 1/2-inch pipe flange, the most common decorative size, is frequently mislabeled by casual sellers.
- Nominal size = the pipe it fits, not any dimension you can measure directly.
- Base diameter = the footprint on your floor, usually 2 to 3 times the nominal size.
- Bolt-hole count = 3 for lighter plastic drains, 4 for cast structural flanges.
Common Materials and When to Choose Each
Material selection depends entirely on the job. Plumbing flanges show up in PVC, ABS, brass, and cast iron. PVC and ABS dominate residential drain work because they resist corrosion, weigh little, and solvent-weld in minutes. Brass and cast iron appear in older homes and commercial settings where heat or code demands metal.
Structural and decorative flanges are almost always malleable cast iron with a black oxide or galvanized finish. Malleable iron tolerates bending stress far better than gray cast iron, which matters when a shelf takes a downward yank. Expect to pay $3 to $8 for a small decorative flange and $12 to $25 for a genuine 2-inch structural or drain flange in metal.
Installing a 2 Inch Drain Flange
For DWV connections, dry-fit everything first. Slide the flange over the pipe stub so the base sits flush on a clean, level subfloor. Mark the mounting holes, then set the flange aside.
- Clean the pipe end and the flange socket with the appropriate primer for PVC or ABS.
- Apply solvent cement evenly, insert the pipe with a quarter-turn, and hold for 30 seconds so it does not push back out.
- Let the joint cure per the label, usually 15 minutes to handle and 2 hours before pressure or water.
- Fasten the base with corrosion-resistant screws sized for your subfloor, and shim if the floor is uneven so you never crack the base by cranking a fastener.
Never overtighten. Plastic bases crack under a driver’s torque, and a hairline fracture invites slow leaks that rot subfloor for months before you notice.
Installing a Structural or Decorative Flange
Building a pipe shelf, towel bar, or table leg is more forgiving. Thread a matching nipple into the flange center by hand, then snug it with a pipe wrench a quarter to half turn past hand-tight. Position the assembly, mark the holes, and drive lag screws or wood screws into a stud, joist, or solid blocking. For anything load-bearing, avoid mounting into drywall alone; use toggle anchors rated for at least three times the expected weight if a stud is unavailable.
Wipe new black iron flanges with mineral spirits before assembly. They ship coated in an oily film that stains hands and resists paint or clear coat until removed.
Sizing, Compatibility, and Buying Tips
Bring the old part or a photo of the threads when replacing a fitting. Thread pitch matters as much as diameter; NPT tapered threads seal against each other, and mixing standards leaves gaps. Confirm whether your project needs female threads on the flange, which is the norm, or a slip-fit hubbed socket used on drain versions.
Measure the base footprint against your available floor space, especially in tight bathroom corners where a 6-inch cast base may collide with a wall. Keep these checkpoints in mind before you buy:
- Match nominal pipe size to your existing run, not the base size.
- Verify thread type (NPT) or joint type (solvent-weld, no-hub) for compatibility.
- Choose metal for load-bearing or high-heat use, plastic for standard drains.
- Buy stainless or coated mounting screws for any wet location.
Troubleshooting a Loose or Leaking Flange
A wobbling flange almost always traces back to a fastener biting into rotted or hollow subfloor. Pull the screws, inspect the wood, and reinforce with a scrap of plywood blocking beneath before remounting. If a threaded joint weeps, back it off, wrap the male threads with three to four wraps of PTFE tape in the direction of tightening, or apply pipe-joint compound, then reassemble.
For a leaking solvent-welded drain flange, there is no repair; the cemented joint must be cut out and replaced with a fresh fitting and a coupling. Catching that early keeps a five-dollar part from becoming a subfloor demolition project.
Final Thoughts
A 2-inch floor flange is a small purchase with outsized consequences for both plumbing integrity and DIY furniture strength. Get the nominal sizing right, match the thread or joint standard, pick the material to suit the load, and fasten into solid structure rather than crushing a base with overtightened screws. Handle those fundamentals and this modest fitting will anchor drains and pipe builds reliably for the life of the project.
Prefer to explore on your own?
See how new flooring looks in your actual room in seconds — free, no signup.
Try the free Floor Studio →