A 2 inch marble threshold is one of the most useful little pieces of stone in a bathroom remodel, and it solves a problem most homeowners do not think about until the tile is already down. That narrow polished strip bridges the gap between two floor surfaces, hides a raw tile edge, and gives a doorway a finished, custom look for a fraction of what a full countertop costs. After setting hundreds of these in shower curbs and bathroom doorways, I can tell you the details matter more than the price.
Part of our Countertops guide — explore the full guide →
Whether you call it a saddle, a transition strip, or a marble sill, this guide walks you through the sizes, the bevel profiles, the color options, and exactly how to set one so it lasts for decades.
What a Marble Threshold Actually Does
A threshold serves three jobs at once. First, it covers the transition where two flooring materials meet, such as tile meeting hardwood or tile meeting carpet at a bathroom door. Second, it creates a small dam that helps keep water inside a wet zone, which is why you see them on shower curbs. Third, it protects the vulnerable cut edges of your floor tile, which would otherwise chip and collect dirt.
The “2 inch” refers to the width of the piece, not the length. That 2-inch face is the sweet spot for most standard interior doorways where a modern jamb is about that deep. It gives you enough surface to bridge the two floors cleanly without looking bulky or protruding into the room.
Standard Sizes You Can Buy
Marble thresholds come in a predictable range of stock dimensions, which makes them easy to buy off the shelf at a tile shop or home center. Understanding the numbers keeps you from over-ordering.
- Widths: 2 inch, 4 inch, 5 inch, and 6 inch are the common face widths. The 2 inch is standard for a typical door opening; wider pieces suit thicker walls, pocket doors, or shower curbs.
- Lengths: 24 inch and 36 inch are the two most common. A 36-inch piece covers a standard 32- to 36-inch door opening; the 24-inch is handy for narrow closet or utility doors.
- Thickness: most run 5/8 inch to 3/4 inch thick, which matches the height of common floor-tile-plus-mortar builds.
If your opening is an odd width, buy the next size up and have it cut down. Marble cuts cleanly with a wet saw and a diamond blade, and any tile shop will trim a piece for a few dollars.
Bevel and Edge Profiles Explained
The edge profile determines how the threshold meets each floor, and picking the wrong one leaves an awkward lip. There are three profiles you will run into.
Single Bevel (Standard)
One long edge is sloped down while the other stays square. Use this when the two floors sit at slightly different heights. The beveled side faces the lower floor to create a gentle ramp, which is easier on toes and vacuum wheels.
Double Bevel
Both long edges are gently sloped. This is the go-to for a doorway where both floors sit at roughly the same height, giving a symmetrical hump that looks intentional from either room.
Hollowback
A channel is routed out of the underside so the threshold sits over an existing raised surface, like a metal door track or a saddle. Hollowback pieces let you install without demolishing what is underneath.
Color and Marble Options
Because a threshold is small, you can afford a premium stone that would be expensive across a whole floor. The three most popular colors cover almost every design scheme.
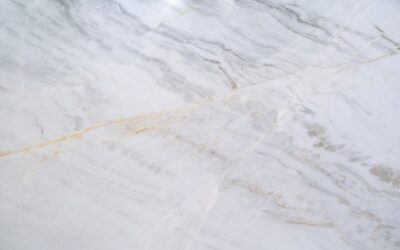
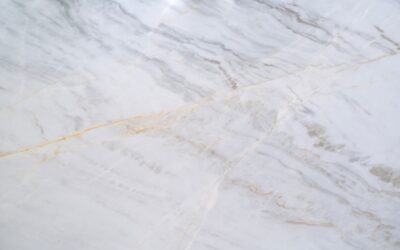
- Carrara White: the classic soft white with faint gray veining. It pairs with white subway tile, gray floors, and nearly any modern bathroom.
- Crema / Beige (Crema Marfil): a warm cream tone that complements travertine, tan tile, and traditional decor.
- Nero Black (Nero Marquina): a deep black, sometimes with white veining, that frames a doorway with strong contrast and hides scuffs well.
Marble is a natural stone, so expect variation from piece to piece. If the doorway is visible from a main room, ask to see the actual slab or take a photo to match your floor before you commit.
How to Install a Marble Threshold
Setting a threshold is a project a confident DIYer can finish in under an hour, plus cure time. Here is the sequence I follow on the job.
- Dry fit and measure. Place the threshold in the opening and mark it. It should tuck under both door jambs and sit flush or slightly proud of the surrounding tile.
- Cut to length. Trim with a wet saw and a diamond blade. Cut the ends so the piece fits snugly between the jamb legs, ideally hidden under them.
- Seal the stone. Marble is porous. Wipe on a penetrating stone sealer before setting so grout and mortar do not stain the face.
- Set in thinset. Comb a layer of white thinset mortar into the bed, back-butter the threshold, and press it into place. Check it with a level.
- Grout and caulk. Grout the joint against the tile, and run a bead of matching color-matched silicone where the threshold meets a wall or shower pan for a waterproof seal.
Let everything cure 24 hours before heavy traffic, and reseal the marble once a year in a wet bathroom.
What a 2 Inch Marble Threshold Costs
Pricing is friendly because the pieces are small. A stock 2 inch marble threshold in Carrara runs roughly $12 to $30 for a 36-inch piece at a home center. Premium colors like Nero Marquina or hollowback custom profiles push toward $30 to $60. Compare that to engineered or solid-surface saddles and marble is often the better value for the look.
If you hire a tile installer, expect $40 to $100 in labor to set a single threshold, though most pros fold it into a larger tile job at little extra cost. Budget another few dollars for sealer and color-matched caulk.
Care, Durability, and Common Mistakes
Marble handles decades of foot traffic, but it is softer than granite and reacts to acids. Wipe up spills, avoid vinegar or citrus cleaners, and use a pH-neutral stone cleaner. Reseal annually in wet areas and every couple of years in a dry hallway.
The two mistakes I see most often are skipping the sealer, which leaves permanent grout haze in the pores, and setting the threshold too high so it becomes a trip hazard. Another frequent error is choosing the wrong bevel, which leaves a hard vertical lip against the lower floor that catches toes and vacuum wheels. Take the extra ten minutes to dry-fit, seal, and level, and a 2 inch marble threshold will outlast the rest of your remodel while giving every doorway a clean, custom edge.
Frequently Asked Questions
Is a 2 inch threshold wide enough for a shower curb?
Usually not. Shower curbs are typically 4 to 6 inches wide to fully cap the mortar curb and shed water back into the pan. Save the 2 inch width for interior doorways and use a 4 inch or wider piece on the curb itself.
Does marble stain in a bathroom?
It can if left unsealed, because marble is porous and reacts to acids in soaps and cleaners. A penetrating stone sealer applied before install and refreshed once a year keeps water, soap, and grout from soaking in. Wipe up standing water and skip vinegar-based cleaners.
Can I install a marble threshold over existing flooring?
Yes, if the heights work out. A hollowback profile is designed to bridge an existing track or raised saddle without demolition. Otherwise, set the threshold in thinset directly on the subfloor so it finishes flush with your tile.
How do I cut a marble threshold to length?
Use a wet saw fitted with a diamond blade and feed the stone slowly to avoid chipping the polished face. If you do not own a wet saw, most tile shops will trim a piece to your measurement for a few dollars.