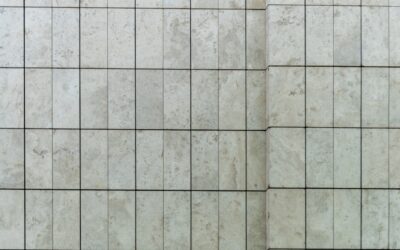
Few tile sizes are as instantly recognizable as the 3×6 tile, the rectangular format that launched the subway-tile look more than a century ago. Originally chosen for the New York City subway stations in 1904, this three-inch by six-inch rectangle has become the default choice for kitchen backsplashes, bathroom walls, and shower surrounds. It hits a sweet spot between coverage and detail: large enough to install quickly, small enough to feel crafted and timeless. If you are weighing this size for an upcoming project, understanding its layout options, real-world pricing, and material choices will help you buy with confidence.
Part of our Tile & Grout guide — explore the full guide →
- What Makes the 3×6 Tile So Popular
- Popular 3×6 Tile Layout Patterns
- Materials and Finishes to Consider
- How Much Does 3×6 Tile Cost
- Choosing Grout for a 3×6 Tile Backsplash
- Installation Tips and Common Mistakes
- Where 3×6 Tile Works Best
- Ceramic vs Porcelain vs Glass 3×6 Tile
- How Much 3×6 Tile Do You Need
- Maintenance and Cleaning Tips
- Final Thoughts on Buying 3×6 Tile
What Makes the 3×6 Tile So Popular
The enduring appeal comes down to proportion and flexibility. The 1-to-2 ratio of a 3×6 tile creates a clean, brick-like module that the eye reads as orderly without feeling rigid. It works in traditional farmhouse kitchens, sleek modern baths, and everything in between. Because the format is so common, nearly every manufacturer produces it, which means you have an enormous range of colors, finishes, and price points to choose from. That ubiquity also keeps costs down and makes matching or replacing a broken piece far easier than with a boutique specialty tile.
Another practical benefit is scale. In a small bathroom, oversized tiles can overwhelm the space, but the modest footprint of a 3×6 keeps proportions comfortable. The grout lines add subtle texture and visual rhythm, which many designers prize for keeping a wall from looking flat or sterile.
Popular 3×6 Tile Layout Patterns
The way you arrange these rectangles changes the entire personality of a room. Here are the most common layouts homeowners request:
- Running bond (offset): Each row shifts by half a tile, the traditional subway look. It is forgiving of minor wall imperfections and the most classic choice.
- Stacked (grid): Tiles align in perfect vertical and horizontal columns for a crisp, contemporary feel. It demands a very flat wall and precise setting.
- Herringbone: Tiles turn at 45 or 90 degrees to form a zigzag. It uses more material and labor but delivers a high-end, dynamic surface.
- Vertical stack: Turning the tile on end and stacking it draws the eye upward, making low ceilings feel taller.
- One-third offset: A softer alternative to the 50 percent offset that reduces the slight “lippage” some tiles show when set at the halfway point.
For most kitchens and baths, the running bond or one-third offset remains the safest, most affordable pick. Reserve herringbone for a feature wall where the extra cost pays off visually.
Materials and Finishes to Consider
A 3×6 tile is sold in nearly every material on the market. Glossy ceramic is the budget-friendly workhorse, easy to clean and bright. Matte ceramic and porcelain hide water spots and fingerprints better, which suits busy kitchens. Handmade or “zellige” style tiles bring subtle color variation and an artisanal, slightly uneven surface that reads as luxurious. Glass versions add depth and reflect light, ideal for a backsplash behind a range. Natural stone such as marble offers organic veining but needs sealing and gentler cleaners.
Beveled edges are a common variation. A beveled 3×6 tile has a chamfered border that catches light and adds dimension, giving a more traditional look than a flat-edge tile. Decide early, because bevels change how corners and grout lines read.
How Much Does 3×6 Tile Cost
Pricing spans a wide range depending on material and brand. Here are realistic 2020s figures to budget around:
- Basic glossy ceramic: $1.50 to $4 per square foot.
- Porcelain: $3 to $8 per square foot.
- Glass: $7 to $20 per square foot.
- Handmade or zellige ceramic: $15 to $40 per square foot.
- Marble and natural stone: $10 to $30 per square foot.
Professional installation typically adds $8 to $15 per square foot for a straightforward running-bond layout, and more for herringbone or intricate patterns. For a standard 30-square-foot kitchen backsplash, expect a total project cost between roughly $400 and $1,200 for mid-range materials installed. Always buy 10 to 15 percent extra to cover cuts, breakage, and future repairs.
Choosing Grout for a 3×6 Tile Backsplash
Grout color is as important as the tile itself. A matching or tone-on-tone grout makes the wall read as a seamless field, calm and understated. A contrasting grout, such as charcoal against white tile, emphasizes the brick pattern and delivers a bolder, more graphic look. For kitchens, a slightly darker grout than the tile hides splatters and coffee stains better than bright white. Choose a stain-resistant, pre-mixed urethane or epoxy grout in wet areas to minimize maintenance. Standard grout-line width for this size runs from 1/16 inch for a tight modern look to 1/8 inch for a more traditional gap.
Installation Tips and Common Mistakes
While a motivated DIYer can tackle a small 3×6 tile backsplash, a few habits separate a clean result from a frustrating one:
- Start with a level ledger board or laser line rather than trusting the countertop, which is rarely perfectly level.
- Dry-lay a row first to plan cuts so you avoid tiny slivers at the ends of a wall.
- Use tile spacers consistently and check for lippage as you go, especially with a stacked layout.
- Back-butter cut pieces and outlet-adjacent tiles for a stronger bond.
- Let thinset cure fully before grouting, then seal natural stone before and after grout to prevent staining.
The most frequent mistake is rushing the layout planning. Ten minutes of dry-fitting prevents a lopsided pattern that will bother you for years.
Where 3×6 Tile Works Best
This size shines on vertical surfaces. Kitchen backsplashes are the number-one application, followed by bathroom shower walls, tub surrounds, and accent walls. It also works beautifully as a fireplace surround or a laundry-room splash zone. While it can be used on floors in a mudroom or entry, most homeowners reserve larger, thicker tiles for high-traffic flooring and keep the 3×6 for walls where its scale and pattern potential make the biggest impact.
Ceramic vs Porcelain vs Glass 3×6 Tile
Choosing the right body material affects both durability and price. Ceramic is fired at lower temperatures, making it softer, lighter, and easier to cut, which suits DIY wall projects and keeps costs down. Porcelain is denser, harder, and less porous, so it resists water and wear better and is worth the upgrade in a shower or a high-splash zone. Glass 3×6 tile is nonporous, stain-proof, and reflective, bouncing light around a room, though it shows fewer scratches than you might fear because backsplashes rarely take abrasion. Natural stone and handmade tiles bring the most character but demand more maintenance. For a kitchen backsplash that will see grease and cleaning, a glazed porcelain or ceramic strikes the best balance of looks, cost, and easy upkeep.
How Much 3×6 Tile Do You Need
Estimating quantity accurately prevents both shortages and waste. Measure the height and width of each wall you plan to cover, multiply to get square footage, and subtract large openings like windows. Add your waste allowance of 10 to 15 percent, bumping to 20 percent for herringbone or diagonal layouts that generate more cuts. Boxes are usually sold by the square foot, so divide your total by the coverage listed on the box to find how many to buy. It is smart to keep a few spare tiles after the job, since dye lots vary between production runs and an exact-match replacement years later can be nearly impossible to source.
Maintenance and Cleaning Tips
One of the reasons the 3×6 tile endures is how easy it is to live with. Glazed ceramic and porcelain wipe clean with mild soap and water, and a soft cloth handles most kitchen splatters. Avoid abrasive pads and harsh acids on any tile, and be especially gentle with natural stone and handmade glazes. The grout, not the tile, is usually the first thing to look tired, so seal cement grout after installation and clean it periodically with a soft brush. A quick wipe-down after cooking keeps grease from building up, and that small habit keeps a backsplash looking new for many years.
Final Thoughts on Buying 3×6 Tile
The 3×6 tile remains a design classic precisely because it is so adaptable, affordable, and easy to source. Whether you favor a crisp stacked grid or a warm handmade running bond, this humble rectangle can carry a project from budget-friendly to genuinely luxurious depending on material and grout choices. Nail down your layout, buy 10 to 15 percent extra, match the grout to the mood you want, and you will end up with a surface that looks intentional and timeless. For most homeowners, a 3×6 tile is the safest way to get a look that will still feel right a decade from now.
Prefer to explore on your own?
See how new flooring looks in your actual room in seconds — free, no signup.
Try the free Floor Studio →