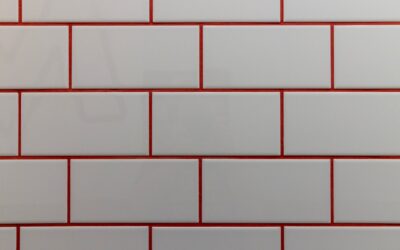
Few tiles have stayed in style as long as the rectangular brick that lines subway stations and farmhouse kitchens alike. 3×6 subway tile is the original and most recognizable size, a 3-inch by 6-inch rectangle that first appeared in New York City subway stations in the early 1900s and never went out of fashion. Its clean proportions, affordability, and versatility make it a safe yet stylish choice for backsplashes, showers, and accent walls.
Part of our Tile & Grout guide — explore the full guide →
Why the 3×6 Size Endures
The 2-to-1 ratio of the 3×6 tile is what makes it so adaptable. It is large enough to cover ground quickly and small enough to fit tight backsplash runs and shower niches without odd cuts. The size suits both traditional and modern designs, and because it is the most common subway dimension, it is widely available and inexpensive. You will find it in glossy white ceramic for a few dollars per square foot, as well as in glass, marble, and handmade finishes for a more custom look.
Popular Layout Patterns
Layout changes the entire personality of a wall. The same white 3×6 tile can read classic or contemporary depending on how you set it.
- Running bond (offset): Each row shifts by half a tile, the timeless brick pattern. The 50 percent offset is the default subway look.
- One-third offset: Rows shift by a third instead of half, a subtle modern twist that avoids lippage issues common with long tiles.
- Stacked (straight set): Tiles align in a grid, vertical or horizontal, for a clean, modern feel.
- Vertical stack or vertical offset: Turning the tiles upright draws the eye up and feels fresh in showers and behind ranges.
- Herringbone: Tiles set at 45 or 90 degrees create a dynamic, upscale pattern.
Choosing Grout Color and Width
Grout is half the design with subway tile. A contrasting grout, such as gray or charcoal against white tile, emphasizes the brick pattern and adds a modern, graphic look. A matching white grout makes the wall read as a soft, seamless field. Thin grout lines, around 1/16 to 1/8 inch, keep the look clean, while wider lines lean rustic. For wet areas, choose a stain-resistant grout and seal it if it is cement-based. The grout decision deserves as much thought as the tile itself.
Where 3×6 Subway Tile Works Best
This size is a workhorse across the home. It is the default kitchen backsplash, where a few rows above the counter add bright, easy-clean coverage. In bathrooms it lines tub surrounds, shower walls, and wainscot. It also makes a striking accent wall behind a range, a fireplace, or a laundry sink. Because the tile is small and the cuts are simple, it suits curved and tight spaces better than large-format tile.
Installation Tips
A successful subway install comes down to layout and consistency.
- Plan the layout so cut tiles land at the edges and corners look balanced.
- Use tile spacers to keep grout lines uniform across the whole wall.
- For an offset pattern, consider a one-third rather than half offset to reduce lippage, since long tiles can crown in the middle.
- Apply thinset with the correct notched trowel and back-butter tiles if the wall is uneven.
- Let the mortar cure before grouting, then seal cement grout in wet areas.
Color and Material Choices
White glossy ceramic is the classic, but the 3×6 size comes in far more than plain white. Soft grays, sage greens, navy, and matte black create modern, moody backsplashes. Glass subway tile adds depth and reflects light, ideal behind a range. Marble and natural-stone subway tiles bring veining and luxury at a higher cost and with more maintenance, since stone needs sealing. Handmade and zellige-style tiles have subtle surface variation and irregular edges that read as artisan and high-end. Choosing a color and material is your chance to make a familiar shape feel personal.
Comparing 3×6 to Other Tile Sizes
The 3×6 is the original, but larger subway formats like 4×12 and 4×16 have grown popular. The bigger sizes cover walls faster with fewer grout lines for a cleaner, more contemporary look, and they suit large modern kitchens. The classic 3×6, by contrast, has more grout lines and a tighter, more traditional rhythm that fits cottage, farmhouse, and vintage designs, and it handles tight spaces and curves better. Smaller mosaic subway tiles, around 1×2 or 2×4, work well in showers and small accents. If you want the timeless, slightly busier classic look, the 3×6 remains the benchmark.
Cost Expectations
Basic glossy ceramic 3×6 subway tile is among the most affordable tile you can buy, often $1 to $4 per square foot. Glass, marble, and handmade versions climb to $8 to $20 or more per square foot. A standard kitchen backsplash uses around 20 to 35 square feet, keeping the basic tile cost modest. Factor in thinset, grout, spacers, and trim, and always buy 10 percent extra for cuts and breakage.
Common Questions About 3×6 Subway Tile
Homeowners planning a backsplash or shower often ask the same things. How many tiles are in a square foot? Eight 3×6 tiles cover one square foot, which makes estimating quick once you know your square footage. Is glossy or matte better? Glossy reflects light and wipes clean easily, ideal for kitchens, while matte hides water spots and reads more contemporary. What grout line width should you use? A 1/16 to 1/8 inch line keeps the classic look tight and clean. Do you need trim pieces? Plan for bullnose or a metal edge profile wherever the tile ends at an exposed edge, since the cut sides are unglazed.
One more question worth answering: can a beginner install subway tile? It is one of the more forgiving tiles for a first-timer because the small, uniform size is easy to handle and cut, and the classic offset layout hides minor imperfections. Start with a small backsplash rather than a full shower, use a tile spacer system, and you can achieve professional-looking results on a first attempt.
Final Thoughts
3×6 subway tile earns its enduring popularity through versatility, low cost, and timeless proportions. Change the layout or grout color and you transform the look from classic farmhouse to sleek modern. Plan your pattern, choose grout deliberately, and set the tiles with consistent spacing. The result is a clean, durable surface that will look right for decades.
Prefer to explore on your own?
See how new flooring looks in your actual room in seconds — free, no signup.
Try the free Floor Studio →