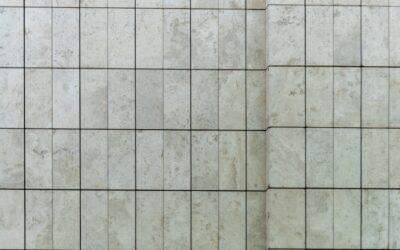
Few tile choices have stayed popular as long as the 3×6 subway tile backsplash. Born in New York City subway stations more than a century ago, this simple 3-inch by 6-inch rectangle has become the default for kitchens that want to look clean, bright, and timeless without gambling on a trend that dates in five years. I have installed thousands of these tiles, and I still recommend them constantly because they are affordable, forgiving to work with, and endlessly flexible in how they can be laid out. The look reads as either classic or modern depending entirely on the layout, grout, and finish you choose.
Part of our Kitchen Remodeling guide — explore the full guide →
What surprises most homeowners is how many decisions hide inside such a simple tile. The same 3×6 white ceramic can look like a traditional farmhouse, a crisp modern galley, or an edgy loft depending on whether you run it in a standard offset, stack it straight, turn it vertical, or set it in a herringbone. In this guide I will cover the layout patterns, realistic costs, grout and trim choices, and the installation details that separate a professional-looking backsplash from an amateur one. Whether you are hiring out the work or setting the tile yourself, understanding these choices up front saves money and regret.
Why the 3×6 Subway Tile Endures
The 3×6 format hits a sweet spot that larger and smaller tiles miss. It is big enough to cover a backsplash quickly without a fussy grid, yet small enough to turn corners, wrap around outlets, and follow the typical 18-inch gap between countertop and upper cabinets cleanly. Three rows of tile plus grout lines fill that gap almost perfectly, which is one reason the size feels so natural in a standard kitchen. That dimensional friendliness is a big part of why it has never gone out of style.
Beyond the practical fit, the tile carries almost no design risk. A white 3×6 backsplash works with white, gray, navy, green, or wood cabinets and with nearly any countertop from quartz to butcher block. Because it is so neutral, you can express personality through grout color, layout pattern, and edge trim rather than committing to a bold tile you might tire of. For resale-minded homeowners, that neutrality is gold; buyers almost universally accept a subway backsplash, whereas a trendy mosaic can be a turnoff.
Layout Patterns That Change the Whole Look
The most common layout is the classic offset, where each row shifts by half a tile, creating that familiar brick pattern. It is forgiving because slight size variations disappear in the running bond, and it suits traditional and transitional kitchens beautifully. A one-third offset is a subtler variation that many designers now prefer because it avoids the very center-heavy shadow line that a perfect 50 percent offset can create with modern rectified tiles.
For a more contemporary feel, a stacked layout runs tiles in straight vertical and horizontal grid lines, emphasizing clean geometry and making a small kitchen feel taller and more modern. Vertical stacking, where the 3×6 stands on end, is a striking way to add height and works well behind a range or in a narrow section. Herringbone, with tiles set at 45 or 90 degrees, is the most dramatic and labor-intensive option; it eats more tile through cuts and takes far longer to set, but it delivers a high-end custom look that photographs beautifully.
My advice is to choose the layout before you buy, because pattern affects how much tile you need. Herringbone and vertical layouts generate more waste from cuts, so order 15 to 20 percent extra rather than the 10 percent overage that suffices for a simple offset. Dry-lay a small section on the counter first to confirm the pattern reads the way you imagined before any thinset goes on the wall.
What a 3×6 Subway Tile Backsplash Costs
One reason this backsplash is so popular is the price. Basic white ceramic 3×6 tile runs as little as $2 to $4 per square foot, while higher-end handmade, glass, or zellige-style versions climb to $10 to $25 per square foot. For a typical kitchen backsplash of roughly 30 square feet, the tile itself might cost anywhere from $60 for builder-grade ceramic to several hundred dollars for artisan tile. That wide range means you can hit almost any budget with the same familiar shape.
Installation is where most of the money goes. Professional tile setters typically charge $8 to $15 per square foot for labor on a straightforward offset backsplash, pushing an installed cost of $10 to $20 per square foot all in. Complex patterns like herringbone, natural stone versions, or tricky layouts around windows and open shelving raise labor toward $20 or more per square foot. Add materials like thinset, grout, spacers, and edge trim, usually another $50 to $150 for a standard kitchen. A DIY installation can cut the labor entirely, and this tile is one of the friendliest projects for a careful first-timer.
Choosing Grout Color and Joint Width
Grout is the single most transformative and underrated choice in a subway backsplash. White tile with bright white grout gives a seamless, clean, almost monolithic look that feels modern and expansive. The same tile with medium gray grout emphasizes the brick pattern and reads more traditional and dimensional, while dark charcoal or black grout creates a bold, graphic, industrial statement. Because grout is cheap, this is where you can add serious personality at almost no extra cost.
Joint width matters too. Most 3×6 subway tiles are set with a tight 1/16-inch to 1/8-inch joint, which keeps the classic proportions and minimizes grout maintenance. Wider joints emphasize the grid but collect more grime and require sealing diligence. I generally recommend a quality stain-resistant grout, and for kitchens especially, consider a single-component pre-mixed or urethane grout that resists staining from cooking splatter better than standard cementitious grout. Seal cementitious grout after it cures, and expect to reseal every year or two behind a busy range.
Edge Trim and Finishing Details
Nothing marks the difference between a professional and a rushed backsplash like the edges. Where tile meets an open wall, ends at an upper cabinet, or turns an outside corner, you need a clean finish. The traditional approach is a bullnose tile with a rounded finished edge, and many subway lines offer matching bullnose pieces. If your tile has no bullnose, a metal or PVC edge trim, called Schluter or tile edging, gives a crisp modern border that many contemporary kitchens now prefer.
Outlets and switches deserve attention too. Backsplash outlets should have their boxes brought forward with spacers so the receptacle sits flush with the finished tile surface, and switch plates should sit on top of the tile, not sink into it. Cutting neat holes around outlets with a diamond hole saw or careful nibbling is what makes a backsplash look built-in rather than tacked on. These small details take extra time but are the ones people notice, consciously or not, when they walk into the kitchen.
Installation Tips From the Field
A successful 3×6 subway tile backsplash starts with a flat, clean, dry wall. Fill any gaps, sand down high spots, and wipe away grease, because thinset does not bond to a greasy or dusty surface. Find your center point and establish level layout lines rather than trusting the countertop or cabinets to be perfectly level, since they rarely are. A small variation compounded across a wall becomes a visible slope, so measure and mark before spreading any mortar.
Use the right trowel, typically a 3/16-inch or 1/4-inch notch, and back-butter tricky pieces around outlets for full coverage. Spacers keep your joints uniform, and periodically stepping back to check the overall line prevents drift. Let the thinset cure per the bag, usually 24 hours, before grouting, and do not rush the grout cleanup; a haze left too long is miserable to remove. Wipe with a damp, well-wrung sponge in gentle circles, then a final buff once the haze forms. Patience at these two stages, setting and grouting, is what produces a backsplash that looks like it belongs in a magazine.
Design Ideas to Make It Your Own
Even within such a classic format, there is plenty of room to personalize. Color is the easiest lever: soft sage green, pale blue, blush, or a deep glossy black transforms the same shape into something with real character. A glossy glaze bounces light and brightens a small kitchen, while a matte or handmade tile with slight color variation adds warmth and an artisanal feel. Zellige-style subway tiles, with their uneven surfaces and glaze pooling, bring a lot of texture and are having a strong moment in design.
You can also mix layouts within one kitchen, running a standard offset across the main wall and switching to vertical or herringbone behind the range as a focal accent. Extending the backsplash all the way to the ceiling behind open shelving or a hood makes a dramatic statement and modernizes the whole space. Whatever direction you choose, the 3×6 subway tile gives you a reliable, budget-friendly foundation that will still look intentional and fresh long after flashier trends have faded from other people’s kitchens.
Prefer to explore on your own?
See how new flooring looks in your actual room in seconds — free, no signup.
Try the free Floor Studio →