There is a reason the white subway tile bathroom has stayed in style for more than a century: it is clean, bright, affordable, and endlessly adaptable. First used in the New York City subway system in 1904, the humble 3-by-6-inch glazed white rectangle works in farmhouse, modern, traditional, and transitional homes alike. But how you lay it, what grout you choose, and where you use it make the difference between a fresh, designer result and a builder-basic one. Here is how to get it right.
Part of our Bathroom Remodeling & Flooring guide — explore the full guide →
- Why White Subway Tile Endures
- Where to Use It in the Bathroom
- Layout Patterns That Change the Whole Look
- Grout Color: The Detail That Defines the Room
- What It Costs
- Installation Basics
- Design Ideas to Avoid a Dated Look
- Cleaning and Maintenance
- Is It Right for Your Bathroom?
- Choosing Ceramic, Porcelain, or Handmade Tile
- Trim Pieces and Finishing Edges
- Estimating How Much Tile to Buy
Why White Subway Tile Endures
Subway tile earns its lasting popularity through pure versatility. White reflects light and makes small bathrooms feel larger and brighter, a real advantage in the compact spaces most homes have. The tile is inexpensive, widely available, and easy for a handy homeowner to install. Because it is a neutral backdrop, you can change the entire feel of the room by swapping grout color, hardware, paint, or accessories without ever touching the tile. It also has strong resale appeal; buyers see it as classic rather than trendy, so it rarely turns them off.
Where to Use It in the Bathroom
White subway tile is remarkably flexible. Common applications include:
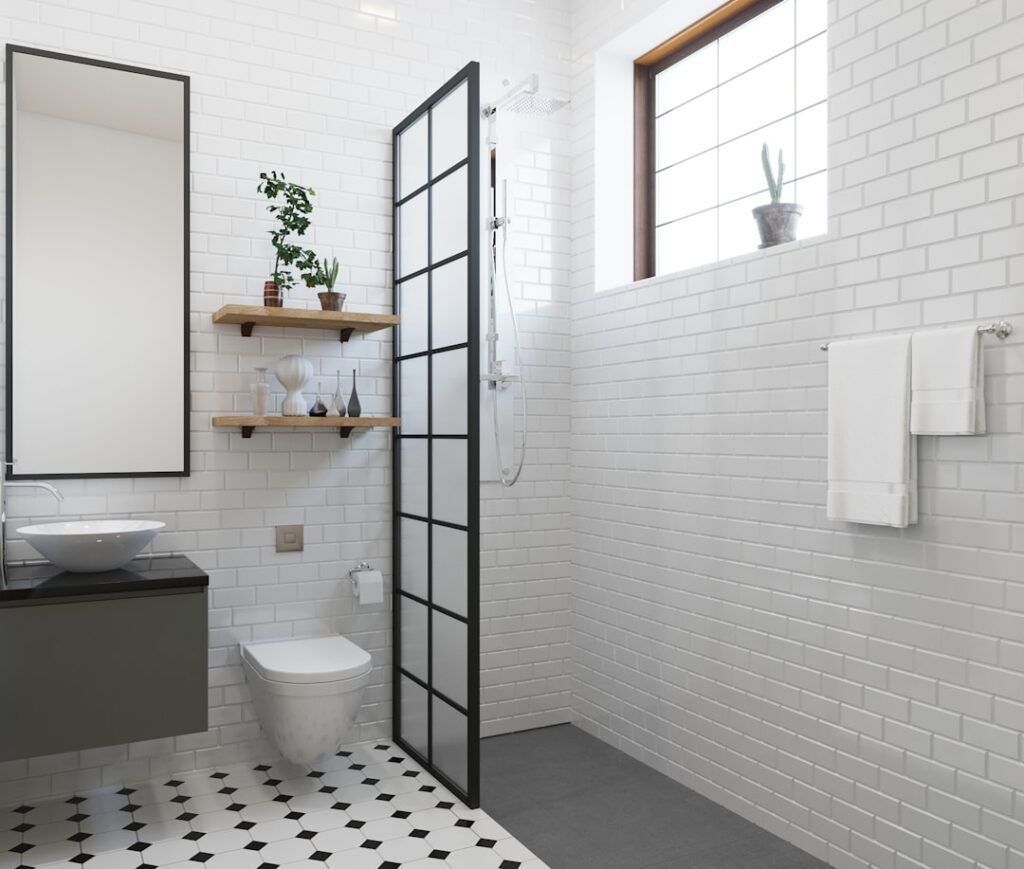
- Shower and tub surrounds: The most popular use, running tile from the tub or shower base to the ceiling for a bright, waterproof enclosure.
- Wainscoting: Tile the lower 36 to 48 inches of the walls with a bullnose or pencil-trim cap for a crisp, traditional look.
- Accent walls: A full feature wall behind the vanity or tub.
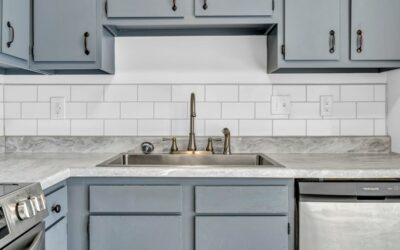
- Backsplash: A short run behind the sink to protect the wall and tie the room together.
- Floor-to-ceiling: A dramatic, spa-like fully tiled bathroom.
Layout Patterns That Change the Whole Look
The same white tile reads completely differently depending on the pattern. The classic 50% offset (running bond), where each row shifts half a tile, is the traditional default. A one-third offset feels more current and avoids the “lightning bolt” grout line some dislike. A stacked (grid) layout, tiles aligned in straight vertical and horizontal lines, looks clean and modern. Herringbone and vertical stacking add contemporary interest and make a small space feel taller. Vertical subway tile in particular is a favorite for making low bathrooms feel more spacious. Choose the pattern before you buy, since some layouts use more tile.
Grout Color: The Detail That Defines the Room
Grout choice is the single biggest design decision after layout. White or off-white grout gives a seamless, soft, all-white look that feels bright and calm but shows dirt and requires more cleaning. Light gray grout is the most popular compromise: it subtly outlines each tile, hides grime better, and looks fresh without being stark. Dark gray or charcoal grout creates bold, graphic contrast that emphasizes the brick pattern and reads modern or industrial. There is no wrong answer, but know that darker grout draws attention to any imperfect tile spacing, so it demands careful installation.
What It Costs
A white subway tile bathroom is one of the most budget-friendly tile projects available. Basic glazed ceramic subway tile costs as little as $0.15 to $1 per square foot, with designer and handmade versions running $7 to $25. For materials on an average tub surround (about 100 square feet including tile, thinset, grout, and trim), budget roughly $150 to $500 for standard tile. Professional installation adds $7 to $15 per square foot, so a pro-installed shower surround typically lands between $1,000 and $2,500. DIY installation can cut that dramatically for confident homeowners.
Installation Basics
Tiling is achievable for a patient DIYer who follows the fundamentals. Start with a flat, waterproof substrate: cement backer board or a foam waterproofing panel in wet areas, never regular drywall or greenboard behind a shower. Dry-lay a row to plan your layout and center the pattern. Spread thinset mortar with a notched trowel, set tiles using spacers (1/16 to 1/8 inch is typical for subway tile), and check level frequently. Let the thinset cure, then grout, wipe, and seal. The most common DIY mistakes are inadequate waterproofing behind the tile, uneven spacing, and failing to keep courses level, which compounds into a crooked wall by the top.
Design Ideas to Avoid a Dated Look
White subway tile can look either fresh or dated depending on the details. Keep it current with these moves:
- Choose light gray or dark grout instead of stark white to add definition.
- Try a modern layout like vertical stack or herringbone rather than only the standard offset.
- Pair it with matte black or brushed brass fixtures for contrast.
- Add a contrasting accent, such as a penny-tile or hexagon floor or a colored niche.
- Use a beveled-edge tile for subtle dimension and light play.
- Extend tile all the way to the ceiling for a more custom, high-end feel.
Cleaning and Maintenance
Glazed white tile itself is easy to keep clean; a quick wipe with a mild bathroom cleaner handles most grime, and the glossy surface resists staining. The grout is the real maintenance point. Seal cement-based grout after installation and reseal annually to prevent staining and mildew, or specify epoxy grout, which is waterproof and stain-resistant but harder to install. Squeegee shower walls after use, run the exhaust fan to control moisture, and scrub grout lines periodically with a grout brush and a baking-soda paste or oxygen bleach to keep them bright.
Is It Right for Your Bathroom?
A white subway tile bathroom is a smart choice for almost anyone: it is affordable, DIY-friendly, universally appealing, and easy to update over time by changing everything around it. It works especially well in small bathrooms that need brightening and in homes where resale value matters. The only downside is that, done carelessly with white grout and a plain offset, it can look generic. Add a thoughtful layout, considered grout color, and contrasting fixtures, and you get a bathroom that looks fresh today and will still look right a decade from now.
Choosing Ceramic, Porcelain, or Handmade Tile
Not all white subway tile is the same, and the body material affects both price and performance. Standard glazed ceramic is the most common and affordable, perfectly suited to walls and shower surrounds that do not take foot traffic. Porcelain is denser, harder, and less porous, making it the better choice for floors or heavy-use areas, though it costs a bit more and is slightly harder to cut. Handmade or zellige-style tiles bring subtle color variation, irregular edges, and a light-catching, artisanal surface that reads as high-end; they cost significantly more and demand a more skilled installer because of their inconsistency. For most bathroom walls, quality ceramic delivers the classic look at the best value, while a splurge on handmade tile can make a feature wall genuinely special.
Trim Pieces and Finishing Edges
The details at the edges separate a polished job from a rough one. Where tile meets an outside corner, a raw cut edge looks unfinished, so plan your edge treatment before you buy. Options include bullnose tiles with one rounded, glazed edge for a soft traditional finish; a metal or PVC edge trim (Schluter profile) in chrome, brass, or matte black for a crisp modern line; or a mitered edge where two tiles meet at 45 degrees for a seamless, trimless look that requires precise cutting. Pencil-liner tiles cap the top of a wainscot run elegantly. Decide which look you want early, because bullnose and trim pieces must be ordered alongside your field tile and can have different lead times.
Estimating How Much Tile to Buy
Ordering the right quantity prevents both shortages and waste. Measure the total square footage of each area you plan to tile, multiply length by height for walls, and add the areas together. Then add 10 to 15 percent extra for cuts, breakage, and future repairs, and more for patterns like herringbone or diagonal layouts that generate more waste. Buy all your tile from the same production lot (dye lot) at once, since color and size can vary subtly between batches, and a mid-project reorder may not match. Keep a small box of leftover tile after the job; having exact-match spares makes repairing a cracked tile years later simple, whereas finding a discontinued match can be nearly impossible.
Timeless, budget-friendly, and infinitely customizable, white subway tile remains the safest and most versatile bet in bathroom design, as long as you sweat the details that make it feel intentional rather than default.
Prefer to explore on your own?
See how new flooring looks in your actual room in seconds — free, no signup.
Try the free Floor Studio →