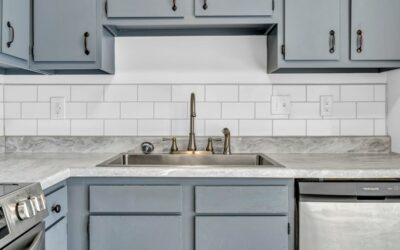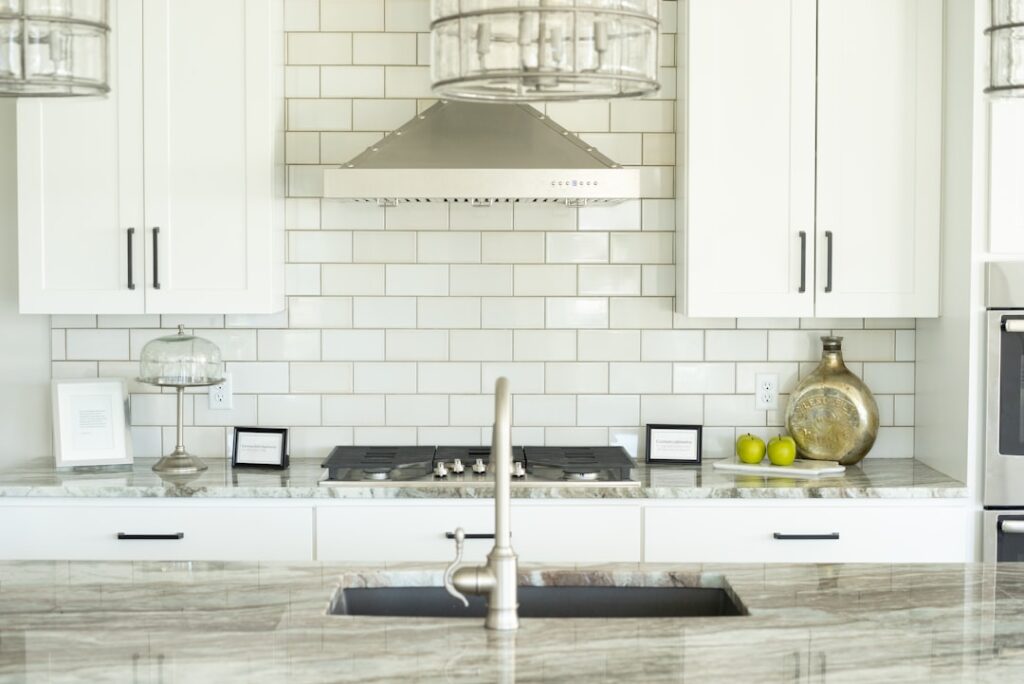
The white subway tile backsplash kitchen look has stayed at the top of design trends for more than a century, and for good reason: it is clean, bright, endlessly versatile, and one of the most affordable ways to make a kitchen feel fresh and finished. Originally used in New York City subway stations in 1904, the humble 3-by-6-inch glossy white tile has proven it works in every style of home, from farmhouse to modern to traditional. Whether you are remodeling top to bottom or just refreshing the wall behind your counter, white subway tile delivers a high-end look on a modest budget.
Part of our Kitchen Remodeling guide — explore the full guide →
- Why White Subway Tile Never Goes Out of Style
- Popular Layout Patterns
- Grout Color Changes Everything
- Tile Size and Finish Options
- What It Costs
- DIY Installation Overview
- Common Mistakes to Avoid
- Styling the Rest of the Kitchen Around It
- Ceramic vs Porcelain vs Glass
- Trimming the Edges Cleanly
- Where the Backsplash Should Start and Stop
Why White Subway Tile Never Goes Out of Style
Trends come and go, but white subway tile endures because it is a neutral backdrop rather than a statement that dates quickly. It reflects light, making small kitchens feel larger and brighter. It pairs with any cabinet color, any countertop, and any hardware finish, so you can change the rest of your kitchen over the years without ripping out the backsplash. It is also inexpensive, widely available, and forgiving to install. That combination of beauty, flexibility, and value is why designers keep recommending it and why buyers respond to it at resale.
Popular Layout Patterns
The layout you choose dramatically changes the personality of the same white tile.
- Classic running bond (50 percent offset): Each row shifts half a tile, the traditional brick pattern. Timeless and safe.
- Stacked (straight set): Tiles align in a clean grid, giving a crisp, modern, architectural feel. Very popular in contemporary kitchens.
- Herringbone: Tiles set at 45 or 90 degrees in a zigzag, adding movement and a designer touch. More cuts and labor, but striking.
- Vertical stack: Tiles run upright in columns, drawing the eye up and making low ceilings feel taller.
- One-third offset: A subtler brick pattern that avoids the busy look some find in a 50 percent offset with larger tiles.
Grout Color Changes Everything
The single biggest decision after layout is grout color, because it defines how much the pattern shows. White or off-white grout creates a seamless, soft look where the tile field reads as one bright plane. Light gray grout is the designer favorite, subtly outlining each tile so the pattern reads without being harsh, and it hides dirt and cooking splatter better than pure white. Dark gray or black grout makes a bold graphic statement, emphasizing every tile edge for a modern or industrial look. Many homeowners regret pure white grout in a working kitchen because it stains; a light gray is the practical, attractive compromise.
Tile Size and Finish Options
The classic 3-by-6-inch tile is just the start. You can also find 2-by-4, 4-by-8, 4-by-12, and elongated 2-by-8 subway tiles for a more contemporary proportion. Finish matters too: glossy tile is the traditional choice, bright and easy to wipe clean, while matte tile offers a softer, more modern feel. Beveled-edge subway tile catches light for a bit of dimension, and handmade or zellige-style tiles with slight irregularities bring artisanal warmth. Ceramic is the affordable standard; porcelain and glass cost more but offer added durability or sparkle.
What It Costs
A white subway tile backsplash is remarkably budget-friendly. Basic ceramic subway tile costs just $2 to $6 per square foot for materials, with premium handmade or glass versions reaching $10 to $25. A typical kitchen backsplash covers 30 to 40 square feet, so tile material often totals only $100 to $300. Professional installation adds $10 to $20 per square foot, bringing a pro-installed backsplash to roughly $600 to $1,200. Because the tile is inexpensive and the area is small, this is one of the most cost-effective upgrades in a kitchen.
DIY Installation Overview
A subway tile backsplash is one of the most beginner-friendly tile projects, since it sits on a vertical surface with no foot traffic and simple straight tiles.
- Clean and lightly sand the wall, and mark a level line as your starting reference; never trust the countertop to be level.
- Spread thinset or use a quality pre-mixed mastic with a notched trowel over a small area.
- Press tiles in place, using spacers or the tile’s built-in lugs for consistent 1/16 or 1/8-inch joints.
- Cut tiles to fit around outlets and at the ends with a wet saw or a snap cutter.
- Let the adhesive cure, then grout, wiping diagonally across the joints with a damp sponge.
- Seal the grout if it is a cement-based, non-epoxy type, and caulk the joint where tile meets the countertop.
Common Mistakes to Avoid
The most frequent errors are starting off the countertop instead of a level line, leaving the backsplash to slope with a crooked counter, and forgetting to caulk rather than grout the counter-to-tile joint, which then cracks. Others include choosing pure white grout that stains in a working kitchen, uneven grout joints from rushing, and not sealing cement grout so it discolors over time. Turning off the power and adjusting outlet boxes with spacer extenders so the covers sit flush over the new tile is another detail amateurs miss.
Styling the Rest of the Kitchen Around It
Because white subway tile is neutral, it lets other elements shine. Pair it with white shaker cabinets for a classic farmhouse look, with navy or deep green lowers for contrast, or with warm wood tones for a Scandinavian feel. Brass or matte black hardware pops against the bright field. Under-cabinet lighting makes the glossy surface glow. The tile stays quietly in the background while your cabinets, counters, and fixtures carry the personality, which is exactly why it works so well.
Ceramic vs Porcelain vs Glass
The material behind the white finish affects durability, look, and cost. Ceramic is the traditional and most affordable choice, easy to cut and perfectly suited to a low-traffic backsplash that never bears foot traffic. Porcelain is denser and tougher, a small step up in price and durability, though its hardness makes it slightly harder to cut cleanly. Glass subway tile has a luminous, reflective quality that bounces light beautifully and feels distinctly modern, but it costs more, shows adhesive through the translucent body so it needs white thinset, and requires careful cutting to avoid chipping. For most kitchens, ceramic delivers the classic look at the best price, while glass is a worthwhile splurge where you want extra brightness and sparkle.
Trimming the Edges Cleanly
How you finish the outer edges of the backsplash separates a polished job from an amateur one. Where the tile field ends at an open edge, such as beside a window or where the backsplash stops, you need a clean transition. Options include a metal edge profile like Schluter in a finish matching your hardware, a ceramic bullnose or quarter-round trim tile if the line offers one, or a simple mitered edge for a seamless look. Many modern subway tiles have no matching bullnose, so a metal profile is often the cleanest solution. Plan the edge treatment before you start tiling, because discovering mid-project that your tile has no finished edge option forces an awkward compromise.
Where the Backsplash Should Start and Stop
Layout planning prevents common headaches. Standard backsplashes run from the countertop up to the underside of the upper cabinets, typically about 18 inches. Behind a range or cooktop, many homeowners extend the tile all the way to the hood or ceiling to create a focal point and protect the wall from cooking splatter. Decide whether you want the tile to wrap around corners and end at an inside or outside corner, and try to plan the horizontal layout so you avoid tiny sliver cuts at the ends by starting from a centered reference line. Around outlets, plan for the tile edges to fall cleanly and use spacer extenders so cover plates sit flush over the finished tile surface.
A white subway tile backsplash kitchen is the definition of a safe bet that never feels boring, delivering bright, timeless style at a fraction of the cost of trendier materials. Choose a layout that suits your taste, pick a practical light gray grout, and take your time installing straight, level rows. The result is a fresh, high-end look that will still feel current decades from now and pairs beautifully with whatever direction you take the rest of your kitchen.
Prefer to explore on your own?
See how new flooring looks in your actual room in seconds — free, no signup.
Try the free Floor Studio →