The subway tile backsplash remains one of the most popular kitchen upgrades for good reason. It is affordable, timeless, and works with virtually every kitchen style from farmhouse to modern minimalist. Whether you are renovating a dated kitchen or building new, a subway tile backsplash delivers clean lines and lasting appeal without breaking the budget.
Part of our Kitchen Remodeling guide — explore the full guide →
This guide covers everything you need to know about choosing and installing a subway tile backsplash in your kitchen, including tile sizes, materials, patterns, grout options, current color trends, step-by-step installation, and realistic cost expectations. For a broader look at tile options for floors and walls, visit our tile flooring guide.
- What Makes Subway Tile a Kitchen Backsplash Staple
- Subway Tile Sizes for Kitchen Backsplashes
- Subway Tile Materials
- Subway Tile Patterns
- Grout Options for Subway Tile Backsplashes
- Color Trends for Kitchen Subway Tile
- How to Install a Subway Tile Backsplash
- Cost of a Subway Tile Kitchen Backsplash
- Maintenance Tips
- Final Thoughts
What Makes Subway Tile a Kitchen Backsplash Staple
Subway tile originated in the New York City subway system in the early 1900s. Its rectangular shape, glossy finish, and beveled edges were designed for easy cleaning in a high-traffic environment. Those same practical qualities make it ideal for kitchens where grease, steam, and food splatters are daily realities.
The appeal goes beyond function. Subway tile creates a uniform, orderly look that pairs well with almost any countertop material, cabinet color, or hardware finish. It serves as a neutral backdrop when you want other elements to stand out, or it becomes the focal point when you choose bold colors or creative patterns.
Subway Tile Sizes for Kitchen Backsplashes
While the classic 3×6 inch tile dominates the market, modern subway tiles come in several sizes that dramatically change the look of your backsplash.
3×6 Inch (Classic)
The traditional subway tile size remains the most popular choice. It works in kitchens of any size and creates a familiar, classic look. The smaller format means more grout lines, which adds texture and visual interest. This size is also the most affordable and widely available.
4×12 Inch (Elongated)
The elongated subway tile has surged in popularity over the past few years. The longer format creates a more contemporary, streamlined appearance with fewer grout lines. It makes small kitchens feel wider and pairs especially well with modern and transitional kitchen designs.
4×16 Inch (Extra Long)
Extra-long subway tiles deliver a dramatic, modern look. The extended length emphasizes horizontal lines and creates a sleek, almost seamless appearance. This size works best in larger kitchens where the proportions match the scale of the space. Fewer grout lines also mean less maintenance over time.
2×8 Inch and Other Variations
Skinny subway tiles in 2×8 or 2×6 dimensions offer a fresh take on the classic format. The narrower profile creates a more delicate, refined aesthetic. You will also find 3×12 and 4×8 options that fall between the standard sizes.
Subway Tile Materials
Ceramic Subway Tile
Ceramic is the most common and budget-friendly material for subway tile backsplashes. It is easy to cut, lightweight, and available in an enormous range of colors and finishes. Standard ceramic subway tile costs between $1 and $5 per square foot. The main drawback is that ceramic is softer than porcelain and can chip more easily, though this is rarely an issue for a backsplash that does not receive physical impact.
Porcelain Subway Tile
Porcelain subway tile is denser, harder, and more water-resistant than ceramic. It withstands heat and moisture exceptionally well, making it a strong choice for behind-the-stove installations. Porcelain typically costs $3 to $8 per square foot. The color runs through the entire body of the tile, so chips are less visible.
Glass Subway Tile
Glass subway tiles create a luminous, reflective surface that brightens kitchens and adds depth. They are completely waterproof and stain-resistant. However, glass tiles are more expensive ($7 to $20 per square foot), more difficult to cut, and show imperfections in the wall surface more readily. They also require specific adhesives and careful handling during installation.
Natural Stone Subway Tile
Marble, travertine, and slate subway tiles bring organic texture and luxury to a kitchen backsplash. Each piece is unique, which creates a one-of-a-kind look. Natural stone requires sealing to prevent staining and costs $8 to $25 per square foot. It demands more maintenance than ceramic or porcelain but delivers unmatched character.
Subway Tile Patterns
The pattern you choose transforms the personality of your backsplash just as much as the tile itself.
Running Bond (Offset)
The classic running bond pattern staggers each row by half the tile length, creating the traditional subway look everyone recognizes. It is the easiest pattern to install and produces the least waste. This is the go-to choice for timeless kitchens.
Herringbone
Herringbone arranges tiles at 45-degree angles in a V-shaped zigzag. It adds dramatic visual movement and works as a stunning focal point behind a range or sink. The trade-off is more complex installation, more cuts, and higher labor costs. The result, however, is worth the investment for kitchens that need a wow factor.
Vertical Stack
Stacking tiles vertically with aligned grout lines creates a modern, architectural look. Vertical orientation draws the eye upward, making kitchens with low ceilings feel taller. This pattern has become increasingly popular in contemporary and Scandinavian-inspired kitchens.
Horizontal Stack
Similar to running bond but with aligned grout lines instead of staggered joints. Horizontal stacking delivers a clean, grid-like appearance that reads as modern and intentional. It requires precise installation since any alignment issues are immediately visible.
Crosshatch and Basketweave
These patterns alternate tile orientation in groups, creating geometric interest. They work well as accent sections within a larger backsplash or for homeowners who want something unique without going too bold.
Grout Options for Subway Tile Backsplashes
Grout Color
Grout color is one of the most impactful decisions you will make. White grout with white tile creates a seamless, clean look. Dark grout with white tile highlights the tile pattern and adds a graphic quality. Matching grout to tile color minimizes the grid effect for a more uniform surface. Gray grout is the most forgiving option for hiding dirt and discoloration over time.
Grout Width
Standard grout lines for subway tile range from 1/16 inch to 1/8 inch. Thinner grout lines create a sleeker, more modern look. Wider grout lines emphasize the individual tiles and add a more traditional or handmade feel.
Sanded vs. Unsanded Grout
For grout lines 1/8 inch or smaller, use unsanded grout. For wider joints, sanded grout provides better structural integrity. Epoxy grout is a premium option that resists staining and does not require sealing, though it costs more and is harder to work with.
Color Trends for Kitchen Subway Tile
White remains the dominant subway tile color for kitchens, and it is unlikely to go out of style. However, several other colors have gained serious traction.
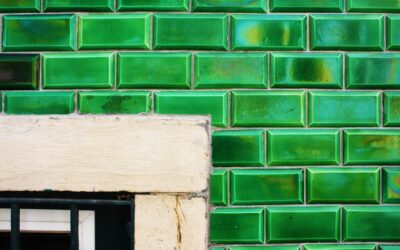
Soft greens (sage, hunter, and eucalyptus) bring warmth and a connection to nature. Navy blue and deep teal create bold contrast against white or wood cabinets. Warm whites with creamy or slightly yellow undertones feel less sterile than bright white. Black subway tile paired with light grout makes a dramatic statement in modern kitchens. Zellige-style tiles with handmade imperfections and varied glazes continue to trend for their artisan character.
How to Install a Subway Tile Backsplash
Step 1: Prepare the Wall
Clean the wall surface and ensure it is smooth, dry, and free of grease or loose paint. Fill any holes or imperfections with spackle and sand smooth. If the wall is freshly painted, wait at least two weeks before tiling.
Step 2: Plan Your Layout
Measure the backsplash area and calculate how many tiles you need, adding 10 percent for cuts and waste. Mark a level horizontal line where the first row will start. Dry-lay tiles on the counter to plan your pattern and identify where cuts will fall.
Step 3: Apply Thinset or Mastic
For ceramic and porcelain subway tile, use premixed mastic adhesive or thinset mortar. Spread adhesive over a small section of wall using a notched trowel. Work in small areas so the adhesive does not dry before you place tiles.
Step 4: Set the Tiles
Press tiles firmly into the adhesive, using tile spacers to maintain consistent grout lines. Start from the center of your layout and work outward. Check level frequently. Cut tiles as needed using a manual tile cutter or wet saw.
Step 5: Grout
Wait 24 hours for the adhesive to cure. Mix grout to the consistency of peanut butter and spread it diagonally across tile joints using a rubber grout float. Wipe excess grout with a damp sponge after 15 to 20 minutes. Allow grout to cure for 24 to 72 hours.
Step 6: Seal and Finish
Apply grout sealer to protect against staining and moisture penetration. Install any edge trim or caulk along countertops, cabinets, and corners using color-matched silicone caulk.
Cost of a Subway Tile Kitchen Backsplash
Material costs vary widely depending on the tile you choose. Ceramic subway tile runs $1 to $5 per square foot, porcelain $3 to $8, glass $7 to $20, and natural stone $8 to $25. For a typical kitchen backsplash covering 25 to 35 square feet, tile materials alone cost between $25 and $875.
Professional installation adds $10 to $25 per square foot, including materials like adhesive, grout, spacers, and sealant. Total installed cost for an average kitchen backsplash ranges from $400 to $1,500 for ceramic or porcelain and $800 to $2,500 or more for glass or stone.
DIY installation can cut costs significantly. If you have basic tools and patience, a ceramic subway tile backsplash is one of the more approachable tile projects for handy homeowners.
Maintenance Tips
Wipe your backsplash regularly with a damp cloth and mild dish soap. Avoid abrasive cleaners on glazed surfaces. Reseal grout every one to two years to prevent staining and mildew. Address any cracked or loose tiles promptly to prevent moisture from reaching the wall behind.
Subway tile backsplashes are among the lowest-maintenance kitchen upgrades available. With proper care, they last decades without needing replacement.
Final Thoughts
A subway tile backsplash is one of the smartest investments you can make in your kitchen. It protects walls, adds visual appeal, and works with any design style. By choosing the right size, material, pattern, and grout combination, you can create a look that ranges from perfectly classic to boldly contemporary. Explore our full tile flooring guide for more inspiration on using tile throughout your home.
Prefer to explore on your own?
See how new flooring looks in your actual room in seconds — free, no signup.
Try the free Floor Studio →