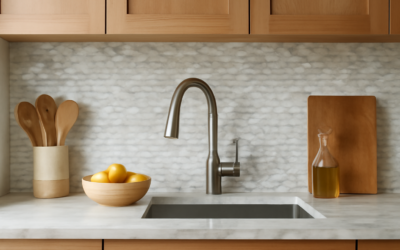
There’s a reason builders, designers, and DIYers keep coming back to the same 3-by-6-inch glossy rectangle for a century running. A white subway tile backsplash is the little black dress of kitchen design — it works in a farmhouse, a modern loft, or a traditional colonial, it costs next to nothing, and it never looks dated. But the difference between a backsplash that looks builder-basic and one that looks custom comes down to layout, grout color, and clean installation. This guide covers the choices that matter and how to get the tile on the wall right the first time.
- Why White Subway Tile Endures
- Layout Patterns That Change the Look
- Grout Color Is the Real Design Decision
- Tile Size and Finish Options
- Step-by-Step Installation
- Cost to Install
- Keeping It Looking New
- Tools and Materials Checklist
- Finishing the Edges Cleanly
- Common Mistakes to Avoid
- White Subway Tile FAQ
Why White Subway Tile Endures
Originally designed for New York City subway stations in 1904, the tile earned its name honestly. The bright white surface reflects light and makes small kitchens feel bigger, hides nothing yet flatters everything, and pairs with any countertop from butcher block to black granite to white quartz. It’s also one of the cheapest backsplash materials you can buy, which is why it shows up everywhere from starter homes to high-end remodels. The classic ceramic version starts around $0.15 to $0.50 per tile, or roughly $2 to $5 per square foot for basic field tile.
Layout Patterns That Change the Look
- Classic 50% offset (running bond) — each row shifted half a tile, the default brick-lay look. Safe and timeless.
- Stacked (straight set) — tiles aligned in a grid for a clean, modern feel. Requires very straight walls.
- 1/3 offset — a subtler stagger that reads more custom than the standard half-offset.
- Herringbone — tiles at 45 or 90 degrees for a dynamic, upscale pattern that uses more tile and labor.
- Vertical stack or vertical offset — turning the tile 90 degrees to draw the eye up and add height.
The layout you pick can make the exact same tile feel classic or contemporary, so decide before you buy — herringbone in particular needs about 10 to 15 percent extra tile for cuts.
Grout Color Is the Real Design Decision
People obsess over the tile and ignore the grout, but grout color defines the entire look. White grout with white tile creates a soft, seamless, monochromatic surface that hides less but reads clean and bright. Light gray grout is the crowd favorite — it subtly outlines each tile and shows a little less dirt over time. Charcoal or black grout turns a plain white backsplash into a graphic, high-contrast statement, though it demands precise spacing because any crooked line jumps out. For most kitchens I steer clients toward a light-to-medium gray as the low-maintenance sweet spot.
Tile Size and Finish Options
The traditional size is 3-by-6, but 2-by-4, 4-by-12, and 4-by-16 “modern subway” tiles have gained ground for a sleeker, more contemporary look with fewer grout lines. Finish matters too: glossy is classic and easy to wipe clean, while matte reads softer and more modern but shows fingerprints less. Beveled-edge subway tile catches light along each edge for a bit of dimension, and handmade or zellige-style tiles bring subtle color variation and an artisanal vibe at a higher price — often $10 to $25 per square foot.
Step-by-Step Installation
- Prep the wall. Clean it, patch holes, and make sure it’s flat. Remove outlet covers and turn off power at those circuits.
- Find your center and level line. Snap a level starting line — never trust the countertop to be level.
- Spread thinset or use pre-mixed mastic with a 3/16-inch notched trowel over a small workable area.
- Set the tile with spacers (1/16 to 1/8 inch) for consistent grout lines, checking level as you go.
- Cut edge and outlet tiles with a wet saw or a manual snap cutter for straight cuts.
- Let it cure 24 hours, then grout, wiping diagonally with a damp sponge.
- Seal the grout after it cures and caulk the seam where tile meets countertop.
Cost to Install
A standard kitchen backsplash covers roughly 30 square feet. DIY materials — tile, thinset, grout, spacers, and sealer — typically run $150 to $400 for basic white subway tile. Hiring a tile setter adds labor of $8 to $15 per square foot, bringing a professional install to around $600 to $1,300 for most kitchens. Herringbone or specialty tile pushes the labor higher. Even at the top of that range, subway tile remains one of the most affordable ways to upgrade a kitchen.
Keeping It Looking New
Wipe the glossy surface with any mild cleaner — grease splatter behind a range comes right off. The grout is where dirt shows, so seal it on install and reseal every year or two, and hit stubborn grout haze with a grout brush and an oxygen-based cleaner. Because a white subway tile backsplash never goes out of style, doing the install carefully pays off for decades — this isn’t a trend you’ll be ripping out in five years.
Tools and Materials Checklist
Round everything up before you spread the first trowel of thinset — a backsplash goes on fast once it’s moving, and stopping to run to the store means half-set adhesive. For a standard 30-square-foot kitchen you’ll want:
- Field tile plus 10 to 15 percent overage — buy from the same dye lot so the white stays consistent.
- Adhesive — pre-mixed mastic is fine for a dry kitchen wall; use thinset for larger or heavier tile.
- 3/16-inch V-notch trowel, tile spacers, and a rubber grout float.
- Manual snap cutter for straight cuts and a wet saw or angle grinder with a diamond blade for outlet and edge cuts.
- Unsanded grout (grout lines under 1/8 inch), a grout sponge, sealer, and color-matched caulk for the countertop seam.
- 4-foot level, tape measure, chalk line, and a scrap 1-by-2 batten to support the first row.
Finishing the Edges Cleanly
Nothing gives away a rushed job faster than a raw, ugly tile edge where the backsplash ends. You have three good options. Bullnose subway tile — a factory-finished rounded edge — is the most traditional and blends seamlessly, though white bullnose can be hard to source in every tile line, so buy it up front. A metal or PVC edge trim (Schluter is the go-to brand) gives a crisp modern border in chrome, brushed nickel, or brass and installs right along with the field tile. The third route, favored on modern stacked layouts, is a mitered or caulked raw edge painted to match, which reads clean but takes a steady hand. Decide before you set the last column so the edge tiles land where you want them.
Common Mistakes to Avoid
- Starting off the countertop. Counters are rarely level. Start from a snapped level line and shim the bottom row instead, or your whole grid drifts.
- Skimping on layout planning. Dry-lay a row on the counter first so you don’t end up with a sliver cut in the most visible spot.
- Grouting too soon. Adhesive needs a full 24 hours to cure; grout over green thinset and tiles shift.
- Caulking the wrong seams. Grout the tile-to-tile joints, but caulk every change-of-plane — inside corners and where tile meets the countertop — so cracks don’t telegraph through.
- Leaving grout haze. Wipe diagonally with a barely damp sponge, then buff the film off with a dry microfiber once it dries, or the white tile stays cloudy.
White Subway Tile FAQ
How long does a backsplash install take? A DIYer can set a 30-square-foot kitchen in a day, grout the next, and be done in a weekend. A pro often does it in a single day.
Do I need to seal glossy tile? No — the glaze is impervious. Seal the grout, not the tile, unless you chose a porous handmade or zellige option.
Can I tile over existing backsplash? Sometimes, if it’s flat, sound, and scuff-sanded, but removing the old surface almost always yields a better, longer-lasting result.
Prefer to explore on your own?
See how new flooring looks in your actual room in seconds — free, no signup.
Try the free Floor Studio →