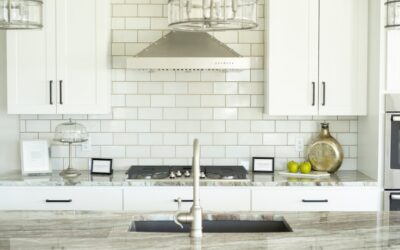
The tile that lined New York’s first subway stations in 1904 is still the most requested backsplash in American kitchens, and that is not an accident. Subway tile backsplashes hit a sweet spot of clean lines, low cost, and near-universal appeal that survives every design trend. The classic is a glossy white 3×6-inch ceramic rectangle, but the category has expanded into dozens of sizes, finishes, and layout patterns that let you keep the timeless bones while making the wall your own. Here is everything you need to plan, price, and install one.
Part of our Kitchen Remodeling guide — explore the full guide →
Why Subway Tile Never Goes Out of Style
Trends come and go, but the rectangle endures because it works with everything. Shaker cabinets, flat-panel modern, farmhouse, industrial loft, traditional colonial, subway tile slots into all of them. It is also one of the cheapest tiles on the market, easy for a first-timer to install, and simple to clean thanks to its usually glazed surface. Resale is another quiet advantage. Buyers rarely object to a white subway backsplash the way they might to a bold trend, so it protects your kitchen’s broad appeal.
Subway Tile Sizes and Materials
The original is 3×6 inches, but “subway” now describes any rectangular tile with a length roughly twice its height, and the format runs much wider.
- 3×6 inch: The classic proportion. Reads traditional and time-tested.
- 2×4 and 2×6 inch: Smaller, more detailed, good for tight backsplash strips.
- 4×12 and 4×16 inch: Elongated modern proportions with fewer grout lines and a cleaner, contemporary feel.
- Materials: Ceramic is the budget standard, porcelain is denser and more durable, and glass or handmade zellige-style tile add depth and light play at a higher price.
Ceramic subway tile starts around $2 to $4 per square foot. Porcelain runs $4 to $8, glass $10 to $25, and handmade or zellige tile can exceed $25 per square foot.
Layout Patterns That Change the Whole Look
The same tile looks completely different depending on how you set it. The pattern is where you make the wall yours.
Classic Running Bond (50% Offset)
Each row shifts half a tile, the standard brick pattern. It is the default for a reason: balanced, familiar, and forgiving of minor size variation.
Stacked (Grid)
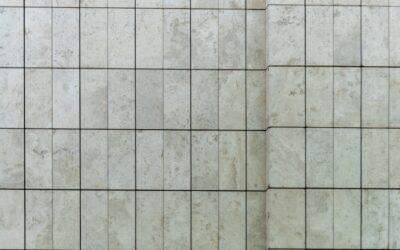
Tiles align in straight vertical and horizontal lines. Modern and crisp, but unforgiving. Any wall that is out of square shows immediately, so it demands careful layout.
Herringbone
Tiles set at 45 degrees in a zigzag. High-impact and dressy, but it wastes more tile in cuts and takes far longer to install. Order 15 to 20 percent extra for waste.
Vertical Stack or Vertical Offset
Turning the tile upright draws the eye up and makes a low backsplash feel taller. A fresh twist on a familiar tile.
One-Third Offset
Shifting each row a third of a tile instead of half is a subtle, contemporary update that avoids the harsh vertical grout stagger some people dislike in a 50 percent bond.
Grout Color: The Most Underrated Decision
Grout choice changes a subway backsplash more than the tile does. White tile with white grout reads seamless and airy but hides less dirt over the stove. White tile with light gray grout is the designer’s favorite compromise: it subtly outlines each tile so the pattern shows without a stark, high-contrast grid. White tile with dark charcoal or black grout is bold and graphic, emphasizing every line, and it hides grease well, but it is a strong statement you either love or tire of. For most kitchens, a light-to-medium gray grout is the safe, flattering choice.
What Subway Tile Backsplashes Cost
A typical kitchen backsplash covers about 30 square feet. Real-world budgets look like this:
- DIY, ceramic running bond: $150 to $350 for tile, thinset, grout, and spacers.
- DIY, glass or herringbone: $400 to $800 given pricier tile and more waste.
- Professionally installed, ceramic: $900 to $1,800 with labor at $8 to $12 per square foot.
- Professionally installed, herringbone or glass: $1,800 to $3,000 because the pattern and material add labor.
Because the tile itself is so cheap, subway tile is one of the best DIY value projects in the house. The labor is where the money goes.
How to Install Subway Tile
A running-bond subway backsplash is a realistic first tile job. Give it a weekend:
- Prep the wall. Degrease behind the range, patch holes, and sand glossy paint so thinset grabs.
- Mark a level line. Countertops are rarely perfectly level, so snap a level reference line and work from it rather than the counter.
- Dry-lay the first row. Plan so cut tiles land at outside corners and ends, and center the layout on a focal point like the range hood.
- Set the tile. Comb white thinset with a 3/16-inch V-notch trowel, press tiles in, and use 1/16-inch spacers for a tight modern joint or 1/8-inch for a classic look.
- Cut around outlets. Score and snap with a manual tile cutter for straight cuts, or use nippers and a grinder for outlet notches.
- Grout after 24 hours. Use unsanded grout for joints under 1/8 inch. Work it in diagonally, wipe with a damp sponge, and buff off the haze.
- Caulk the seams. Caulk where tile meets counter and where walls meet, using color-matched silicone rather than grout, since those joints move.
Design Tips to Elevate the Classic
Run the tile all the way to the underside of the upper cabinets for a finished look, and consider carrying it full height behind the range as a feature. A thin metal edge trim or a bullnose tile cleans up the exposed outer edges. If you want interest without leaving the classic, keep white 3×6 tile but switch the layout to vertical stack or the grout to charcoal. Those small moves keep the timeless appeal of subway tile backsplashes while making the kitchen feel intentional rather than default.
Frequently Asked Questions
How many tiles should I order?
Measure your square footage and add 10 percent for straight running-bond cuts and breakage, or 15 to 20 percent for herringbone and diagonal patterns that waste more. Buy it all in one lot number so shades match, and keep a few spares for future repairs.
Should the joints be tight or wide?
For a clean modern look, use 1/16-inch spacers and unsanded grout. For a more traditional, defined grid, go to 1/8 inch. Handmade and zellige-style tiles usually want a slightly wider joint to absorb their natural size variation.
Is white subway tile too plain?
Only if you set it the default way. Switching the layout to vertical stack or herringbone, or the grout to gray or charcoal, keeps the affordable classic tile while giving the wall real personality. That flexibility is exactly why the format has stayed popular for over a century.
The Bottom Line
Subway tile backsplashes stay popular because they are affordable, flexible, easy to clean, and safe for resale. Pick your proportion from classic 3×6 to elongated 4×12, choose a layout, and treat grout color as the design lever it really is. Budget $150 to $350 for a DIY ceramic run or up to $3,000 for a professionally installed herringbone in glass. Whatever you choose, it will still look right in a decade, which is exactly why the pattern has lasted more than a century.
Prefer to explore on your own?
See how new flooring looks in your actual room in seconds — free, no signup.
Try the free Floor Studio →