Few tile choices have aged as gracefully as the humble 3×6 rectangle. A subway tile bathtub surround pairs a waterproof, easy-to-clean wall with a look that has survived more than a century of design trends. Whether you are refreshing a tired 1980s fiberglass insert or building a brand-new wet wall, subway tile gives you a clean canvas that reads as classic in a farmhouse and crisp in a modern loft. This guide walks you through layouts, materials, real costs, and the installation details that separate a surround that lasts 30 years from one that leaks in three.
Part of our Bathroom Remodeling & Flooring guide — explore the full guide →
- Why Subway Tile Works So Well Around a Tub
- Choosing the Right Tile Material and Size
- Layout Patterns That Flatter a Bathtub
- What a Subway Tile Bathtub Surround Costs
- The Installation Details That Prevent Leaks
- Grout, Sealing, and Long-Term Care
- Design Ideas to Elevate a Simple Surround
- DIY Versus Hiring a Pro
- Common Mistakes to Avoid
Why Subway Tile Works So Well Around a Tub
Subway tile earns its keep in a bathtub area for practical reasons, not just looks. Glazed ceramic and porcelain resist water, shrug off soap scum, and wipe clean with a damp cloth. The small format also handles the slight curves and out-of-square walls common in older homes far better than large-format slabs, because each tile only has to sit flat across 6 inches instead of 24.
There is also a budget angle. A standard white 3×6 glazed ceramic runs $0.15 to $0.40 per tile, or roughly $2 to $6 per square foot before labor. That makes a full three-wall surround one of the most affordable upgrades in the bathroom. You get a high-end, custom-tiled appearance for a fraction of what natural stone or hand-painted tile would cost.
Choosing the Right Tile Material and Size
The word “subway” describes the shape, not the material. You can buy it in glazed ceramic, porcelain, glass, and even marble. For a tub surround that sees daily splashing, glazed ceramic is the workhorse and porcelain is the upgrade. Porcelain is denser, absorbs less than 0.5 percent water, and stands up better if the tile also wraps into a niche or a shower zone above the tub.
While the traditional size is 3×6 inches, the format has expanded. Popular options now include:
- 3×6 — the original proportion, ideal for a classic running bond
- 2×4 and 2×6 — a tighter grid that suits small powder-room tubs
- 4×8 and 4×12 — a modern, cleaner look with fewer grout lines
- Beveled edge — adds shadow lines and a slightly dressier feel
For a single tub wall, order 10 to 15 percent extra to cover cuts, breakage, and future repairs. Keep a dozen spare tiles in the attic; matching a discontinued color years later is nearly impossible.
Layout Patterns That Flatter a Bathtub
Pattern choice changes the entire mood of the room. The 50-percent offset running bond is the default because it hides minor lath waviness and reads as timeless. Want something with more character? Consider these alternatives.
Vertical Stack
Running tiles straight up in a grid draws the eye toward the ceiling and makes a low bathroom feel taller. It demands dead-level walls, so it is best over new backer board rather than old plaster.
Herringbone
Turning subway tile 45 degrees creates a woven texture that feels custom. Expect more waste, closer to 20 percent, and budget extra labor because every field cut is angled.
Third-Offset Brick
Shifting each row by one-third instead of one-half is a subtle modern move that avoids the sagging “smile” some designers dislike in a straight running bond over long runs.
What a Subway Tile Bathtub Surround Costs
Total price depends on tile grade, wall square footage, and whether you hire a pro. A typical alcove tub surround covers about 60 to 80 square feet across three walls. Here is a realistic breakdown for a mid-range job:
- Tile: $2 to $8 per sq ft ($150 to $600 for the surround)
- Cement backer board and waterproofing: $150 to $300 in materials
- Thinset, grout, and sealer: $80 to $150
- Professional labor: $8 to $15 per sq ft ($600 to $1,200)
All in, a homeowner hiring a tile setter usually spends $1,000 to $2,500. Doing it yourself can cut that to $400 to $900, though it costs you a weekend and demands care at the waterproofing stage.
The Installation Details That Prevent Leaks
Beautiful tile over a bad substrate is a slow-motion disaster. Behind the surface, three things protect your walls: a proper backer, a waterproof membrane, and clean grout joints. Skip any one and moisture eventually finds the framing.
Start by removing the old surface down to the studs. Install 1/2-inch cement backer board, not standard drywall, and tape the seams with alkali-resistant mesh and thinset. Then apply a liquid waterproofing membrane such as a roll-on redguard product or a sheet membrane over the entire wet zone, lapping it over the tub flange. Let it cure fully before you spread thinset.
Set your tile with a 1/4-inch notched trowel, back-buttering cut pieces near the tub edge. Maintain a consistent 1/16- to 1/8-inch grout joint using spacers. Above all, do not grout the joint where the tile meets the tub. That corner moves seasonally and must be filled with a flexible 100-percent silicone caulk color-matched to your grout, not rigid grout that will crack.
Grout, Sealing, and Long-Term Care
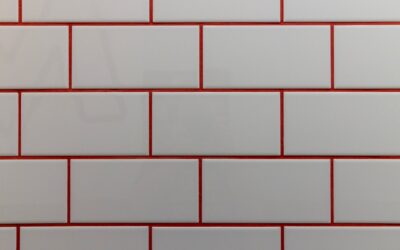
Grout color is a design decision as much as a maintenance one. Bright white grout looks sharp on day one but shows every stain; a light gray hides soap film and reads nearly as clean. For a wet area, use a modern cement grout with a built-in sealer or, better yet, an epoxy grout that never needs resealing and resists mildew.
If you choose standard cement grout, seal it 48 to 72 hours after installation and reseal once a year. Weekly, wipe the walls with a pH-neutral cleaner and squeegee after showers to keep soap scum from building in the joints. Avoid bleach-heavy products that erode grout over time; a paste of baking soda and water lifts most stains without damage.
Design Ideas to Elevate a Simple Surround
Subway tile does not have to look plain. A few thoughtful touches turn a basic three-wall surround into a focal point. Run a horizontal accent band of penny-round mosaic or a marble pencil liner at eye level to break up the field. Carry the tile all the way to the ceiling on the plumbing wall for a dramatic, high-end effect that also protects the drywall from steam.
Color placement matters too. Keeping the field a soft white and switching the recessed shampoo niche to a contrasting tile, such as a matte green or a marble hexagon, gives the eye a place to land without adding cost across the whole wall. If you want warmth, pair white tile with a warm greige grout and unlacquered brass fixtures; for a cooler, spa-like feel, choose a light gray tile with matching gray grout and matte black hardware.
DIY Versus Hiring a Pro
A tub surround is one of the more approachable tile projects for a confident DIYer, but it is not beginner territory. The layout is mostly straight cuts, the walls are small, and there are no complicated slopes as there would be on a shower floor. If you own or can rent a wet saw, understand how to waterproof properly, and can dedicate a full weekend, you can realistically save $600 to $1,200 in labor.
Hire a professional when the walls are badly out of square, when you are combining the tub surround with a full shower conversion, or when the job involves a curbless entry or a steam enclosure. A seasoned tile setter also earns their fee on the details that are easy to botch: dead-level layout lines, tight consistent grout joints, and a flawless silicone bead at every change of plane. Whichever route you choose, the waterproofing step is the one you never cut corners on.
Common Mistakes to Avoid
The failures I see most often are avoidable. Homeowners tile over green drywall instead of cement board, grout the tub-to-tile joint solid, or rush the membrane cure. Others buy just enough tile with no attic stock and get stranded mid-project when a box arrives from a different dye lot. Order early, order extra, and check that every box shares the same lot number before you open them.
Done right, a subway tile bathtub surround is one of the best returns you can make in a bathroom. It is affordable, endlessly customizable through layout and grout color, and genuinely durable. Take your time on the waterproofing, respect the movement joints, and you will have a wall that looks as good at year 20 as it did on install day.
Prefer to explore on your own?
See how new flooring looks in your actual room in seconds — free, no signup.
Try the free Floor Studio →