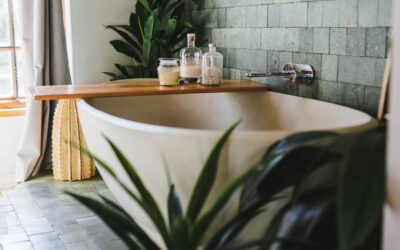
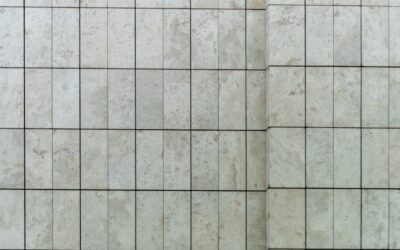
The three walls around a tub take more abuse than almost any surface in the house, soaking up splashes, steam, and soap every single day. A well-built bathtub tile surround handles all of it, sealing the walls against water while turning a plain alcove into a design feature. Done properly, it lasts decades; done carelessly, water sneaks behind the tile and rots the wall from the inside. The difference is almost entirely in the waterproofing you never see.
Part of our Bathroom Remodeling & Flooring guide — explore the full guide →
Whether you are replacing a cracked fiberglass insert or upgrading a dated 4-inch tile job, understanding the materials, the layout, and the critical waterproofing layer will help you build a surround that looks great and stays sound. This guide covers the choices and the process from backer board to grout.
Choosing Your Tile
Almost any wall-rated tile can work around a tub, but some choices are smarter than others in a wet, high-use zone. Porcelain and ceramic are the workhorses: dense, water-resistant, affordable, and available in endless looks. Natural stone like marble and travertine is stunning but porous, so it needs sealing and more careful maintenance. Glass tile is beautiful and fully waterproof but shows every water spot and demands precise installation.
Size affects both looks and labor. Large-format tiles, such as 12-by-24-inch pieces, mean fewer grout lines to clean and a modern feel, while classic subway tile and mosaics give a traditional look with more joints. For the tub deck and any horizontal ledge, choose a slip-resistant, denser tile and slope the surface slightly so water drains rather than pooling.
The Waterproofing That Makes or Breaks It
This is the part homeowners skip and regret. Tile and grout are not waterproof on their own; grout in particular is porous and lets moisture through. What keeps water out of the wall is the layer behind the tile, and getting that right is non-negotiable.
Never tile a tub surround over ordinary drywall or green board. Instead, use cement backer board, such as HardieBacker or Durock, or a foam board system like Schluter Kerdi-Board. Then apply a waterproofing membrane over the seams and the whole wet area, either a liquid-applied membrane like RedGard or a sheet membrane. Seal every corner, the joint where the walls meet the tub flange, and around the valve and spout penetrations. This continuous waterproof envelope is what actually protects your framing.
Planning the Layout
A little planning prevents awkward slivers of tile and off-center focal points. Start by finding the center of the back wall and dry-laying tiles outward so you end with balanced cuts at both corners rather than a thin sliver on one side. Plan the vertical layout so you do not end with a tiny cut row at the top or a partial tile right at the tub edge.
Decide on accent features before you start, since a niche for shampoo bottles, a decorative band, or a contrasting listello all need to be framed into the layout and waterproofed. A recessed niche is the most popular upgrade, and it must be waterproofed as carefully as the walls, with a sloped bottom shelf so water drains out.
What It Costs
Budget varies widely with tile choice and whether you DIY. Materials for a standard three-wall surround, including backer board, membrane, thinset, tile, and grout, typically run $300 to $900 for mid-range porcelain. Premium stone or glass and larger surrounds push materials higher.
Professional installation generally adds $1,000 to $3,000 depending on tile complexity, region, and whether old tile must be demolished first. Intricate patterns, mosaics, and natural stone raise labor costs because they take longer to set and seal. A capable DIYer can save most of the labor, but the waterproofing is where mistakes are expensive, so it is the step to research most carefully.
Setting Tile and Finishing Up
With waterproofing cured, tiling follows a steady rhythm. Spread thinset with the correct notched trowel, back-butter larger tiles for full coverage, and use spacers to keep grout lines even. Work up from a level ledger board so the first full row stays perfectly horizontal, then remove the ledger and cut the bottom row to meet the tub. Keep checking that tiles sit flush with no lippage.
Once the thinset cures, grout the joints, but treat the corners and the tub-to-tile joint differently. Those movement joints should be filled with a matching flexible silicone caulk, not rigid grout, because the tub flexes slightly and grout there will crack. Seal natural stone and cement grout after everything dries, then reseal periodically. Built with proper backer board, a full waterproof membrane, and flexible joints in the right places, a bathtub tile surround stays watertight and beautiful for the long life of the bathroom.
Preparing the Tub and Walls First
Before any backer board goes up, the tub itself has to be set correctly, because everything above it depends on that foundation. The tub must sit level and be fully supported, often on a bed of mortar under the base, so it does not flex or settle once it is loaded with water and a person. A tub that rocks even slightly will crack the tile and open the caulk joint within months. Protect the finished tub surface with cardboard and tape throughout the job, since dropped tools and thinset splatter can chip the enamel or acrylic.
The wall framing matters just as much. Studs should be straight, plumb, and spaced correctly, with solid blocking added where a grab bar, niche, or heavy accent will attach. Any bowed studs get shimmed or planed flat, because the backer board and tile will telegraph a wavy wall. Taking an hour to true up the framing before you hang cement board saves hours of frustration trying to hide lippage in the finished tile.
Common Mistakes That Cause Failures
The failures plumbers and remodelers see most often trace back to a handful of avoidable shortcuts. Tiling over drywall or moisture-resistant green board in the wet zone is the biggest one, since neither is waterproof and both eventually fail behind the tile. Skipping the membrane over cement board is nearly as bad, because cement board is not waterproof on its own; it simply will not fall apart when wet, but water passes right through it into the cavity.
Grouting the movement joints with rigid grout instead of caulk is another classic error, guaranteeing cracks at the corners and the tub line as the structure moves. Finally, rushing the cure times leads to problems: setting tile before membrane cures, or exposing new grout to water too soon, undermines the whole assembly. Patience at each stage, along with respecting the waterproofing details, is what separates a surround that lasts thirty years from one that leaks in three.
Prefer to explore on your own?
See how new flooring looks in your actual room in seconds — free, no signup.
Try the free Floor Studio →