
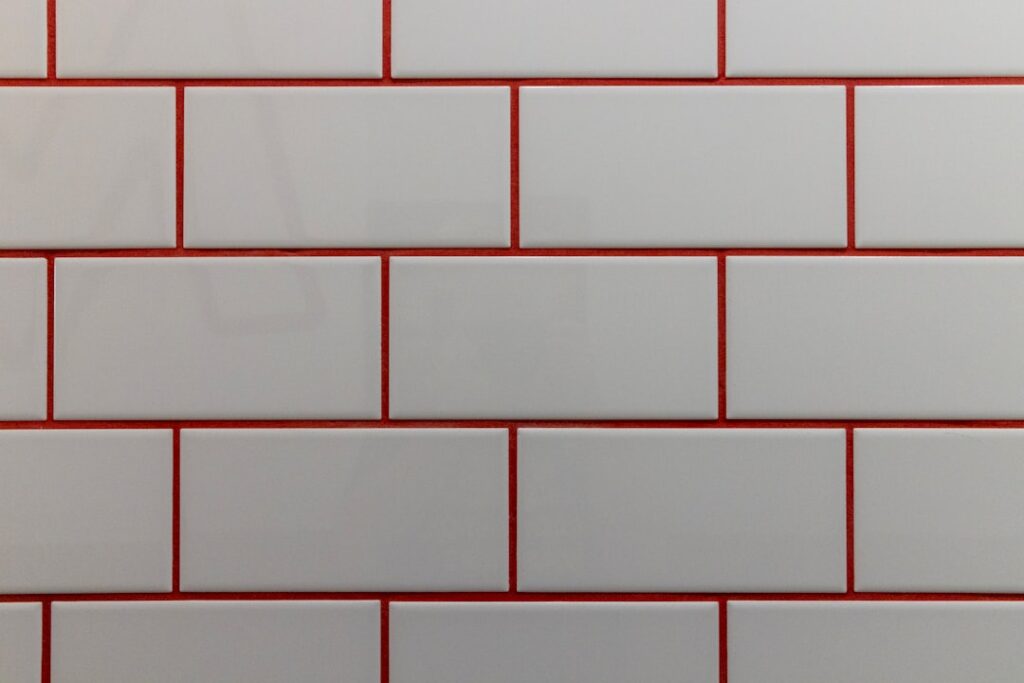
More than a century after it first appeared on New York City subway walls, ceramic subway tile remains one of the most popular surfaces in American homes. Its appeal is simple: a clean rectangular shape, a glossy easy-to-clean glaze, and a price that fits almost any budget. It works in kitchens, bathrooms, laundry rooms, and mudrooms, and it bends to nearly any style depending on how you lay it and what grout you choose. If you want a finish that looks good now and will not feel dated in ten years, subway tile is a safe, smart bet.
Part of our Tile & Grout guide — explore the full guide →
What Is Ceramic Subway Tile
Subway tile refers to a rectangular, typically glossy ceramic tile, classically 3 inches by 6 inches with a 2-to-1 length-to-width ratio. The original was a beveled white tile chosen for subway stations because it was bright, durable, and easy to clean. Today the name covers the broad family of rectangular wall tiles in many sizes and colors, but the spirit is the same: a simple, functional, timeless shape.
Sizes and Colors
While 3 by 6 is the classic, subway tile now comes in many proportions:
- 3 by 6 inch — the traditional original size.
- 2 by 4 and 2 by 8 inch — smaller and longer variations for different scales.
- 4 by 12 and 4 by 16 inch — modern elongated formats with fewer grout lines.
Glossy white is the icon, but matte finishes, soft grays, sage greens, navy blues, and warm beiges are all widely available. Beveled edges add a traditional touch; flat edges read more modern.
Layout Patterns
One of subway tile’s superpowers is how much the layout changes the look:
- Classic running bond — each row offset by half a tile, the timeless default.
- One-third offset — a subtler stagger that suits longer tiles and avoids lippage.
- Stacked (straight grid) — aligned joints for a crisp, contemporary feel.
- Herringbone — angled and woven for a high-end statement.
- Vertical stack — tiles set upright to add height to a backsplash.
For long tiles like 4 by 16, avoid a 50 percent offset, since slight warping common to long tiles can create lippage; a one-third offset is safer.
Choosing Grout
Grout color defines the personality of a subway tile wall. White grout with white tile creates a seamless, soft look. Gray or dark grout against white tile highlights the brick pattern for a bolder, more graphic effect that is also more forgiving of cooking splatter. Choose a quality grout, and for tight joints under 1/8 inch use unsanded grout to avoid scratching the glaze. Keep joints consistent, usually 1/16 to 1/8 inch.
Where to Use It
Ceramic subway tile is primarily a wall tile, ideal for:
- Kitchen backsplashes, where its glaze wipes clean of grease easily
- Bathroom walls and tub surrounds
- Shower walls, paired with proper waterproofing behind the tile
- Laundry and mudroom accent walls
Standard glossy ceramic subway tile is not rated for floors, so reserve it for vertical surfaces and choose floor-rated porcelain underfoot.
How to Install It
Subway tile is one of the more beginner-friendly tiling projects. The basic process:
- Prep a clean, flat, dry wall, using cement board or a waterproof membrane in wet areas.
- Find your center line and a level starting row, often using a ledger board so tiles do not slide.
- Spread thin-set or mastic with a notched trowel and press tiles in, using spacers for even joints.
- Cut tiles around outlets and edges with a wet saw or score-and-snap cutter.
- Let the adhesive cure, then grout, sponge clean, and buff off haze.
- Seal the grout once cured, and caulk inside corners and where tile meets the counter.
Using a level and consistent spacers is what separates a clean result from a wavy one.
Cost and Value
Ceramic subway tile is among the most affordable tiles available, with basic white at the low end of the price range and designer colors and shapes costing more. Because installation is approachable, many homeowners save further by tackling a backsplash themselves. Even with professional installation, subway tile offers excellent value for the durability and timeless look it delivers.
Design Ideas That Elevate Subway Tile
Because the tile itself is so simple, small design choices carry big weight. Carry a backsplash all the way to the underside of the upper cabinets rather than stopping partway for a more finished, custom look. Run the tile vertically behind a range to draw the eye up and emphasize ceiling height. Pair white tile with dark grout and matte black hardware for a modern bistro feel, or with soft beige grout and brass fixtures for warmth. A single accent strip of a colored or patterned tile within a field of plain subway tile adds personality without overwhelming the space.
Finishing details matter just as much. Plan where the tile ends and use trim, a bullnose tile, or a metal edge profile to cap exposed edges cleanly. Thoughtful edges are what separate a backsplash that looks installed from one that looks designed.
Cleaning and Long-Term Care
Subway tile is famously low-maintenance, which is part of why it has stayed popular for so long. The glossy glaze wipes clean with a soft cloth and a mild cleaner, releasing grease and food splatter with little effort. Avoid abrasive scrubbing pads that can dull the glaze over time. The main upkeep is the grout: keep it clean, reseal cement grout periodically, and re-caulk the inside corners and the joint where tile meets the counter if it cracks or discolors. Catching a failing caulk line early prevents moisture from getting behind the tile.
Final Thoughts
Ceramic subway tile endures because it pairs a clean, classic shape with low cost, easy cleaning, and remarkable versatility. Change the size, layout, color, or grout, and you can take it from heritage charm to sleek modern. Plan your pattern, choose a grout color that fits your style and maintenance tolerance, finish the edges with care, and keep the grout sealed. The result is a surface that looks great for years and rarely goes out of fashion.
Prefer to explore on your own?
See how new flooring looks in your actual room in seconds — free, no signup.
Try the free Floor Studio →

