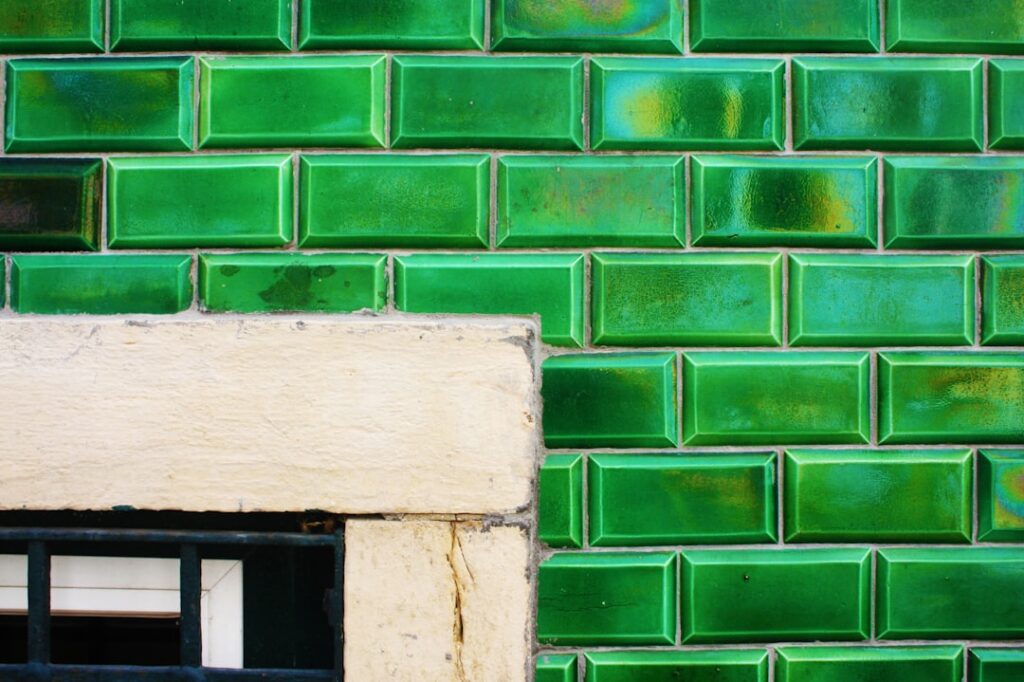
White subway tile built its reputation on being safe, but a green subway tile backsplash is what happens when a homeowner is ready to trade safe for memorable. Green has quietly become one of the most requested backsplash colors, because it bridges the gap between a neutral and a statement: sage reads almost like a warm gray, while emerald or forest turns the same wall into the focal point of the whole kitchen. The familiar 3-by-6-inch brick keeps the look grounded and classic even when the color is bold.
Part of our Kitchen Remodeling guide — explore the full guide →
Below you will find the shades worth considering, the layouts that flatter each one, how to pair grout, and what the project actually costs so you can plan the wall from tile to grout line.
Choosing Your Shade of Green
Green spans a huge range, and the undertone determines how the kitchen feels. Sage and soft eucalyptus greens are muted and grayed, which makes them the easiest to live with; they behave almost like neutrals and pair with nearly any cabinet color, from white to walnut to navy. Olive and moss lean warm and earthy, giving a cozy, organic feel that suits farmhouse and transitional kitchens.
On the saturated end, emerald and forest green make a dramatic, jewel-toned statement, especially in a glossy glaze that catches light. These deep shades look spectacular against brass hardware and white or cream cabinetry but demand confidence, since they define the room. Cooler mint and seafoam tones feel fresh and retro, nodding to mid-century kitchens. If you plan to keep the backsplash for a decade or more, a muted sage or olive ages more gracefully than a trendy bright, while a bold emerald rewards those who want their kitchen to feel designed rather than default.
Glossy Versus Matte Finish
Finish changes a green tile as much as the color itself. A glossy glaze reflects light, deepens the color, and wipes clean easily, which is why it remains the classic backsplash choice; grease and splatter come off with a damp cloth. Matte tiles read more contemporary and understated, muting the color into something softer and more organic, but they can show fingerprints and grease a bit more readily behind a busy range. Handmade or crackle-glaze green tiles add irregular color variation and a light-catching surface that gives the wall depth and a high-end, artisanal look, at the cost of a slightly harder clean.
Layout Patterns That Change the Look
The tile is only half the design; how you set it does the rest. A standard running-bond offset, where each row shifts by half a tile, is the timeless default and the most forgiving of a slightly out-of-square wall. A stacked layout, with tiles aligned in a clean grid, reads modern and architectural and pairs well with flat-panel cabinets. Herringbone and vertical-stack orientations turn the same green tile into something more deliberate and eye-catching, ideal if you want the backsplash to feel custom.
Running the tile vertically instead of horizontally draws the eye up and makes a low backsplash feel taller, while carrying the tile all the way to the ceiling behind a range or hood creates a dramatic feature wall. Match the pattern’s energy to the shade: a bold emerald often looks best in a simple offset so the color leads, while a muted sage can carry a busier herringbone.
Pairing Grout Color
Grout is the detail that makes or breaks a green backsplash. A white or light gray grout creates crisp definition, outlines each brick, and keeps the look classic and bright. A grout matched to the tile’s own green blends the lines and lets the color wash across the wall as one continuous field, which suits deep emerald and forest tones beautifully. For an edgier, industrial feel, a dark charcoal grout frames each tile in a graphic grid, though it emphasizes every alignment imperfection, so it demands clean installation.
Whatever you choose, use a stain-resistant grout or seal cement grout after it cures, because a backsplash lives with grease, tomato sauce, and daily wiping. Behind the stove especially, a slightly forgiving grout color hides the occasional splatter better than stark white.
What a Green Subway Tile Backsplash Costs
Green subway tile itself is affordable, with ceramic options starting around $3 to $8 per square foot and premium handmade or crackle-glaze tiles running $15 to $30. A typical kitchen backsplash covers 30 to 40 square feet, so tile for the average job lands between roughly $150 and $500 depending on the line you pick. Installation labor generally runs $10 to $20 per square foot, bringing a professionally installed backsplash to somewhere around $600 to $1,300 for a standard kitchen.
Because the area is small, a green backsplash is one of the highest-impact, lowest-cost updates in a kitchen. Splurging on a premium handmade tile still keeps the total reasonable, since you only need a few dozen square feet, which is why designers often recommend spending here rather than on a larger surface.
Making the Green Work With Your Whole Kitchen
A green backsplash rarely lives alone, so consider the room as a system. Green pairs naturally with warm metals like brass, unlacquered brass, and gold, which pick up its warmth, while chrome and black hardware give a cooler, more modern read. White and cream cabinets let the green take center stage, walnut and oak echo its organic quality, and a bold move like green tile against deep navy cabinets creates a rich, saturated palette for the confident.
Bring in a few natural materials, a butcher-block counter, a marble-look quartz, a wood shelf, and the green backsplash stops feeling like a color choice and starts feeling like a designed kitchen. Sample two or three shades on the actual wall and live with them through a few days of changing light before you commit; green in particular shifts noticeably between morning sun and evening bulbs.
Cleaning and Maintaining a Green Tile Backsplash
One practical reason subway tile has endured for over a century is how easy it is to keep clean, and a green backsplash is no exception. A glossy glazed surface wipes down with a damp microfiber cloth and a drop of dish soap, lifting grease and cooking splatter without special products. Avoid abrasive scrubbing pads and harsh acidic cleaners on the glaze, since over years they can dull the sheen that gives the color its depth. For daily upkeep, a quick wipe after cooking keeps grease from building into a film that flattens the tile’s shine.
The grout lines need more attention than the tile itself, because grout is porous and shows grease and grime faster than glazed ceramic. Sealing cement grout after installation and resealing it every year or two keeps it from absorbing stains, and a soft brush with a mild cleaner refreshes any lines that darken over time. Choosing a mid-tone grout rather than stark white behind the stove is a smart hedge, since it disguises the inevitable splatter that a bright white line would broadcast.
Why Green Has Staying Power
Trend cycles come and go, but green’s roots in the kitchen run deep, drawing on the color’s association with gardens, herbs, and the natural world, which is exactly where a kitchen’s ingredients come from. That connection gives a green backsplash a grounded, timeless quality that a purely fashion-driven color lacks. Muted sages and olives in particular read as near-neutrals that will not feel dated in a few years, while a bold emerald makes a confident statement that a homeowner who loves color will enjoy for the long haul.
If resale is a concern, lean toward the softer, grayed greens that function as neutrals and appeal to the widest range of buyers, and keep the rest of the kitchen relatively simple so the backsplash carries the personality. A green subway tile backsplash, chosen thoughtfully and installed cleanly, delivers character and warmth that plain white never will, and it does it at a price that makes the upgrade one of the easiest wins in any kitchen refresh.
Prefer to explore on your own?
See how new flooring looks in your actual room in seconds — free, no signup.
Try the free Floor Studio →