White subway tile had a hundred-year head start, but its inverse has quietly become the designer shortcut for kitchens that need instant depth. A black subway tile backsplash delivers the same humble, timeless format — the 3×6 rectangle borrowed from early New York subway stations — in a color that makes brass glow, white cabinets pop, and open shelving look curated. It is also a design decision with real consequences: grout color changes the entire personality of the wall, finish choice decides your cleaning routine, and the wrong pairing can swallow a small kitchen. Here is how to get every one of those calls right.
Part of our Kitchen Remodeling guide — explore the full guide →
- Why Black Works in the Subway Format
- Grout Color: The Decision That Changes Everything
- Finish: Glossy, Matte, or Handmade-Look
- Layouts and Where to Stop the Tile
- Pairing With Cabinets, Counters, and Metals
- Cleaning and Living With It
- The Bottom Line
- Material Type: Ceramic, Porcelain, or Natural Stone
- Installation Realities and Cost Planning
Why Black Works in the Subway Format
Subway tile succeeds because the format is modest — small rectangles, thin grout lines, no pattern competing with the room. Rendered in black, that modesty turns into architecture: the wall reads as a textured, light-absorbing plane rather than a glossy feature demanding attention. Black grounds a kitchen the way a black window frame grounds a wall, which is why it pairs so naturally with the current wave of white oak, brass, and cream. It is also practical in ways white never was. Cooking splatter, tomato sauce, coffee spray, and the shadow of daily life simply do not register on black tile between cleanings — the reverse of white tile’s constant confession. The trade-off comes with water spots and grease sheen on glossy finishes, covered below.
Grout Color: The Decision That Changes Everything
With black tile, grout is not a detail — it is the design. Three lanes:
- Black or charcoal grout makes the joints disappear and the wall read as one continuous dark surface. Sleek, modern, moody — and the most forgiving to keep clean, since grout discoloration never shows. Best for contemporary kitchens and anywhere the tile texture, not the grid, should star.
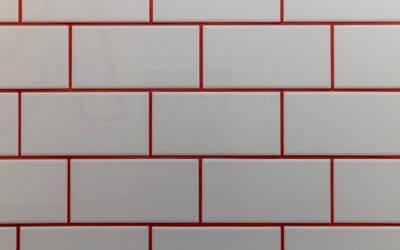
- White or light gray grout flips the classic white-tile-dark-grout look and turns the wall into a bold graphic grid. Every tile is outlined, so layout precision matters and so does grout maintenance — light grout behind a range collects grease color over time. Choose a stain-resistant urethane or epoxy grout here, and this look stays crisp for years.
- Mid-gray grout is the compromise: subtle definition without the checkerboard effect, and realistic maintenance. When clients cannot decide, mid-gray is almost always the answer.
Whatever the color, keep joints tight — 1/16 to 1/8 inch — and remember that grout haze shows mercilessly on black tile, so buff thoroughly during installation.
Finish: Glossy, Matte, or Handmade-Look
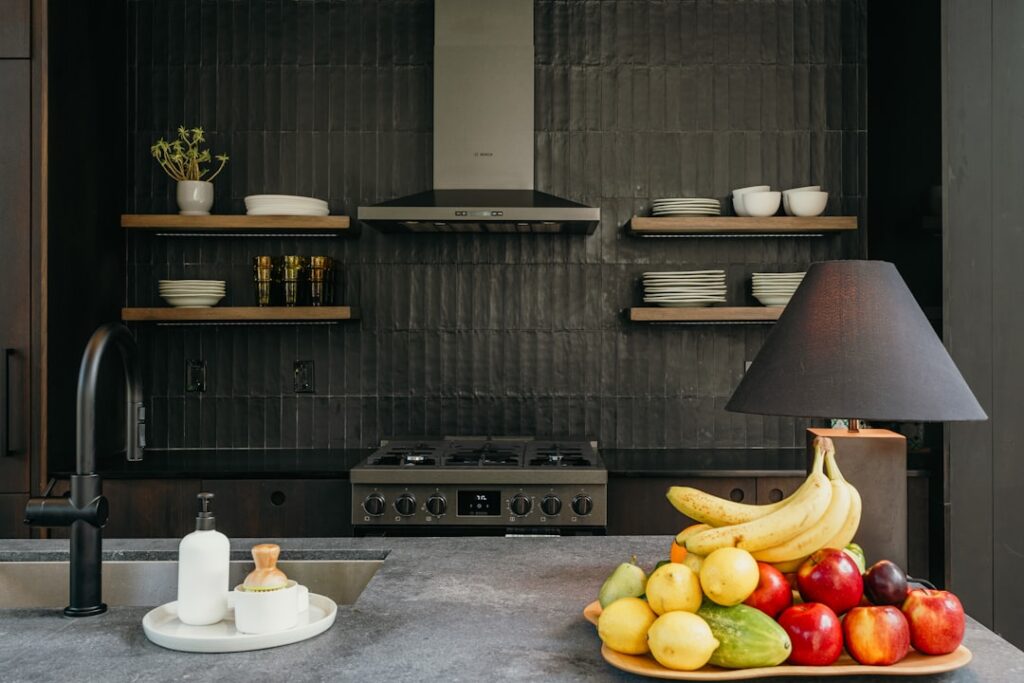
Glossy black tile bounces light around the room — genuinely useful in kitchens with limited windows, since a black wall that reflects is far brighter than one that absorbs. The cost is honesty: gloss shows water spots, grease film, and fingerprints, and demands a weekly wipe-down to look its best. Matte black hides all of that and photographs beautifully, reading soft and contemporary, but it absorbs light — reserve fully matte walls for kitchens with good natural or layered lighting, and note that some matte glazes hold onto oily fingerprints until properly washed. The third lane, glazed handmade-look tile with irregular edges and variable glaze depth, is the current designer favorite: each tile catches light differently, so the wall shimmers with variation, spots disappear into the texture, and the backsplash reads bespoke rather than builder-grade. Expect to pay for it — handmade-look runs $10 to $30 per square foot against $2 to $8 for standard ceramic subway.
Layouts and Where to Stop the Tile
The classic 50 percent running-bond offset is the default and never wrong. Vertical stack bond turns black subway modern and emphasizes ceiling height behind open shelving; horizontal stack reads calm and architectural; herringbone in black is dramatic but busy — better as a range-wall feature panel than a whole kitchen. On coverage: counter-to-upper-cabinet is standard, but black subway rewards commitment. Running it to the ceiling behind a range hood or on a shelving wall creates the focal point this color was born for, while a single 18-inch strip of black in an otherwise pale kitchen can look tentative. In bathrooms, black subway wainscoting or a full shower wall with white grout is a classic that predates the kitchen trend.
Pairing With Cabinets, Counters, and Metals
White and cream cabinets with black subway is the high-contrast classic — safe, bright, resale-friendly. White oak and walnut cabinetry against black tile is the organic-modern signature, with the wood supplying the warmth black needs. Black-on-black (dark cabinets, black backsplash) works only with abundant light and something pale — counters or floor — to break it up. For countertops, white and light-veined quartz is the no-fail partner; butcher block warms the scheme; black counters with black tile need a deliberate hand. Metals matter more against black than any other tile color: brass and gold turn luminous, matte black hardware disappears into sleekness, and chrome goes crisp and diner-like. Under-cabinet lighting is effectively mandatory — black tile absorbs task light, and an LED strip restores what the wall soaks up while making glossy tile glitter.
Cleaning and Living With It
The practical reality: black hides food mess and shows mineral and grease films — the exact opposite of white. Routine care is a soft cloth with warm water and a drop of dish soap, then a dry microfiber buff to prevent water spots on gloss. For the greasy zone behind the range, a weekly wipe with a 1:1 vinegar-water mix (fine on glazed ceramic and porcelain; skip it if your “black subway” is actually natural stone like slate or honed granite, which vinegar etches) keeps the sheen even. Avoid abrasive powders and scrub pads that dull glaze over time. Sealed epoxy or urethane grout needs nothing; cement grout should be sealed after installation and every year or two after. Total honest time commitment: about ten minutes a week for gloss, half that for matte and handmade finishes.
The Bottom Line
A black subway tile backsplash is the rare bold choice with a classic’s safety margin: a hundred-year-old format in a color that flatters wood, brass, and white paint alike. Make the three decisions deliberately — grout color for the personality (invisible black, graphic white, practical gray), finish for your light and cleaning tolerance, and full-height coverage where you want a focal wall — then wire in under-cabinet lighting and keep a microfiber cloth in the nearest drawer. Done that way, it is the least trendy trend decision a kitchen can make.
Material Type: Ceramic, Porcelain, or Natural Stone
“Black subway tile” describes a shape and a color, not a material, and the material underneath changes both cost and care. Glazed ceramic is the workhorse — inexpensive, easy to cut, and with a fired-on glaze that resists staining and never needs sealing. It is the right default for the vast majority of kitchens. Porcelain is denser and more chip-resistant, and because premium porcelain is often colored all the way through the body, a chipped edge shows black rather than a pale clay scar; it costs a little more and is slightly harder to cut cleanly. Then there is genuine stone masquerading as subway tile — honed black slate, soapstone, or basalt cut into 3×6 pieces. These are stunning and richly matte, but they are porous, must be sealed on installation and periodically after, and etch or dull under acidic cleaners. If you love the stone look but not the maintenance, a through-body porcelain with a stone-look finish gives you the appearance without the sealing schedule. Always confirm which material you are actually buying before you choose a cleaner, because the vinegar solution that is perfectly safe on glazed ceramic will slowly ruin honed slate.
Installation Realities and Cost Planning
Budgeting a black subway backsplash means looking past the per-square-foot tile price. A standard kitchen backsplash runs roughly 30 to 40 square feet, and labor typically costs more than the tile itself — installers commonly charge by the square foot with premiums for tight patterns like herringbone, for tile-to-the-ceiling height, and for the fussy outlet and window cutouts every real kitchen has. Order 10 to 15 percent extra tile beyond the measured area to cover cuts, breakage, and a future repair stash, and buy it all in one lot number so the black shade matches; dye lots drift, and two “black” boxes from different runs can read subtly different on the wall. Because black hides so little at the edges, the finishing details carry the whole job: use a proper edge trim, a matched bullnose, or a mitered return where the tile meets a wall or window rather than a raw exposed edge, and insist the installer keeps grout lines dead consistent, since any wander is glaring against the dark field. Finally, plan your outlets — swapping standard white receptacles and cover plates for black ones is a small expense that keeps the wall reading as one clean plane instead of being interrupted by white rectangles.
Prefer to explore on your own?
See how new flooring looks in your actual room in seconds — free, no signup.
Try the free Floor Studio →