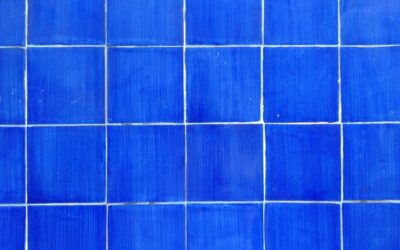
A blue subway tile backsplash is one of the easiest ways to bring color and personality into a kitchen without committing to a bold cabinet or countertop. The classic 3×6 subway shape reads timeless, while blue glaze adds warmth in navy or freshness in a coastal aqua. This guide covers shades, layouts, grout pairings, cost, and how to install a blue subway backsplash that still looks right in ten years.
Part of our Kitchen Remodeling guide — explore the full guide →
- Why Blue Subway Tile Works
- Choosing the Right Shade of Blue
- Layout Patterns to Consider
- Grout Makes or Breaks the Look
- What a Blue Subway Backsplash Costs
- Tools and Materials
- Installation Step by Step
- Common Mistakes to Avoid
- Ceramic vs Glass vs Handmade Tile
- Full Backsplash vs Focal Accent
- Sealing and Long-Term Care
- Styling the Rest of the Kitchen
Why Blue Subway Tile Works
Subway tile earned its name from the glazed ceramic tiles lining New York subway stations starting in 1904. The format survived because it is simple, reflective, and neutral in shape, which lets you introduce a strong color like blue without the room feeling busy. Blue in particular pairs naturally with white cabinetry, wood tones, brass hardware, and stainless appliances, making it one of the most flexible accent colors in kitchen design.
Choosing the Right Shade of Blue
- Navy and deep indigo: dramatic and sophisticated, best against white or cream cabinets and warm brass fixtures.
- Cobalt and true blue: vivid and energetic, a statement choice that suits modern and eclectic kitchens.
- Sky and powder blue: soft and airy, ideal for cottage and farmhouse styles.
- Aqua and teal: coastal and lively, great with white shiplap and natural wood.
- Slate and gray-blue: muted and versatile, a safe pick for resale that reads as a neutral.
Order sample tiles and tape them to the wall for several days. Blue glaze shifts dramatically under warm incandescent light versus cool LED and daylight, so judge the color at the times you actually use the kitchen.
Layout Patterns to Consider
The default is the classic 50 percent offset running bond, where each row shifts half a tile. For a more modern look, try a one-third offset, a stacked vertical layout, or a herringbone pattern that turns the humble subway tile into a focal point. Vertical stacking makes a low backsplash feel taller, while herringbone adds movement but wastes more tile and takes longer to set.
Grout Makes or Breaks the Look
Grout color changes the entire personality of a blue subway tile backsplash. White or light gray grout creates crisp contrast and emphasizes the brick pattern, giving that classic clean look. A matching blue or medium-gray grout softens the grid and makes the surface read as a solid field of color. Dark grout with light blue tile delivers a bold graphic effect but shows every imperfection in your spacing, so it demands precise installation.
Whatever you choose, use a quality sanded or unsanded grout appropriate to your joint width, and seal it. In a kitchen, grease and splatter stain porous grout fast, so a sealed joint or an epoxy grout keeps the backsplash looking new.
What a Blue Subway Backsplash Costs
Ceramic blue subway tile runs $2 to $8 per square foot for standard glazed options, while handmade or zellige-style blue tile with irregular edges can hit $15 to $30 per square foot. A typical kitchen backsplash covers 30 to 40 square feet. Materials for a mid-range job, including tile, thinset, grout, and trim, land around $150 to $400 for DIY. Professional installation adds $8 to $15 per square foot in labor, bringing a pro-installed backsplash to roughly $600 to $1,300 for an average kitchen.
Tools and Materials
- Notched trowel, tile spacers, and a rubber grout float.
- A snap tile cutter for straight cuts, or a wet saw for outlets and curves.
- Premixed or bagged thinset mortar rated for wall tile.
- Grout, grout sealer, and a matching silicone caulk for corners and the counter seam.
- A level, tape measure, and pencil for layout lines.
Installation Step by Step
Start with a clean, flat, dry wall. Find the center of your main wall and mark a level line so your pattern stays straight even if the countertop is not. Spread thinset with the notched trowel, working in small sections so it does not skin over. Press tiles in with a slight twist, using spacers for even joints, typically 1/16 inch for a tight modern look or 1/8 inch for a traditional grid.
Cut tiles to fit around outlets and at the ends of runs. Let the thinset cure for 24 hours before grouting. Apply grout diagonally across the joints with the float, wipe the excess with a damp sponge, and buff the haze once it dries. Finish inside corners and the counter-to-tile seam with color-matched silicone caulk rather than grout, because rigid grout cracks where two planes meet.
Common Mistakes to Avoid
The biggest error is leveling off the countertop instead of a true level line, which magnifies any slope across the whole backsplash. Second is choosing grout too quickly; grab physical grout samples, not just a screen color. Third is skipping the caulk at the counter seam, which leads to cracked grout within a year. Fourth is grouting before the thinset fully cures, which pulls tiles loose. Fifth is forgetting to seal, leaving grout to stain in a greasy kitchen.
Ceramic vs Glass vs Handmade Tile
Blue subway tile comes in several materials that dramatically change the look and price. Standard glazed ceramic is the affordable, durable workhorse and comes in every shade of blue. Glass subway tile glows with depth and reflects light beautifully, making a small kitchen feel brighter, though it shows adhesive behind it, so it requires white thinset and careful installation. Handmade or zellige-style tile from Morocco has irregular edges, subtle color variation, and a glossy, imperfect surface that reads as artisan and high-end. Zellige is stunning but its uneven thickness and edges make installation slower and grouting trickier, and it costs several times more than machine-made ceramic.
Full Backsplash vs Focal Accent
Decide how much blue you want. A full backsplash running the entire wall and up behind the range makes blue the dominant feature and demands calm, neutral counters and cabinets. Alternatively, use blue subway tile only as an accent, such as the wall behind the range hood or a single stretch above the counter, with a neutral tile elsewhere. Running the tile all the way to the ceiling behind the stove or the open shelving creates a dramatic feature wall, while a standard four-inch-to-cabinet height keeps things understated. For a bold navy, many homeowners prefer the accent approach so the color reads as intentional rather than overwhelming.
Sealing and Long-Term Care
Glazed ceramic and glass tile surfaces are essentially non-porous and wipe clean with a damp cloth, so the tile itself needs little care. The grout is what needs protection. In a kitchen, grease and cooking splatter settle into porous cement grout and darken it over time, especially with light grout against dark blue tile. Seal cement grout after it cures and reseal annually, or choose epoxy grout upfront for a maintenance-free joint. Wipe the backsplash down regularly rather than letting grease build, and avoid abrasive scouring pads that can dull a glossy glaze over years.
Styling the Rest of the Kitchen
Let the blue tile lead and keep other elements calmer. White or wood cabinets, a white or lightly veined quartz counter, and brass or matte black hardware all flatter blue. Pull the blue into a small accent, like a runner, bar stools, or a vase, to tie the room together without repeating it everywhere. If your blue is bold, keep countertops and walls neutral so the backsplash stays the star.
A blue subway tile backsplash blends a timeless shape with a color that feels fresh and personal. Nail the shade under your real lighting, pick a grout that supports the look you want, install on a true level line, and seal the joints. Done well, it is an affordable upgrade that transforms the whole kitchen and holds its charm for years.
Prefer to explore on your own?
See how new flooring looks in your actual room in seconds — free, no signup.
Try the free Floor Studio →