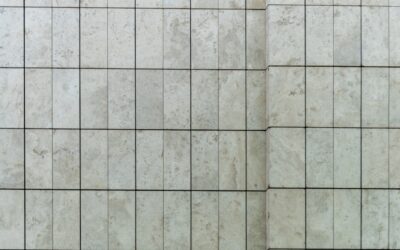
If you have ever stood in the tile aisle wondering where to start, the humble one-foot square is a smart place to begin. A 12 x 12 floor tile is the workhorse of American flooring: it covers exactly one square foot, keeps your math painless, and works in almost any room from a mudroom to a full bathroom. I have set thousands of these squares over the years, and the format still earns its keep because it is forgiving to lay out, easy to source, and priced for real budgets. This guide walks you through choosing, buying, and installing them like someone who has done it before.
Part of our Tile & Grout guide — explore the full guide →
Why the 12-Inch Square Still Rules
Bigger formats like 24 x 24 and rectangular plank tile get a lot of attention right now, but the 12-inch square has not gone anywhere. It hits a sweet spot between coverage speed and manageability. A single square is light enough to handle with one hand, small enough that you are not fighting lippage across a slightly uneven subfloor, and standard enough that every tile shop and big-box store stocks dozens of options.
For a first-time DIYer, that forgiveness matters. Larger tiles telegraph every dip and hump in your floor because they bridge a wider span. A 12 x 12 tile flexes with the substrate more gracefully, so small imperfections in your slab or backer board are less likely to show up as rocking tiles or cracked corners down the road.
Ceramic vs. Porcelain: Pick the Right Body
Most 12-inch squares come in two materials, and the difference is more than marketing. Understanding it saves you money and headaches.
- Ceramic: Softer, more porous, and cheaper, usually running $1 to $3 per square foot. It is fine for low-to-moderate traffic areas like a guest bathroom or laundry room. Because it cuts easily with a basic snap cutter, it is beginner-friendly.
- Porcelain: Denser, fired hotter, and rated with a water absorption of less than 0.5 percent. Expect $2 to $5 per square foot. Porcelain shrugs off heavy traffic, freeze-thaw cycles, and moisture, making it the better choice for entryways, kitchens, and anywhere near an exterior door.
Check the PEI rating on the box. For most residential floors you want PEI 3 or higher; PEI 4 and 5 are built for commercial abuse and will outlast the house. Also look at the DCOF (dynamic coefficient of friction) rating if the tile goes anywhere that gets wet. Aim for 0.42 or above so the floor is not a slip hazard when it is damp.
Coverage Math Made Simple
This is where the one-foot square earns its reputation. Since each tile equals one square foot, the tile count roughly equals your room’s square footage. Measure the length and width of the room in feet, multiply them, and that is your base number.
- Measure the room: a 10-foot by 12-foot bathroom is 120 square feet.
- Add waste: buy 10 percent extra for straight layouts, 15 percent for diagonal or patterned installs. That covers cuts, breakage, and future repairs.
- So 120 square feet becomes roughly 132 tiles for a straight lay. Round up to full boxes.
Always keep a few spare tiles from the same production lot after the job. Dye lots shift between runs, and a replacement tile bought two years later almost never matches perfectly.
Layout Patterns That Work
A 12 x 12 floor tile is versatile, but the pattern you choose changes the whole feel of the room.
Straight (Grid) Lay
The classic. Tiles align in a simple grid with continuous grout lines. It is the fastest to install and the most economical because it generates the fewest cuts. Great for contemporary and traditional spaces alike.
Diagonal (45-Degree)
Rotating the grid 45 degrees makes a room feel wider and hides the fact that most walls are not perfectly square. It costs more in tile and labor because of the extra triangular cuts along the perimeter, but the payoff in a small bathroom is real.
Brick or Offset
Staggering each row by a few inches gives a subtle running-bond look. Keep the offset modest, around 20 to 25 percent rather than a full 50 percent, since flat tiles can show lippage at the center of each tile when offset too aggressively.
Step-by-Step Installation
Here is the sequence I follow on a typical floor. Take your time on prep; it determines everything that follows.
- Prep the substrate. The floor must be clean, flat within 1/4 inch over 10 feet, and structurally sound. Over a wood subfloor, install cement backer board and tape the seams. Over concrete, patch cracks and level low spots.
- Find your center. Snap chalk lines to locate the room’s center and dry-lay a row in each direction. Adjust so you avoid thin slivers of tile against the walls.
- Mix and spread thinset. Use a 1/4-inch square-notch trowel. Spread only what you can cover in about 15 minutes so the mortar does not skin over.
- Set the tile. Press each tile with a slight twist to collapse the ridges, and use 1/8-inch or 3/16-inch spacers for consistent joints. Check flatness with a level as you go.
- Let it cure. Wait 24 hours before walking on it or grouting.
- Grout and seal. Use sanded grout for joints 1/8 inch and wider. Once cured, apply a penetrating sealer to the grout lines to resist stains.
Cost and Budget Expectations
Material for a 12-inch square runs $1 to $5 per square foot depending on ceramic versus porcelain and design. Professional installation typically adds $5 to $10 per square foot, so a 100-square-foot bathroom might land between $700 and $1,500 installed. Doing it yourself can cut that in half, but budget another $150 to $250 for a decent snap cutter or rented wet saw, trowels, spacers, thinset, and grout.
Do not skimp on the underlayment or the sealer. Those two line items are cheap insurance against the cracked tiles and stained grout that turn a weekend project into a redo.
Care and Maintenance
One of the reasons this format stays popular is how little it asks of you afterward. Sweep or vacuum grit regularly since sand acts like sandpaper on any glaze. Damp-mop with a pH-neutral cleaner rather than vinegar, which slowly etches grout and some finishes. Reseal grout lines every one to two years in wet areas, and keep a couple of spare tiles on a shelf for the day something heavy gets dropped.
Frequently Asked Questions
Is a 12 x 12 tile actually 12 inches?
Close, but not exact. Nominal 12-inch tiles often measure around 11 7/8 inches so grout joints bring the finished module back to 12 inches on center. Always dry-lay before committing.
Can I put these tiles on a wall?
Yes, though a full-size square reads heavy on a wall. Many people use them on floors and step down to a 6-inch or subway format on the walls for contrast.
Do I need to seal the tile itself?
Glazed ceramic and porcelain do not need sealing. Only the grout and any unglazed or natural-stone-look tile require a penetrating sealer.
Get the prep right, buy 10 to 15 percent extra, and match your material to the room’s traffic, and a floor built from these one-foot squares will look sharp and hold up for decades.
Prefer to explore on your own?
See how new flooring looks in your actual room in seconds — free, no signup.
Try the free Floor Studio →