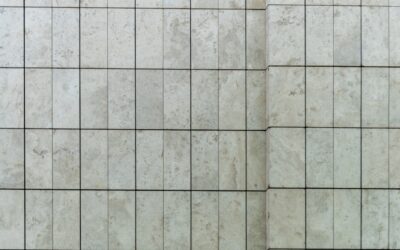
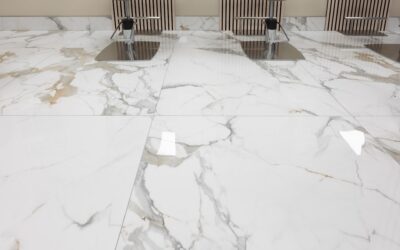
Walk into any showroom and you will see hundreds of bathroom tile options, but only a fraction of them belong on a wet floor. Porcelain tile for bathroom projects has earned its reputation because it absorbs less than 0.5% water by weight, which is the technical line ASTM C373 draws between porcelain and standard ceramic. That single number explains why it shrugs off mop water, shower splashes, and the occasional toilet overflow without warping or staining.
Part of our Bathroom Remodeling & Flooring guide — explore the full guide →
Most failures I see in the field come down to picking the wrong PEI rating, the wrong finish, or the wrong size for the layout. Get those three right and porcelain will outlast every other surface in the room.
Why Porcelain Outperforms Ceramic in Wet Areas
Ceramic tile is fired at roughly 1,800°F using softer red or white clay. Porcelain uses denser kaolin clay fired closer to 2,400°F, which fuses the body into something closer to glass than pottery. The practical result is a tile that does not telegraph cracks when a shampoo bottle drops, and it does not soak up moisture during a long, steamy shower.
For bathrooms specifically, you want a porcelain rated PEI 3 or higher for floors. Walls can run lower, since they take no foot traffic. If you are tiling a curbless walk-in shower or a wet room layout, ask the supplier for the tile’s Dynamic Coefficient of Friction (DCOF). Anything 0.42 or higher meets ANSI A326.3 for wet barefoot use.
Choosing Between Glazed and Through-Body
Glazed porcelain has a colored layer fired onto a neutral body. It is the most affordable category, generally $2 to $5 per square foot at big-box stores. Through-body porcelain (sometimes called full-body) carries the color all the way through, so a chip on a high-traffic threshold is barely visible. Expect $5 to $9 per square foot for through-body, with European brands like Florim and Marazzi running higher.
Polished glazes look stunning in a powder room but turn into an ice rink when wet. For shower floors and main bath floors, stick to matte, honed, or textured surfaces. A small mosaic, around 2 by 2 inches, gives you grout joints every couple of inches that act as natural traction.
Best Sizes and Layouts for Bathrooms
Three formats handle 90% of bathrooms cleanly:
- 12 by 24 inch planks in a 1/3 offset pattern make a 5 by 8 foot bathroom feel longer. Limit offsets to 33% with planks longer than 15 inches, or you will fight lippage.
- 24 by 24 inch squares reduce grout lines on the floor and make small rooms read larger. Pair with a coordinating mosaic on the shower pan.
- 2 by 2 inch mosaics for shower floors only. The dense grout pattern handles the slope to the drain and adds slip resistance.
Avoid 6 by 6 inch tile on the main floor unless you are matching a 1920s aesthetic. The grout lines look busy and the cuts around toilets get awkward.
Wood-Look vs Stone-Look vs Concrete-Look
Modern inkjet printing has made porcelain tile for bathroom installs nearly indistinguishable from real materials at arm’s length. Wood-look planks (Daltile Emerson Wood, Mohawk Treyburne) give you the warmth of oak without the moisture risk. Stone-look in a Carrara or travertine pattern saves $15 to $30 per square foot over the real slab, and you never seal it. Concrete-look in 24 by 48 sheets reads modern and minimalist; just budget for a backer board because those large formats need a flat substrate.
Subfloor and Substrate Requirements
Porcelain is unforgiving of deflection. Your subfloor needs an L/360 rating minimum, which translates to 3/4 inch tongue-and-groove plywood over 16 inch on-center joists for a standard residential bath. Add a layer of 1/4 inch cement backer board (Durock, HardieBacker) screwed every 8 inches, then mortar the seams with alkali-resistant mesh tape.
For shower walls, a waterproof membrane is non-negotiable. I use Schluter Kerdi or Laticrete Hydro Ban over greenboard. The old method of plastic sheeting behind cement board still passes code in many areas, but it traps moisture inside the wall cavity. Sheet membranes keep water on the surface where it belongs.
Real Cost Breakdown
For a 40 square foot bathroom floor with mid-grade porcelain, here is what you should budget:
- Tile: $4 per sq ft × 44 sq ft (10% waste) = $176
- Modified thinset (50 lb bag): $35
- Sanded grout: $20
- Backer board, screws, tape: $60
- Sealer for grout: $25
- Total DIY materials: about $320
Pro installation runs $9 to $14 per square foot installed in most US markets, so the same floor with labor lands around $500 to $700. Shower walls and pans cost more per square foot due to waterproofing labor, typically $14 to $22 installed.
Grout, Sealing, and Long-Term Care
Pick an epoxy or urethane grout for showers (Mapei Kerapoxy, Bostik Dimension) and you can skip annual sealing entirely. For floors, a quality cement-based grout like Custom Building Products Polyblast will last decades if you seal it twice in the first month and once a year after.
The tile itself never needs sealing. Wipe with a pH-neutral cleaner, never vinegar (it eats grout), and avoid steam mops on shower floors where the heat can stress the membrane below. A microfiber pad and warm water handles 90% of cleaning.
Common Mistakes to Skip
Three errors come up in nearly every DIY bathroom I get called to fix: using mastic adhesive instead of thinset, running tile up to a tub without leaving a 1/8 inch caulk joint, and grouting before the thinset has cured 24 hours. Mastic dissolves in standing water. Grout in expansion joints cracks within a season. Premature grouting pulls moisture out of the thinset and creates hollow spots you will hear when you walk on them. Plan one weekend for prep, one for setting, and one for grout and seal — the slow approach pays back for 30 years.
Prefer to explore on your own?
See how new flooring looks in your actual room in seconds — free, no signup.
Try the free Floor Studio →