Wood floors in a bathroom used to be a gamble; porcelain made it a design choice. Porcelain wood tile flooring — dense, kiln-fired planks printed with high-definition wood grain — delivers the visual warmth of oak or hickory with the water immunity of tile, which is why it now dominates showers, kitchens, and whole-house installs across the Sun Belt. But porcelain planks are also the most demanding wood-look product to install correctly: long, narrow tiles magnify every flaw in the slab and every shortcut in layout. This guide digs into the porcelain-specific details — body types, rectified edges, DCOF ratings, and the offset rules — that separate a floor that fools guests from one full of lippage.
Why Porcelain, Specifically?
Porcelain is ceramic’s tougher sibling: pressed from finer clays and fired hotter (around 2,200 to 2,400°F), it comes out denser, harder, and nearly impervious, with water absorption of 0.5 percent or less per the ANSI A137.1 standard. That last number is the one that matters. Sub-0.5-percent absorption means porcelain planks are frost-rated for covered patios, safe in steam-heavy bathrooms, and immune to the swelling that kills laminate and warps hardwood.
Compared with standard ceramic wood-look tile, porcelain resists surface wear dramatically better — look for a PEI rating of 4 or 5 for residential floors — and chips are less catastrophic because the body beneath the glaze is dense and uniform. You pay for the upgrade: porcelain planks run $2 to $7 per square foot for solid domestic and Spanish lines, and $7 to $15 for premium Italian product with elaborate graphic variation.
Glazed vs Through-Body Construction
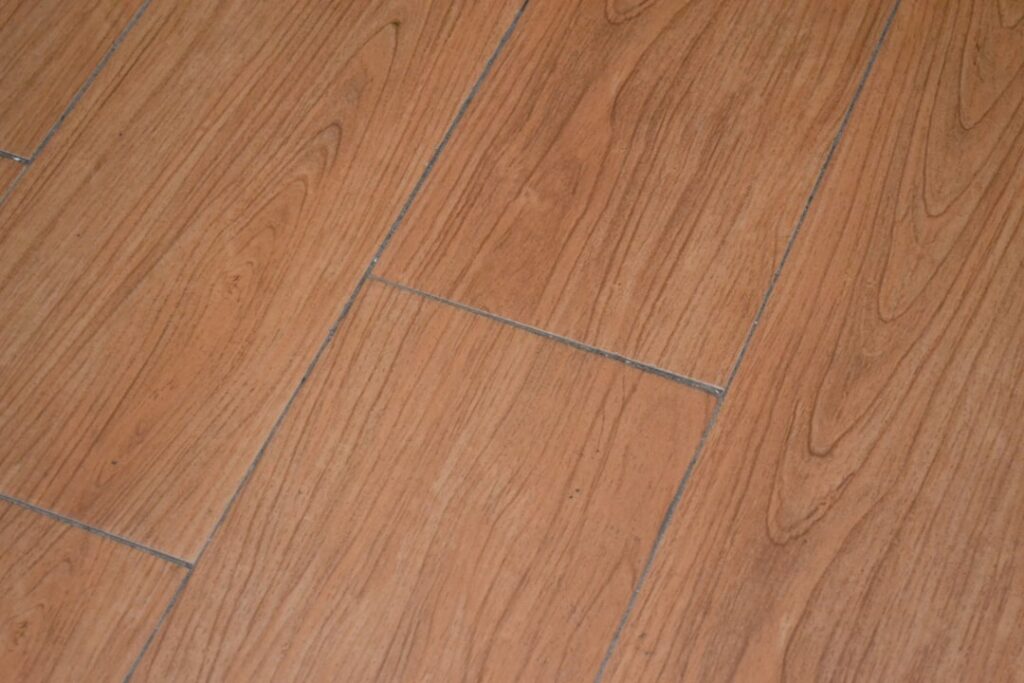
Nearly all wood-look porcelain is glazed: the wood grain is inkjet-printed onto the tile face and sealed under a wear layer of glaze. Modern printing is remarkable — better lines carry 20 to 40 unique faces before a pattern repeats, with grain texture embossed in register so knots you see are knots you feel. The trade-off is that a deep chip exposes the tile body beneath, which will not match the printed face.
Through-body and color-body porcelain run the color through the biscuit itself, so chips are far less visible. True through-body wood looks are rare because the grain must still be printed, but color-body versions — where the biscuit is tinted to match the face’s dominant tone — are common in better lines and worth the modest premium in high-traffic homes. Ask the distributor specifically; the spec sheet will say “color body” or “colored body porcelain.”
Rectified Edges and Why They Matter for Planks
Rectification means the tile was mechanically ground to exact dimensions after firing, producing dead-straight, square edges. For wood-look planks this is close to mandatory. Rectified planks can be set with grout joints as tight as 1/8 inch — sometimes 3/32 — which is what lets a tile floor read as wood from across the room. Non-rectified (pressed-edge) planks vary enough in size that they need 3/16-inch or wider joints, and wide grout lines are the number one giveaway that a “wood” floor is tile.
Check the box or spec sheet for the word “rectified” and for the caliber rating. One caution: tight joints demand a flatter substrate and more careful setting, because there is no fat grout line to absorb small height differences between adjacent planks.
DCOF: The Slip Rating You Should Actually Read
Slip resistance in the US is measured as DCOF (dynamic coefficient of friction) under the ANSI A326.3 test. The benchmark: 0.42 or higher wet DCOF for level interior floors that get wet. Most wood-look porcelain intended for floors meets this, but verify it on the spec sheet rather than assuming — some high-sheen “polished” wood looks test below the line and belong on walls only. For bathroom floors, laundry rooms, and entries, favor matte or textured finishes rated 0.42+; for shower floors, most designers step down to mosaic formats anyway for drainage slope, but textured planks rated for wet areas do exist. Grain texture helps here: embossed planks generally grip better than smooth-glazed ones, a rare case where the more realistic option is also the safer one.
Plank Sizes and the 1/3 Offset Rule
Common formats run 6×24, 6×36, 8×40, and 8×48 inches, with premium lines stretching to 10×60 and beyond. Longer planks look more like real hardwood but raise the difficulty, because virtually all long porcelain planks are slightly bowed — crowned in the middle — as an unavoidable artifact of firing. Industry guidance (TCNA) responds with the rule every installer should tattoo somewhere visible: offset plank ends by no more than one-third of the tile length, never 50 percent.
A 50-percent brick-bond pattern puts the crown of one plank directly against the dipped end of its neighbor, guaranteeing lippage you will feel underfoot and see in raking light. A one-third stagger (or a random 25-to-33-percent layout, which mimics real wood installation anyway) keeps crowns near crowns. If a bidding installer plans a half-offset with 48-inch planks, keep interviewing.
Installation Demands: Flat Substrate, Leveling Systems, Good Mortar
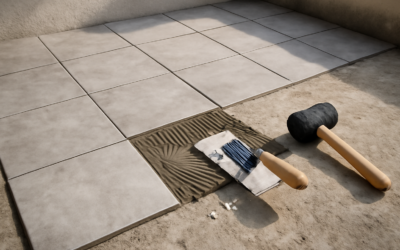
Porcelain planks tolerate exactly zero sloppy prep. The requirements that make or break the job:
- Substrate flatness of 1/8 inch in 10 feet for planks with any edge 15 inches or longer — twice as strict as the standard tile spec. Budget for self-leveling underlayment ($35 to $60 per bag covering ~25 sq ft at 1/4 inch) on most slabs.
- Large-and-heavy-tile (LHT) mortar, combed in straight lines parallel to the short side, with planks back-buttered on larger formats. Target 90-95 percent coverage; hollow corners chip.
- A lippage control system — Raimondi, Spin Doctor, or MLT clips and wedges ($0.15 to $0.30 per plank) — is cheap insurance on long planks with tight joints.
- Movement joints at the perimeter and every 20 to 25 feet in the field, per TCNA EJ171.
Labor reflects the difficulty: expect $6 to $12 per square foot for quality plank-tile installation, noticeably above square-tile rates. This is one product category where the cheapest bid is reliably the most expensive decision.
Honest Downsides
Porcelain wood tile is hard and cold underfoot — harder than any wood or vinyl — and dropped glassware rarely survives it. Standing at a kitchen counter for hours is more fatiguing than on resilient flooring, so plan on anti-fatigue mats or, better, electric radiant heat beneath it ($8 to $16 per square foot added), which porcelain conducts beautifully. Grout lines, however tight, still need occasional sealing and cleaning. Repairs mean chiseling out a plank and resetting, so buy a spare box. And while the material itself often costs less than hardwood, the installed price frequently does not, once leveling and skilled labor are counted.
The Verdict
Choose porcelain wood tile flooring where water and wear rule: bathrooms, kitchens, mudrooms, whole-house installs in humid or sandy climates, and homes with large dogs whose claws chew through wood finishes. Spec rectified, color-body planks with a wet DCOF of 0.42+, insist on a flat substrate and a one-third maximum offset, and hire an installer who volunteers the phrase “leveling clips” before you ask. Done to that standard, it is a 50-year floor that never asks for refinishing — the closest thing to permanent wood ever put in a wet room.
Prefer to explore on your own?
See how new flooring looks in your actual room in seconds — free, no signup.
Try the free Floor Studio →