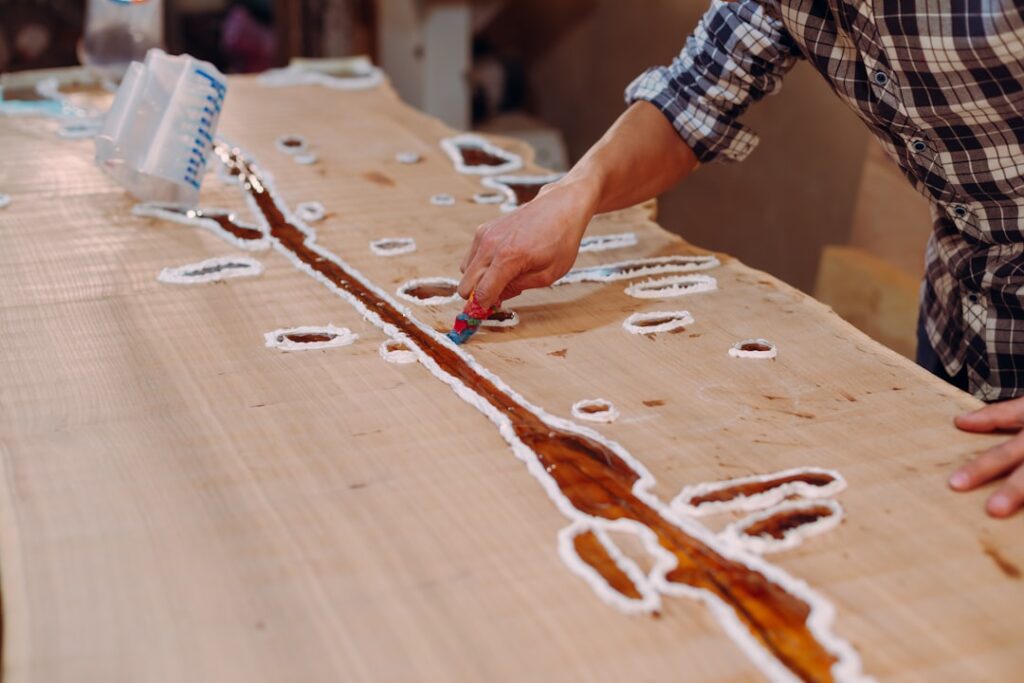
After more than a decade of pouring bar tops, live-edge river tables, and coated countertops, I can tell you that most epoxy failures happen before a single drop is mixed. When you apply epoxy to wood, roughly seventy percent of the outcome is decided during prep and mixing, and only thirty percent during the actual pour. Get the surface clean, dry, and sanded correctly, respect your ratios and temperature, and you end up with a glass-clear finish that lasts for decades. Skip those steps and you get fisheyes, cloudy spots, soft patches that never harden, and bubbles frozen in place forever.
Part of our Epoxy, Concrete & Garage Floors guide — explore the full guide →
This guide walks through the whole process the way I do it on a real job: choosing the right product, preparing raw or finished wood, mixing without introducing air, laying a seal coat before a flood coat, torching out bubbles, and knowing exactly how long to wait before you flip your project and put it into service.
Bar-Top Epoxy vs. Deep-Pour Epoxy
There are two families of resin, and confusing them is the single most expensive mistake beginners make. Bar-top or coating epoxy is designed to be poured in thin layers, usually no more than an eighth of an inch at a time. It cures fast, kicks off a lot of heat, and self-levels beautifully across flat surfaces like a table, a counter, or a plank bar. A standard mix ratio is one part resin to one part hardener by volume, and one gallon of combined material covers about twelve to sixteen square feet at that eighth-inch thickness.
Deep-pour or casting epoxy is a different animal. It is formulated to cure slowly so heat dissipates instead of building up, which lets you pour two inches or more in a single lift. River tables, where you flood a channel between two live-edge slabs, need this stuff. Deep-pour ratios are usually two parts resin to one part hardener by volume, and the working time can stretch to twenty-four hours or longer. Pour deep-pour thin and it may never fully harden; pour bar-top thick and it can overheat, crack, yellow, or even smoke.
Surface Preparation Makes or Breaks the Job
Raw wood needs to be dry, ideally under twelve percent moisture content, and sanded progressively up to 120 or 150 grit. Going finer than that is counterproductive because epoxy grabs best on a lightly toothed surface. Vacuum every speck of dust, then wipe the wood with denatured alcohol and let it flash off. Never wipe with mineral spirits or a tack cloth that leaves wax residue, because silicone and wax are what cause those maddening fisheye craters.
Knots, cracks, and end grain in porous species like walnut or oak will outgas air as the resin cures, pushing bubbles up from below. To stop that, brush on a thin seal coat and let it partially cure first. If you are coating over an existing finish such as polyurethane or old varnish, scuff-sand the entire surface with 220 grit until it looks uniformly dull, then clean it. Epoxy will not bond to a glossy sealed surface, and it will peel like a sticker within months if you skip the scuff.
Mixing Without Ruining the Batch
Measure by volume or weight exactly as the manufacturer specifies. Eyeballing the ratio is why so many pours stay tacky. Use graduated mixing cups, pour both parts in, and stir slowly and deliberately for at least three full minutes, scraping the sides and bottom of the container the entire time. Unmixed resin clinging to the cup wall is a common cause of soft spots.
Stir slow. Fast, aggressive whipping folds air into the mix that you will fight later with a torch. Many pros use the double-cup method: mix in the first cup, then pour into a clean second cup and stir again to catch any material that never touched the paddle. Temperature matters enormously here. Keep the resin, the wood, and the room between 70 and 75 degrees Fahrenheit. Below 65 the epoxy thickens, traps bubbles, and can cure cloudy; above 80 it kicks too fast and shortens your working window to almost nothing.
Seal Coat First, Then Flood Coat
When you apply epoxy to wood on a table or bar top, work in two stages. The seal coat is a thin skim you spread with a brush or squeegee to lock down the pores and stop outgassing. It only needs to be a paper-thin layer. Let it set until it is tacky but firm, usually four to six hours, then you can pour the flood coat directly over it without sanding between.
The flood coat is the thick, self-leveling layer that gives you that mirror surface. Pour it in a zigzag pattern across the whole surface, then spread it toward the edges with a foam spreader and let gravity do the rest. Bar-top resin will flow out level on its own within ten minutes. Keep a chip brush handy to catch drips running down the sides, or place your project on painter’s-tape dams so the overflow drips onto plastic below instead of gluing your piece to the workbench.
Getting the Bubbles Out
Bubbles rise for the first fifteen to thirty minutes, and that is your window to remove them. A propane or butane torch is the tool of choice because the heat pops surface bubbles and the carbon dioxide from the flame breaks their surface tension. Hold the flame six to eight inches above the surface and keep it moving in a steady sweeping pass. Never let it dwell in one spot; you will scorch the resin and leave a yellow burn mark.
A heat gun works too but is gentler and slower, useful if open flame makes you nervous. Do one or two passes at fifteen minutes, wait, then do a final pass around the thirty-minute mark as any late bubbles surface. After that, leave it alone. Once the epoxy starts to gel, poking at it only makes divots that will not self-level back out.
Cure Times and When to Use the Piece
Bar-top epoxy is usually dust-free in a few hours and dry to the touch overnight, but that does not mean it is done. It reaches a hard cure in 24 to 72 hours and full chemical cure in about seven days. You can move a table gently after 24 hours, but do not set hot mugs, cutting boards, or heavy objects on it until it has cured a full week. Deep-pour resin can take five to seven days just to harden enough to sand and finish, so plan your timeline accordingly and resist the urge to demold early.
If you want a satin rather than glossy look, or you cast a river table and need to level the top, let it fully cure, then sand progressively from 220 up through the higher grits and buff or top with a wipe-on finish. Trying to sand epoxy before it is fully hard just gums up your paper.
Cost and Common Mistakes
Budget-friendly bar-top kits run about $40 to $60 per gallon, while premium UV-resistant and deep-pour casting resins climb to $90 to $150 per gallon. A typical 3-by-6-foot bar top at an eighth-inch flood coat needs roughly a gallon and a half. Always mix ten to fifteen percent more than your calculator says, because running short mid-pour leaves a visible cold-joint line where the two batches meet.
The mistakes I see most often are pouring in a cold garage, skipping the seal coat over porous wood, whipping air into the mix, torching too close, and putting the piece into service before it cures. Avoid those and your first project will look like it came out of a professional shop. When you apply epoxy to wood with patience and the right temperature, the results are genuinely hard to mess up, and the durable, waterproof finish will outlast almost anything else you could put on a wood surface.