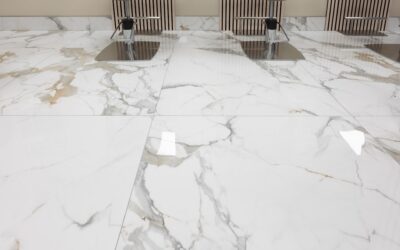
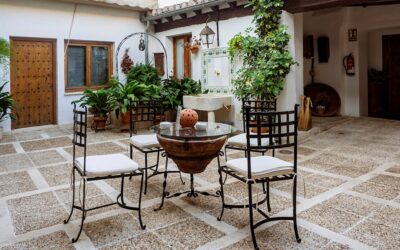
Outdoor flooring has changed a lot in the last decade, and thick porcelain pavers are a big reason why. Arterra porcelain pavers are a popular line of 2-centimeter-thick porcelain tiles built specifically for exterior use, offering the look of natural stone or wood with the toughness of high-fired porcelain. Unlike thin indoor tile, these heavy-duty pavers can be dry-laid on gravel, set on pedestals over a rooftop, or mortared to a slab, which makes them one of the most versatile outdoor surfaces available. If you’re planning a patio, walkway, or deck, understanding how they work helps you choose the right install method.
Part of our Tile & Grout guide — explore the full guide →
What Sets Outdoor Porcelain Pavers Apart
The defining feature is thickness. At 20 millimeters, roughly 3/4 inch, these pavers are two to three times thicker than standard indoor porcelain, which typically runs 8-10 millimeters. That heft gives them the structural strength to be walked on without a fully bonded mortar bed underneath, opening up installation methods that thin tile can’t handle.
Beyond thickness, outdoor porcelain is engineered for the elements. It’s frost-resistant thanks to very low water absorption, usually under 0.5 percent, so it won’t crack when trapped moisture freezes. The surfaces carry slip-resistant textures rated for wet conditions, and the color runs through the body enough to resist fading under UV exposure.
The Look and Style Options
A major draw is the realism. These pavers convincingly mimic materials that would be expensive or high-maintenance in their natural form:
- Stone looks: Travertine, limestone, slate, and granite appearances without the sealing and staining.
- Wood-plank looks: The warmth of decking without rot, splinters, or annual staining.
- Concrete and cement looks: Clean, modern gray tones for contemporary patios.
Common paver sizes include 24×24 and plank formats, sized to be handled by one or two people despite the weight. A 24×24 porcelain paver weighs around 40-50 pounds, so plan your lifting accordingly.
Installation Method 1: Gravel and Sand
The simplest DIY-friendly method sets pavers on a compacted base, much like traditional concrete pavers. You excavate, lay landscape fabric, add and compact several inches of gravel, then a leveling layer of sand or fine aggregate, and set the pavers on top with spacing.
This dry-set approach drains well, allows individual pavers to be lifted for repairs, and requires no mortar. It’s ideal for patios and walkways at grade. The key is a properly compacted, well-drained base; skip that and the pavers will shift and rock. Slope the base about 1/4 inch per foot away from the house for drainage.
Installation Method 2: Pedestal Systems
For rooftops, decks, and balconies, adjustable pedestals are the go-to. These plastic supports sit at the corners of each paver and screw up or down to create a perfectly level surface over an uneven or sloped substrate. The pavers float on the pedestals with an open gap beneath.
This method has real advantages. Water drains straight through the joints to the surface below, the cavity underneath hides wiring or plumbing, and any paver lifts out instantly for access. Pedestal systems are why porcelain pavers dominate modern rooftop terraces. The 2-centimeter thickness is what allows the pavers to span the pedestal spacing without cracking underfoot.
Installation Method 3: Bonded to Concrete
Over an existing concrete slab, you can set the pavers in a mortar bed like conventional tile for a permanent, rigid surface. Use an exterior-rated thinset and follow the same flatness and coverage standards you would for large-format indoor tile, aiming for full mortar contact to prevent cracking under freeze-thaw stress.
This method gives the most solid, immovable result and works well when you already have a sound slab. It sacrifices the easy removability of the other two methods, so choose it when permanence is the priority.
Cost Expectations
Outdoor porcelain pavers cost more than thin tile because of the material and thickness. Typical ranges:
- Pavers: $5-$12 per sq ft, with premium looks reaching $15
- Pedestals: $3-$6 each, several per paver on a raised system
- Base materials: gravel, sand, and fabric for dry-set installs
- Professional installation: $8-$20 per sq ft depending on method
The material premium pays back in durability and near-zero maintenance. Unlike wood decking that needs staining every couple of years, or natural stone that needs sealing, porcelain pavers essentially just need occasional cleaning.
Maintenance and Longevity
Care is refreshingly simple. Sweep off debris, rinse with a hose, and scrub occasional stains with mild soap and water. Because the porcelain is dense and nearly non-absorbent, oil, wine, and organic stains sit on the surface rather than soaking in. No sealing is required, which is a genuine advantage over stone and concrete.
In freezing climates, the frost resistance means you can leave them in place year-round without worrying about cracking. Clear snow with a plastic shovel and avoid metal blades that could scratch the surface. Properly installed porcelain pavers can last for decades with almost no upkeep.
Are They Right for Your Project?
Before deciding, it helps to see how these pavers compare to the alternatives homeowners usually weigh. Poured concrete is cheaper upfront but cracks over time, stains easily, and can’t be lifted for repairs. Natural stone like travertine and bluestone looks gorgeous but costs more, needs periodic sealing, and can stain and spall in freeze-thaw climates. Traditional concrete pavers are affordable and DIY-friendly but fade, grow moss in the joints, and lack the crisp, modern look of porcelain. Against that field, porcelain pavers land as the premium option that trades higher material cost for near-zero upkeep.
A few site details make or break any porcelain paver project regardless of method. Drainage is the big one: water must flow away from the house and off the surface, which means a slope of about 1/4 inch per foot on dry-set installs and open joints on pedestal systems. Edge restraint matters too, so dry-set patios need a solid border to keep the field from creeping outward over the seasons. Get the base and drainage right and the pavers stay flat and stable for decades; skimp on them and even the best tile will heave, rock, and pool water.
If you want an outdoor surface that looks like stone or wood but shrugs off weather, stains, and heavy use, Arterra porcelain pavers deliver on all three. The dry-set and pedestal methods make them accessible even for ambitious DIYers, while the bonded method offers a permanent option over existing concrete. Weigh the higher upfront cost against years of no staining, sealing, or rot, and for many patios and decks the math works out strongly in the pavers’ favor. Pick the install method that fits your site, build a solid base, and you’ll have a handsome, low-maintenance outdoor floor for the long haul.
One planning note before you order: measure carefully and buy about 10 percent extra. Porcelain pavers are heavy and shipped by freight, so a shortfall mid-project means waiting weeks and possibly a color mismatch from a different production run. Keeping a few spare pavers on hand also means you can swap out a rare cracked or stained piece years later without hunting for a discontinued match. For a surface built to last decades with almost no upkeep, that small buffer of extra material is cheap insurance well worth carrying.
Prefer to explore on your own?
See how new flooring looks in your actual room in seconds — free, no signup.
Try the free Floor Studio →