Most kitchens built between 1975 and 2005 have an awkward strip of dead space between the top of the upper cabinets and the ceiling, and running backsplash tile above kitchen cabinets has become one of the most requested fixes for it. Done well, it turns a dusty gap into a deliberate design feature that makes eight-foot ceilings feel taller. Done badly, it looks like someone ran out of ideas and kept slapping tile until they hit drywall. I have installed backsplash tile above kitchen cabinets in dozens of homes over the past fifteen years, and the difference between the two outcomes comes down to a handful of decisions you should make before a single tile goes on the wall.
Part of our Kitchen Remodeling guide — explore the full guide →
What This Actually Involves
To be clear about scope: this is not about decorating the cabinet tops. This is about carrying the same tile field that sits between your countertop and your uppers all the way up the wall behind and above the cabinets, usually to the ceiling. In a kitchen with 42-inch uppers and a 96-inch ceiling, that gap runs 12 to 18 inches tall depending on crown detail. In older homes with 30-inch cabinets, the gap can be a full 24 inches. Multiply that height by the run of your cabinets and you are typically adding 15 to 30 square feet of tile to the job.
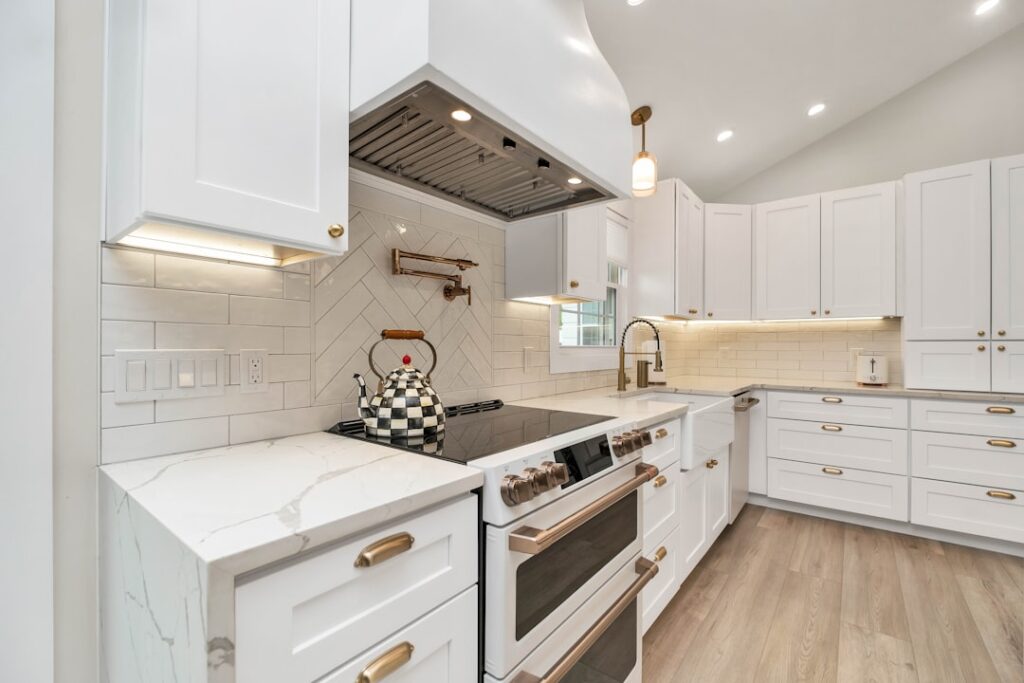
There are two common versions. The first extends tile only above the cabinets on walls that already have backsplash below, keeping everything in one material. The second is the full floor-to-ceiling treatment on a feature wall, most often the range wall, where tile runs unbroken from countertop to ceiling with the hood sitting in the middle of the field. Both count as tiling above the cabinets, but the range wall version is by far the more forgiving and the more photographed.
When It Looks Right and When It Looks Busy
The look works when the tile is calm and the run is continuous. Large-format subway in a soft white, a handmade-look zellige in one tone, or a simple stacked 2×8 all read as texture from across the room rather than pattern. That is what you want up high, because the eye reads anything above the cabinets at a distance. A quiet field of tile up there makes the ceiling feel a foot taller and ties the uppers into the wall so they look built in rather than hung on.
It fails when the tile is loud. A high-contrast mosaic, a busy Moroccan-pattern cement look, or dark grout on small white tile turns that upper band into a flickering stripe that fights with everything below it. It also fails when the run is choppy. If your uppers step up and down in height, or a soffit wraps two walls but not the third, tiling the leftover gaps produces a patchwork of tile islands that emphasizes the irregularity instead of hiding it. Walk your kitchen and count the separate rectangles of wall you would be tiling. One or two continuous bands look intentional. Five scattered patches look like a mistake.
Ceiling height matters too. With a 9- or 10-foot ceiling and standard uppers, the gap is large enough to read as a real design band. With a 3-inch sliver between crown molding and ceiling, tile just looks crammed. If the gap is under 6 inches, skip the tile and close the gap with a filler strip or extended crown instead.
What the Extra Square Footage Costs
Figure the addition in three parts. Material is the easy one: 20 square feet of ceramic subway at $4 per square foot is $80, while the same area in handmade zellige at $18 per square foot is $360, plus roughly 10 percent waste on straight runs and 15 percent if you are cutting around a hood. Setting materials, thinset, grout, and edge trim add $60 to $120 for a job this size.
Labor is where the number moves. Tiling above cabinets pays worse per square foot for the installer because everything happens off a ladder, cuts are constant at the ceiling line, and the work zone is cramped between crown and drywall, so expect a premium of $3 to $8 per square foot over the standard wall rate in your area. On a typical job I quote the above-cabinet portion at $18 to $28 per square foot labor when it rides along with a full backsplash install, so 20 square feet adds $360 to $560. As a standalone project, most tile setters will apply a minimum charge of $300 to $500 regardless of size, which is why this upgrade is dramatically cheaper to do at the same time as the main backsplash than as an afterthought two years later.
All in, adding the above-cabinet band to a new backsplash project usually runs $500 to $900 with mid-range ceramic and $900 to $1,500 with premium tile. Against a total kitchen refresh budget, that is a modest line item for a change people notice the moment they walk in.
Prep Work: The Drywall Up High Is Rarely Ready
Here is what surprises homeowners. The wall behind and above cabinets was never finished to a paint-grade standard because the builder knew nobody would see it. Expect unsanded joint compound, overspray texture, missed screw pops, and sometimes bare gypsum where the cabinet crew scribed their layout lines. Tile hides color but telegraphs bumps, so the surface still needs to be flat within 1/8 inch over 10 feet.
Practical prep goes like this. Skim any heavy texture with setting-type compound such as Durabond 45, knock down ridges with a 6-inch knife, and prime with a drywall primer-sealer so the thinset does not flash-dry against raw paper. If the area sits above a range wall where grease has been condensing for twenty years, wash it first with TSP substitute, because thinset will not bond through a grease film no matter how good the tile setter is. For a standard non-wet wall area like this, tile can go directly over primed drywall; you do not need cement board above the cabinets the way you might behind a range without a hood.
One more item: outlets. Some kitchens have receptacles or cable jacks hiding up in that dead zone from an old plug-in clock or under-cabinet lighting transformer. Each box needs a box extender, about $3 apiece, to bring it flush with the new tile plane, and each one adds cutting time to the labor bill.
Matching Existing Tile and the Dye Lot Problem
If your lower backsplash already exists and you want to extend the same tile upward, slow down before ordering. Ceramic and porcelain tile are produced in dye lots and calibers, and a white subway tile bought three years apart can differ visibly in tone and in size by a millimeter or more. Up high the tone shift is what betrays you, because the two fields sit in different light and the eye compares them constantly.
Check the box label from your original purchase if you saved one, and ask the distributor to pull from the same lot number. Failing that, buy a sample box and hold pieces against the installed field in daylight and again under your kitchen lighting at night. If the match is off, you have three honest options: choose a deliberately different but coordinating tile so the change reads as a design decision, separate the two fields with a pencil liner or metal trim strip so the eye accepts a break, or retile the whole wall. The one thing you cannot do is install a near-miss match and hope. Near misses read as mistakes every single time.
Alternatives Worth Considering
Tile is not the only answer for the gap. Closing the soffit with framed drywall costs $40 to $75 per linear foot and gives you a clean painted band that extends the wall down to the cabinet crown, which is the right call when the gap is shallow or the cabinet layout is irregular. Extending the cabinets themselves with stacked upper boxes runs $150 to $400 per linear foot but adds real storage. Simple crown molding scaled to fill the space costs the least, often under $20 per linear foot installed, and works when the gap is 6 inches or less. Tile beats all three when you want visual height, when the gap is generous and continuous, and when you are already paying a tile setter to be in the room.
The Bottom Line
Extending backsplash tile above kitchen cabinets is worth doing when three things line up: a continuous gap of 8 inches or more, a calm tile that reads as texture rather than pattern, and a project timeline that lets you tack it onto the main backsplash install instead of paying a separate minimum charge. Budget $500 to $900 extra for a typical kitchen in ceramic, prep the never-finished drywall properly, and treat tile matching as a dye lot problem rather than a color name problem. Get those right and the space over your cabinets stops being the spot where dust collects and starts being the detail that makes the whole kitchen look taller and more expensive than it was.
Prefer to explore on your own?
See how new flooring looks in your actual room in seconds — free, no signup.
Try the free Floor Studio →