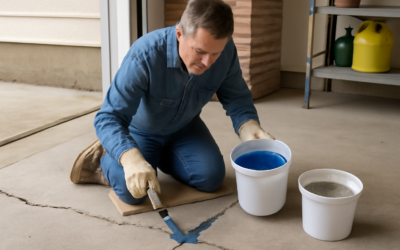
Bartop epoxy is the thick, glass-like resin coating that gives home bars, counters, and tabletops that deep, glossy, professional finish you see in pubs and restaurants. Pouring bartop epoxy is a rewarding weekend project, but it rewards preparation and patience, since the chemistry only cures correctly when you mix, pour, and protect it the right way.
Part of our Epoxy, Concrete & Garage Floors guide — explore the full guide →
What Bartop Epoxy Is
Bartop epoxy is a two-part system made of a resin and a hardener that, when combined, undergo a chemical reaction and cure into a hard, clear, high-gloss plastic. Unlike thin coating epoxies, bartop formulas are designed to be poured in thicker layers, self-leveling across a surface to create a smooth, durable top.
The cured finish resists scratches, heat to a degree, moisture, and everyday spills, which is why it is popular for bar tops, kitchen counters, river tables, and live-edge wood projects. It also encapsulates and protects whatever you place beneath it, from photos and bottle caps to coins and wood grain.
Choosing the Right Product
Not all epoxies are interchangeable, and the differences matter for a surface where people eat and drink. Look for these key traits when you shop:
- Bartop or tabletop rated: Confirm the product is specifically formulated for thick pours and countertop use, not just a thin floor or art coating.
- Food-contact safety once cured: If the surface will touch food or drink, choose a product the manufacturer specifically rates as food-safe after full cure. Do not assume a generic epoxy qualifies.
- UV resistance: Sunlight can yellow some clear epoxies over time, so a UV-stabilized formula is worth it near windows.
- Pot life and cure time: These tell you how long you have to work and how long before the surface is usable.
Read the technical data sheet for each candidate, since the manufacturer’s own ratings are the only reliable word on food safety and performance.
Tools and Materials You Will Need
Gathering everything before you start prevents a frantic scramble once the clock starts ticking on your mixed batch. A typical pour calls for:
- The two-part bartop epoxy kit in sufficient volume for your surface area and pour depth.
- Calibrated mixing containers and clean stir sticks.
- Nitrile gloves, safety glasses, and protective clothing.
- A foam brush or spreader for edges, plus a heat source like a propane torch or heat gun for bubbles.
- Painter’s tape, plastic sheeting to protect the floor, and a level work surface.
Surface Prep Is Everything
A flawless epoxy finish starts with a flawless surface. Whatever you are coating must be clean, dry, level, and sealed. Sand bare wood smooth, vacuum and wipe away all dust, and remove any oils or wax that could cause the epoxy to fish-eye or fail to bond.
Build a dam or use tape around the edges to contain the self-leveling resin and prevent it from running off. Make sure your work surface is perfectly level, because epoxy flows to the low side and will pool unevenly if the table is tilted. Many pros do a thin seal coat first to lock down porous materials and prevent air bubbles from rising out of the wood during the main flood coat.
Mixing and Pouring
This is where discipline pays off. Epoxy cures by an exact chemical ratio, so follow the manufacturer’s mix ratio precisely, measuring by volume or weight as the label directs rather than eyeballing it. Too much or too little hardener can leave the surface tacky, soft, or cloudy forever.
- Measure the resin and hardener in the exact ratio the manufacturer specifies.
- Stir slowly and thoroughly for the full time stated, scraping the sides and bottom so no unmixed product remains.
- Pour the mixed epoxy onto the surface and spread it toward the edges with a foam spreader.
- Let it self-level, then pass a torch or heat gun briefly over the surface to release trapped air bubbles, keeping the flame moving so you never scorch the resin.
- Watch for new bubbles for the first 20 to 30 minutes and re-pass with heat as needed.
Safety and Ventilation
Uncured epoxy is a chemical product, and the resin and hardener can irritate skin, eyes, and lungs before they cure. Always work in a well-ventilated space, ideally with cross-ventilation or fans moving fresh air, and wear nitrile gloves and safety glasses throughout mixing and pouring.
Avoid skin contact with the liquid components, keep the area free of open flame except for the controlled bubble-popping pass, and keep children and pets away until the surface has fully cured. This guide offers general best practices, but the manufacturer’s safety data sheet and instructions always take priority. If you are unsure about ventilation or handling, consult a professional finisher.
Curing and Long-Term Care
Patience during curing separates a beautiful bar top from a ruined one. Most bartop epoxies are touch-dry within a day but need a full cure, often several days to a week or more, before the surface reaches maximum hardness and any food-safe rating takes effect. Keep dust, bugs, and fingers off it the entire time, and maintain the room temperature the label recommends, since cold rooms slow or stall the cure.
Once cured, the finish is easy to live with. Wipe it with a soft cloth and mild soap, use coasters and trivets to guard against extreme heat, and avoid harsh abrasives that could dull the gloss. Treated well, a quality bartop epoxy surface stays clear and lustrous for many years. Material costs vary, but home-scale kits commonly run in the range of $40 to $150 depending on coverage, with larger or premium UV-stable kits costing more.
Troubleshooting Common Problems
Most epoxy mishaps trace back to a handful of avoidable causes, and knowing them in advance saves a lot of frustration. A surface that stays tacky or soft almost always means the resin and hardener were measured or mixed incorrectly, so precise ratios and thorough stirring are non-negotiable. Cloudy or hazy patches often come from moisture, cold temperatures, or stirring in too much air.
Lingering bubbles usually mean the surface was not torched soon enough or the underlying material outgassed without a seal coat. Dips, waves, and uneven thickness point to a work surface that was not truly level. If you catch a problem before the epoxy sets, you sometimes have a small window to correct it, but once cured, the only real fix is to sand the surface and pour a fresh coat over the top after the manufacturer-recommended recoat steps.
When to Hire a Professional
Many homeowners successfully pour their own bar tops, and the satisfaction of a hand-finished surface is real. Still, some projects justify professional help. Large surfaces, intricate embedded objects, deep river-table pours, and any job where a flawless commercial-grade result matters can be worth the investment in an experienced finisher.
A pro brings the right tools, a controlled environment, and the muscle memory to mix and pour large batches before the working time runs out. If you are coating an expensive slab, working in a space that is hard to ventilate, or simply unwilling to risk a ruined first attempt, getting a quote from a local resin specialist is a sensible step. For a modest home bar, though, a careful first-timer who respects the prep, the mix ratio, and the cure time can achieve excellent results.