Understanding batt insulation R value is the foundation of any successful insulation project, because that single number tells you how well the material resists heat flow and how much comfort and energy savings you will actually get. Batt insulation, the familiar fluffy blankets of fiberglass or mineral wool that fit between framing, is the most common and DIY-friendly insulation in American homes. But buying the wrong R-value, or installing a good batt poorly, wastes money and leaves rooms cold in winter and hot in summer. This guide demystifies R-value so you can insulate right.
We will cover what R-value means, the ratings of common batts, how much you need in walls, attics, and floors, and the installation mistakes that quietly destroy performance.
- What R-Value Actually Means
- Common Batt R-Values and Thicknesses
- How Much R-Value Do You Need?
- Matching Batt Size to Your Framing
- Faced vs. Unfaced Batts
- Installation Mistakes That Kill Performance
- Safety and DIY Tips
- Batt Insulation vs. Blown-In and Spray Foam
- Signs You Need More Insulation
- Getting the Most From Your Insulation
What R-Value Actually Means
R-value measures a material’s resistance to conductive heat flow; the higher the number, the better it slows heat from passing through. A wall rated R-13 resists heat flow less than one rated R-21. R-value is additive, so two layers of R-19 stacked in an attic give you roughly R-38. It is important to know that R-value depends on both the material and its thickness. Compress a thick batt into a thinner cavity and you lose R-value, because the trapped air that does the insulating gets squeezed out. This is why proper fit matters as much as the label.
Common Batt R-Values and Thicknesses
Batts are manufactured in standard R-values sized to fit standard framing. Here are the typical ratings you will encounter:
- R-11 to R-13: About 3.5 inches thick, made for 2×4 walls (a standard exterior wall cavity).
- R-15: A higher-density 3.5-inch batt for 2×4 walls when you want more performance in the same space.
- R-19 to R-21: About 5.5 to 6.25 inches thick, sized for 2×6 walls and floors.
- R-30: Roughly 8 to 10 inches thick, common for floors and cathedral ceilings.
- R-38: About 12 inches thick, used in attics in many climates.
Fiberglass and mineral wool differ slightly: mineral wool tends to pack more R-value into the same thickness and adds fire and sound resistance, though it costs a bit more.
How Much R-Value Do You Need?
Recommended R-values vary by where you live, since colder climates need more. The Department of Energy divides the country into climate zones and suggests targets by location and building area. As a general rule of thumb:
- Exterior walls: R-13 to R-21 depending on wall depth and climate.
- Attics: R-38 to R-60, the single most important area to insulate well since heat rises.
- Floors over unconditioned space: R-19 to R-30.
- Basement and crawlspace walls: R-11 to R-19.
Cold northern zones push toward the high end of each range, while warm southern zones can use less in walls but still benefit from a deep, well-insulated attic to fight summer heat. Check the DOE recommendations for your specific zone before buying.
Matching Batt Size to Your Framing
Getting the right R-value starts with matching the batt to your cavity. A 2×4 wall is only about 3.5 inches deep, so an R-13 or R-15 batt fits without compression; trying to cram an R-19 batt meant for a 2×6 wall into a 2×4 cavity actually delivers less than its rated value because it gets crushed. A 2×6 wall accepts R-19 or R-21. Attics have open framing, so you can lay in deep R-38 batts or add loose fill on top. Always buy the batt designed for your stud or joist depth, and check whether you want faced batts (with a paper or foil vapor retarder) or unfaced ones.
Faced vs. Unfaced Batts
Faced batts have a kraft-paper or foil facing that acts as a vapor retarder, slowing moisture from migrating into the wall. The facing goes toward the heated living space, meaning the paper faces the interior of the home. Use faced batts in exterior walls and floors in most climates. Use unfaced batts when adding a second layer over existing insulation, for interior sound-dampening walls, or where a separate vapor barrier is already present. Never install two vapor-retarder facings in the same assembly, as that can trap moisture between them.
Installation Mistakes That Kill Performance
A high R-value batt installed carelessly can underperform a lower-rated one installed well. The most damaging errors include:
- Compressing the batt: Stuffing insulation behind wires, pipes, or into a too-shallow cavity squeezes out the air that provides the R-value. Split the batt around obstructions instead.
- Leaving gaps and voids: Even small uninsulated gaps around outlets, at corners, and along edges let heat pour through. Cut batts to fit snugly with no gaps.
- Wrong vapor retarder direction: Facing the paper the wrong way can trap moisture and cause mold.
- Blocking soffit vents in the attic: Pushing batts into the eaves cuts off ventilation; use baffles to keep the airway open.
Fit is everything. A perfectly filled cavity with no compression or gaps delivers the R-value on the label.
Safety and DIY Tips
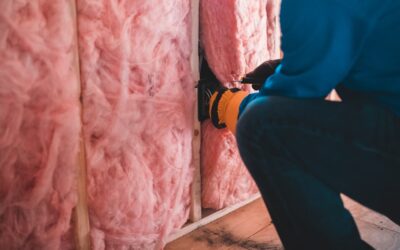
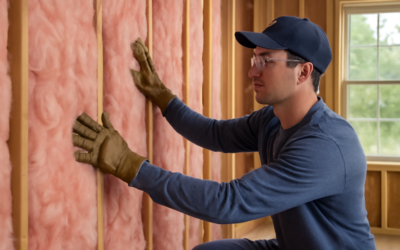
Batt insulation is very DIY-friendly, but wear the right protection. Fiberglass irritates skin, eyes, and lungs, so wear long sleeves, gloves, safety glasses, and an N95 or better respirator. Cut batts by compressing them with a straightedge and slicing with a sharp utility knife. Work methodically and press batts fully into the cavity depth without overstuffing. For most homeowners, insulating an accessible attic or an open wall during a remodel is a very achievable weekend project that pays back quickly in comfort and lower bills.
Batt Insulation vs. Blown-In and Spray Foam
Batts are only one way to insulate, and knowing how they compare helps you choose the right product for each part of the house. Batt insulation is the most DIY-friendly and affordable option, ideal for open, accessible framing like unfinished walls during a remodel, attic joists, and floors over crawlspaces. Its main weakness is fitting around obstructions; wherever wiring, pipes, boxes, and irregular framing interrupt the cavity, batts are hard to fit perfectly and gaps reduce performance.
Blown-in loose fill, typically fiberglass or cellulose, excels in attics because it flows into every gap and around obstacles, giving a seamless blanket with no seams or voids, and it is easy to add on top of existing insulation to boost R-value. Spray foam is the premium option; it expands to fill and air-seal the cavity completely, delivers the highest R-value per inch, and stops air leakage that batts cannot, but it costs significantly more and usually requires professional installation. Many homeowners use a smart mix: batts in open walls and floors for cost, blown-in for the attic where coverage matters, and spray foam in tricky spots like rim joists where air sealing pays off most.
Signs You Need More Insulation
Knowing when your home is under-insulated helps you prioritize where to spend. Several telltale signs point to inadequate insulation and the comfort and cost penalties that come with it. Rooms that are noticeably colder in winter or hotter in summer than the rest of the house, especially rooms over garages or under attics, often signal missing or compressed insulation. High heating and cooling bills relative to similar homes in your area suggest energy is escaping through poorly insulated surfaces. Uneven temperatures from floor to ceiling, cold drafts near walls and floors, and interior walls that feel cold to the touch all point to gaps in the thermal envelope.
The attic is the first place to check, since it is usually the easiest to access and where the biggest savings hide. If you can see the tops of the ceiling joists poking above the insulation, you likely have less than the recommended depth and would benefit from adding more. Ice dams forming on the roof edge in winter are another red flag, indicating heat escaping through the attic and melting snow that refreezes at the eaves. Frozen pipes in exterior walls and persistent condensation problems can also trace back to insufficient insulation. A simple attic inspection, and in cold weather a check for which walls and rooms feel drafty, quickly reveals where adding insulation will deliver the most comfort and savings for your money.
Getting the Most From Your Insulation
The right batt insulation R value, correctly installed, is one of the highest-return improvements you can make to a home. Match the R-value to your climate zone and the area you are insulating, buy batts sized to your framing depth so they fit without compression, face the vapor retarder toward the living space, and fill every cavity snugly with no gaps. Prioritize the attic, where the biggest savings hide, and your home will stay more comfortable year round while your heating and cooling bills drop.