Walk into any home-improvement store and the aisle of fluffy rolls and pre-cut panels you see is the workhorse of American home insulation. Batting insulation, often just called batts, comes in pre-cut lengths or long rolls sized to fit standard framing bays, and it’s the material most homeowners reach for when insulating walls, attics, floors, and ceilings. It’s affordable, widely available, and genuinely DIY-friendly. But the performance you get depends entirely on choosing the right type and R-value and installing it without the gaps and compression that quietly wreck its effectiveness. Here’s what you need to know to buy and install it correctly.
What Batt Insulation Is
Batts are flexible blankets of insulation cut to fit between framing members. They’re manufactured in widths sized for the standard spacing between studs and joists, most commonly 16 inches and 24 inches on center, so they friction-fit into the cavity.
You buy them either as pre-cut batts in fixed lengths, typically 48 or 93 inches, or as continuous rolls you cut to length on site. Some come faced with a paper or foil vapor retarder with stapling flanges; others are unfaced for use where a separate vapor barrier exists or isn’t needed. The faced-versus-unfaced choice matters and depends on where you’re installing, which we’ll get to. The key point is that batts are designed to slot neatly into a framing bay, which is exactly why proper fit is everything.
The Common Types of Batting
Not all batts are the same material, and each has strengths. Your choice affects R-value, cost, fire resistance, and how it handles moisture.
- Fiberglass: The most common and least expensive. Made from spun glass fibers, it’s the pink or yellow batt everyone pictures. Good R-value per dollar, easy to cut.
- Mineral wool (rock wool): Denser, spun from stone or slag. Higher R per inch, excellent fire resistance, better sound damping, and it holds its shape. Costs more.
- Cotton (recycled denim): Made from recycled fabric, itch-free to handle, good sound control, and a greener choice. Priciest of the three.
Fiberglass covers most budget projects. Mineral wool is my pick where fire rating, moisture resistance, or soundproofing matter, such as around a furnace room or a shared wall. Cotton is worth it if handling comfort and eco-content are priorities.
Understanding R-Value
R-value measures resistance to heat flow, and higher numbers insulate better. It’s the single most important spec when buying batts, and it drives which thickness you need for each part of the house.
Standard fiberglass batts deliver roughly R-3 to R-4 per inch, while mineral wool runs a bit higher at around R-4 to R-4.3 per inch, which is why it can hit a target R-value in a thinner profile. Batts are sold labeled by their finished R-value rather than just thickness, so you’ll see products marked R-13, R-15, R-19, R-21, R-30, and R-38.
- 2×4 exterior walls: R-13 to R-15.
- 2×6 exterior walls: R-19 to R-21.
- Floors over unconditioned space: R-19 to R-30.
- Attics and ceilings: R-30 to R-49, sometimes higher in cold climates.
Your local climate zone sets the recommended targets, and colder zones call for more. Check the recommendations for your region before buying, since under-insulating an attic is a common and costly mistake.
Faced vs. Unfaced
The facing on a batt is a vapor retarder, and getting it right prevents moisture problems inside walls. The rule of thumb in most of the country is that the vapor retarder faces the warm-in-winter side, meaning the interior.
Use faced batts, kraft-paper or foil facing toward the living space, in exterior walls, and in floors and ceilings where you need to control moisture migration. Use unfaced batts when you’re adding a second layer over existing insulation, when there’s already a separate vapor barrier, or in interior walls used only for soundproofing where no vapor control is needed. Never install a second faced layer over a first faced layer, because you’d trap moisture between two vapor retarders. Facing rules can vary by climate, so confirm what applies where you live.
Where Batts Work Best
Batts shine in open, accessible, evenly spaced framing. That’s where their pre-cut sizing pays off and you can get a clean, gap-free fit.
They’re ideal for new-construction walls before drywall, attic floors between joists, floors over crawl spaces and garages, and interior walls for sound control. Where batts struggle is in irregular, obstructed, or hard-to-reach cavities, an attic full of wiring and boxes, walls with lots of blocking, or retrofits where you can’t open the framing. In those spots, blown-in loose fill or spray foam often fits better because it flows around obstructions. For clean, open bays, though, batts are hard to beat on cost and speed.
Installing Batts the Right Way
Installation quality makes or breaks batt performance. Poorly fitted batts can lose a large share of their rated R-value, so the goal is a snug, complete fill with no gaps and no compression.
- Measure and cut batts slightly long so they fully fill the bay height without being crammed.
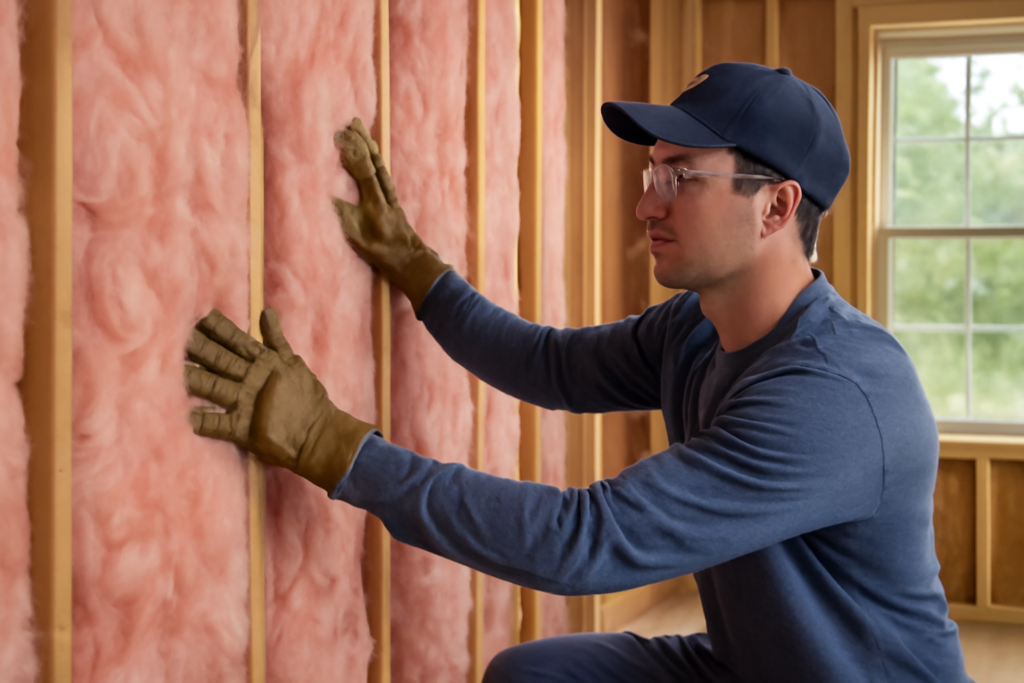
- Fit the batt so it fills the full depth and width, tucking the edges gently against the studs, not jamming them.
- Split the batt around wiring and pipes rather than crushing it behind them, sliding half the thickness behind and half in front.
- Cut neatly around electrical boxes so the batt fits around, not over, them.
- For faced batts, staple the flanges to the face or inside of the studs per the manufacturer, keeping the facing continuous.
Never compress a batt to fit a shallower cavity, since compression reduces R-value. And never leave gaps at the top, bottom, or sides; even small voids let heat bypass the insulation. Wear a respirator, gloves, long sleeves, and eye protection, especially with fiberglass, which sheds irritating fibers.
Batts vs. Blown-In and Spray Foam
Batts aren’t the only game in town, and knowing how they compare helps you choose the right product for each job. The three main options each have a sweet spot.
Blown-in loose fill, cellulose or fiberglass, is blown in with a machine and excels in attics and closed wall cavities because it flows around wiring, pipes, and irregular framing that batts can’t fit neatly. Spray foam, open or closed cell, expands to fill and air-seal every gap and delivers a high R-value per inch, but it costs several times more and usually needs a pro. Batts sit in the middle: cheapest, DIY-friendly, and excellent in open, evenly spaced framing, but weaker where obstructions or gaps let air bypass them. A common smart approach in an attic is to lay batts between the joists and then blow loose fill over the top to bury the framing and stop thermal bridging. Match the material to the cavity and you get the best of each.
Common Batt Installation Mistakes
Most of the performance complaints about batts trace back to installation, not the product. A batt only delivers its rated R-value when it’s installed correctly, and a handful of errors show up over and over.
- Compression: Cramming a thick batt into a shallow cavity crushes the air pockets and drops the R-value.
- Gaps and voids: Leaving space at the ends, sides, or around obstructions lets heat bypass the insulation.
- Crushing behind wires and pipes: Not splitting the batt around obstructions leaves a compressed, underperforming spot.
- Wrong facing direction: Installing the vapor retarder toward the cold side in a heating climate can trap moisture.
- Not cutting around boxes: Jamming a batt over an electrical box instead of fitting it around leaves gaps.
Every one of these is avoidable with a little care. Take the extra minute to split the batt around a wire, cut it to fit an outlet box, and fill the cavity fully without cramming, and your batts will actually perform to their label.
Safety and Handling
Batt insulation, especially fiberglass, needs to be handled with basic protection. The fine fibers irritate skin, eyes, and lungs, and nobody enjoys the itch that follows a careless afternoon in an attic.
Wear a properly rated dust mask or respirator, safety glasses, gloves, and long sleeves whenever you cut or place batts. Work in a ventilated space, and if you’re in an attic, watch your footing on the joists and mind the heat, since attics get dangerously hot in summer. Mineral wool and cotton batts are less itchy than fiberglass but still warrant a mask because you don’t want to breathe any airborne fibers. After the job, wash your work clothes separately to get the fibers out. None of this is complicated, but skipping the protection turns an easy project into a miserable, itchy one, and repeated fiber exposure is genuinely worth avoiding.
Cost and the Bottom Line
Batts are the budget-friendly insulation choice, which is a big part of their popularity. Fiberglass runs roughly $0.30 to $0.80 per square foot in materials, mineral wool $1.00 to $1.75, and cotton at the higher end. A DIY installer can insulate a room in an afternoon.
The value is real, but only if you install it well. Batting insulation rewards careful fitting, correct R-value for the location, and the right faced-or-unfaced choice for moisture control. Buy the R-value your climate zone calls for, fit each batt snug and gap-free, respect the vapor-retarder rule, and you’ll get quiet, efficient, comfortable rooms for the lowest material cost of any insulation on the shelf.