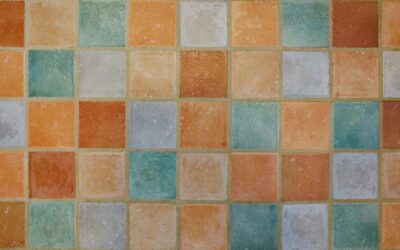
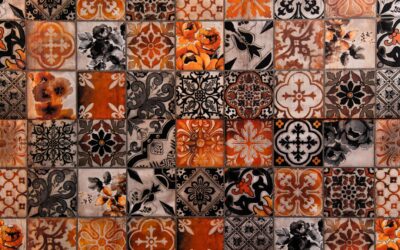
Peel and stick backsplash tiles have evolved from a cheap, temporary fix into a legitimate design option. Modern products use real stone composites, gel resins, and premium vinyl that look convincingly like ceramic, glass, or natural stone tile — at a fraction of the cost and with zero mess. Here’s how to choose and install the best peel and stick backsplash for your kitchen or bathroom.
Part of our Kitchen Remodeling guide — explore the full guide →
Types of Peel and Stick Backsplash
Vinyl Peel and Stick
Flexible vinyl sheets or tiles with printed designs and adhesive backing. The most affordable option. Available in subway, mosaic, marble-look, and geometric patterns. Lightweight and easy to cut with scissors. Best for renters and budget projects.
- Cost: $3 to $10 per square foot
- Durability: 3 to 7 years
- Heat resistance: Low — keep away from direct flame
Gel/Resin Tiles
Thicker, semi-rigid tiles made from gel or epoxy resin. They have a 3D appearance with depth and dimension that flat vinyl lacks. Gel tiles are heavier, more convincing, and more durable than vinyl. Many have a glass-like appearance. Brands: Smart Tiles, Tic Tac Tiles.
- Cost: $8 to $20 per square foot
- Durability: 5 to 10 years
- Heat resistance: Moderate — safe near stoves at typical distances
Real Stone Composite
Thin slices of real stone (marble, slate, travertine) bonded to a flexible backing with adhesive. These are actual stone — they look and feel authentic because they are. More expensive and heavier than vinyl or gel options. Brands: Aspect Stone, StickTILE.
- Cost: $15 to $35 per square foot
- Durability: 10+ years
- Heat resistance: Excellent (real stone)
Metal Peel and Stick
Thin aluminum or stainless steel tiles with adhesive backing. Create a modern, industrial, or contemporary look. Available in brushed, polished, and copper finishes. Lightweight and easy to cut with tin snips.
- Cost: $10 to $25 per square foot
- Durability: 10+ years
- Heat resistance: Excellent (metal)
Installation Steps
- Prepare the surface: The wall must be clean, dry, smooth, and free of grease or dust. Wash with TSP (trisodium phosphate) or degreaser, then wipe with isopropyl alcohol for maximum adhesion.
- Plan your layout: Measure the backsplash area. Mark a center line and plan tile placement from the center outward so cut tiles on both edges are equal.
- Start at the bottom: Begin at the countertop or a level line and work upward. If your countertop isn’t level, start from a level line and caulk the gap at the counter.
- Peel and place: Peel back the adhesive liner partially, position the tile, and press firmly from center to edges. Complete removing the liner as you press.
- Cut to fit: Mark tiles with a pencil and cut with scissors (vinyl), utility knife (gel), or tile snips (stone/metal). For outlets and switches, turn off power, remove cover plates, and cut tiles to fit around the box.
- Press firmly: After all tiles are placed, press each one firmly or roll with a J-roller to ensure full adhesion.
- Seal edges: Apply clear silicone caulk along the bottom edge (counter joint), top edge, and sides for a finished look and moisture protection.
Surface Preparation Tips
- Painted drywall: Works well if paint is in good condition. Semi-gloss and glossy paint may need light sanding for better adhesion.
- Existing tile: Peel and stick can go over existing tile if the surface is clean and flat. Textured tile may prevent proper adhesion.
- Wallpaper: Remove wallpaper first. Adhesive won’t bond reliably to wallpaper.
- New drywall: Must be primed and painted first. Raw drywall is too porous for adhesive.
Pros and Cons vs Traditional Tile
Advantages
- No thin-set, grout, or special tools needed
- Install a kitchen backsplash in 1 to 3 hours
- Removable — ideal for renters (use heat gun to soften adhesive for removal)
- No mess, no dust, no drying time
- 50% to 75% less expensive than traditional tile installation
Disadvantages
- Not as durable or long-lasting as traditional tile
- Adhesive may weaken over time in humid or hot environments
- Some products look obviously synthetic up close
- Not suitable for direct contact with flame or extreme heat
- May not add resale value the way traditional tile does
Renter-Friendly Tips
- Choose products specifically marketed as removable
- Test adhesive on a small, hidden area first to ensure clean removal
- Use a heat gun or hair dryer on low to soften adhesive during removal
- Peel slowly at a 45-degree angle to minimize wall damage
- Clean any adhesive residue with Goo Gone or rubbing alcohol
Cost Comparison
- Peel and stick (vinyl): $90 to $300 for a 30 sq ft backsplash
- Peel and stick (gel/resin): $240 to $600
- Peel and stick (real stone): $450 to $1,050
- Traditional ceramic tile (installed): $300 to $1,500
- Traditional glass tile (installed): $600 to $2,500
Peel and stick backsplash has earned its place as a legitimate design solution — especially for renters, budget-conscious homeowners, and anyone who wants a quick kitchen refresh without the commitment and cost of traditional tile.
Prefer to explore on your own?
See how new flooring looks in your actual room in seconds — free, no signup.
Try the free Floor Studio →