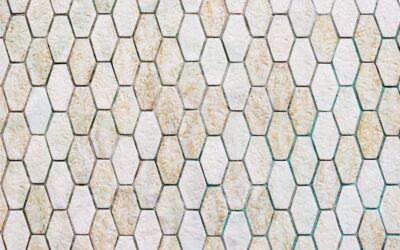
Black mosaic tile brings instant drama, depth, and a sense of polish to a space that few other materials can match. Whether it is a glossy glass backsplash catching kitchen light, a matte hexagon shower floor, or a marble-look penny-round accent, black mosaic reads as both timeless and modern. It is one of those choices that looks expensive even when it is not.
Part of our Tile & Grout guide — explore the full guide →
Used well, black anchors a room and lets your fixtures, cabinetry, and lighting stand out. Used carelessly, it can feel heavy or show every water spot. This guide walks you through the types, best uses, costs, and care so your black mosaic looks intentional and stays looking sharp.
What Mosaic Tile Means
Mosaic refers to small tile pieces, usually under 2 inches, mounted on a mesh or paper sheet so they can be installed as a unit. Instead of setting hundreds of tiny pieces individually, you set 12-inch sheets that hold the pattern in place. That construction is what makes mosaics so versatile: they wrap curves, cover shower floors, and create intricate patterns that large tiles cannot.
Black mosaics come in shapes like squares, hexagons, penny rounds, subway mini-bricks, herringbone, and arabesque. The shape sets the personality, from the clean geometry of a square grid to the soft vintage charm of penny rounds.
Types of Black Mosaic Tile
- Glass: Reflective and rich, glass mosaics give black a glossy, jewel-like depth. Ideal for backsplashes and accent walls; easy to wipe clean but shows fingerprints.
- Porcelain and ceramic: Durable and budget friendly, available in matte or glossy. Great all-rounders for floors and walls.
- Natural stone (marble, basalt, slate): Black marble like Nero Marquina offers white veining and luxury; stone needs sealing to resist stains.
- Metal and mixed-material: Stainless or blends mixed with glass add a contemporary edge for backsplash accents.
Finish matters as much as material. Glossy black amplifies light and looks dramatic but reveals smudges and streaks. Matte black hides spots better and gives a soft, modern, sophisticated look, especially on floors.
Where Black Mosaic Tile Works Best
Black mosaic earns its keep in a handful of high-impact spots. As a kitchen backsplash, it frames the counter and makes light cabinets pop. On a shower floor, small hexagon or penny mosaics provide grip thanks to their many grout lines, plus they conform to the slope toward the drain. As a bathroom floor, a black-and-white mosaic delivers a classic look that never dates.
It also shines as an accent: a niche inside a shower, a border strip, a fireplace surround, or a feature stripe in an otherwise neutral floor. In small rooms, use black as an accent rather than wall-to-wall coverage so the space does not feel closed in. In larger, well-lit rooms, you can be bolder.
Design Tips for Working With Black
Black is powerful, so balance is everything. A few field-tested ideas:
- Pair black mosaic with light grout for a graphic, high-contrast look, or with dark grout for a seamless, monolithic effect.
- Offset the darkness with bright surroundings, white counters, light walls, warm wood, or brass and gold fixtures that glow against the black.
- Use glossy black to bounce light in dim spaces and matte black where you want a calm, contemporary feel.
- Let the mosaic shape carry the style: arabesque for traditional, hexagon for transitional, square grid for modern.
Grout color is a design decision, not an afterthought. White grout on black tile creates a striking grid but shows dirt; gray or charcoal grout hides grime and softens the pattern.
Cost Expectations
Pricing varies by material and where you buy, so treat these as estimates. Ceramic and porcelain black mosaics often run about $5 to $15 per square foot. Glass mosaics typically land around $10 to $30 per square foot, and natural stone such as black marble can reach $15 to $40 or more. Installation labor usually adds $8 to $20 per square foot because mosaics take longer to set and grout than large-format tile. Budget an extra 10 to 15 percent of material for cuts and future repairs.
Installation Basics
Mosaics are among the more DIY-friendly tiles thanks to the mesh backing, but they reward patience and planning.
- Prepare a flat, clean, properly waterproofed substrate, especially in showers.
- Dry-lay sheets to plan the layout so seams between sheets blend into the overall grid.
- Use a white or light thinset under glass and translucent tiles so it does not darken the color; non-sag thinset helps on walls.
- Set each sheet, then use a grout float or a flat board to gently tap the surface flush and even.
- Let the thinset cure per the manufacturer, then grout, wipe with a damp sponge, and buff off haze.
For showers and any waterproofed assembly, consider a licensed tile installer to protect against leaks. When cutting tile, wear safety glasses and a dust mask, work in a ventilated area, and follow your tools’ and materials’ instructions.
Cleaning and Maintenance
Black tile, especially glossy and glass, shows water spots, soap film, and fingerprints more than lighter colors, so a quick wipe routine keeps it looking its best. Use a soft microfiber cloth and a pH-neutral or glass-safe cleaner, then dry the surface to prevent streaks and mineral spots, particularly in hard-water areas.
Skip abrasive pads and harsh chemicals that can scratch glass or dull stone. Real stone mosaics need sealing on installation and periodic resealing to resist stains. The grout, more than the tile, attracts grime, so seal cement grout and clean it with a soft brush as needed. A squeegee in the shower dramatically cuts down on water spotting.
The Bottom Line
Black mosaic tile is a high-style choice that delivers depth and elegance across backsplashes, floors, showers, and accents. Decide between glossy drama and matte subtlety, choose a material rated for its location, and pick a grout color that matches the maintenance you are willing to do. Balance the black with bright surroundings and quality lighting, keep up a simple wipe-down routine, and your mosaic will look striking and stay that way for years.
Prefer to explore on your own?
See how new flooring looks in your actual room in seconds — free, no signup.
Try the free Floor Studio →